Get Rid of Bindweed Naturally
Bindweed is the kind of garden visitor that looks sweet at first, then quietly wraps itself around your best intentions. One week it is a few heart-shaped leaves. The next, it is stitching your perennials together like it pays rent.
The good news: you can control bindweed naturally. The honest news: it is usually a multi-season project, and full eradication is not always realistic if it is entrenched or constantly reinvading from nearby. With the right timing and a couple of soil-friendly tactics, you can exhaust it without poisoning your garden or your future harvests.
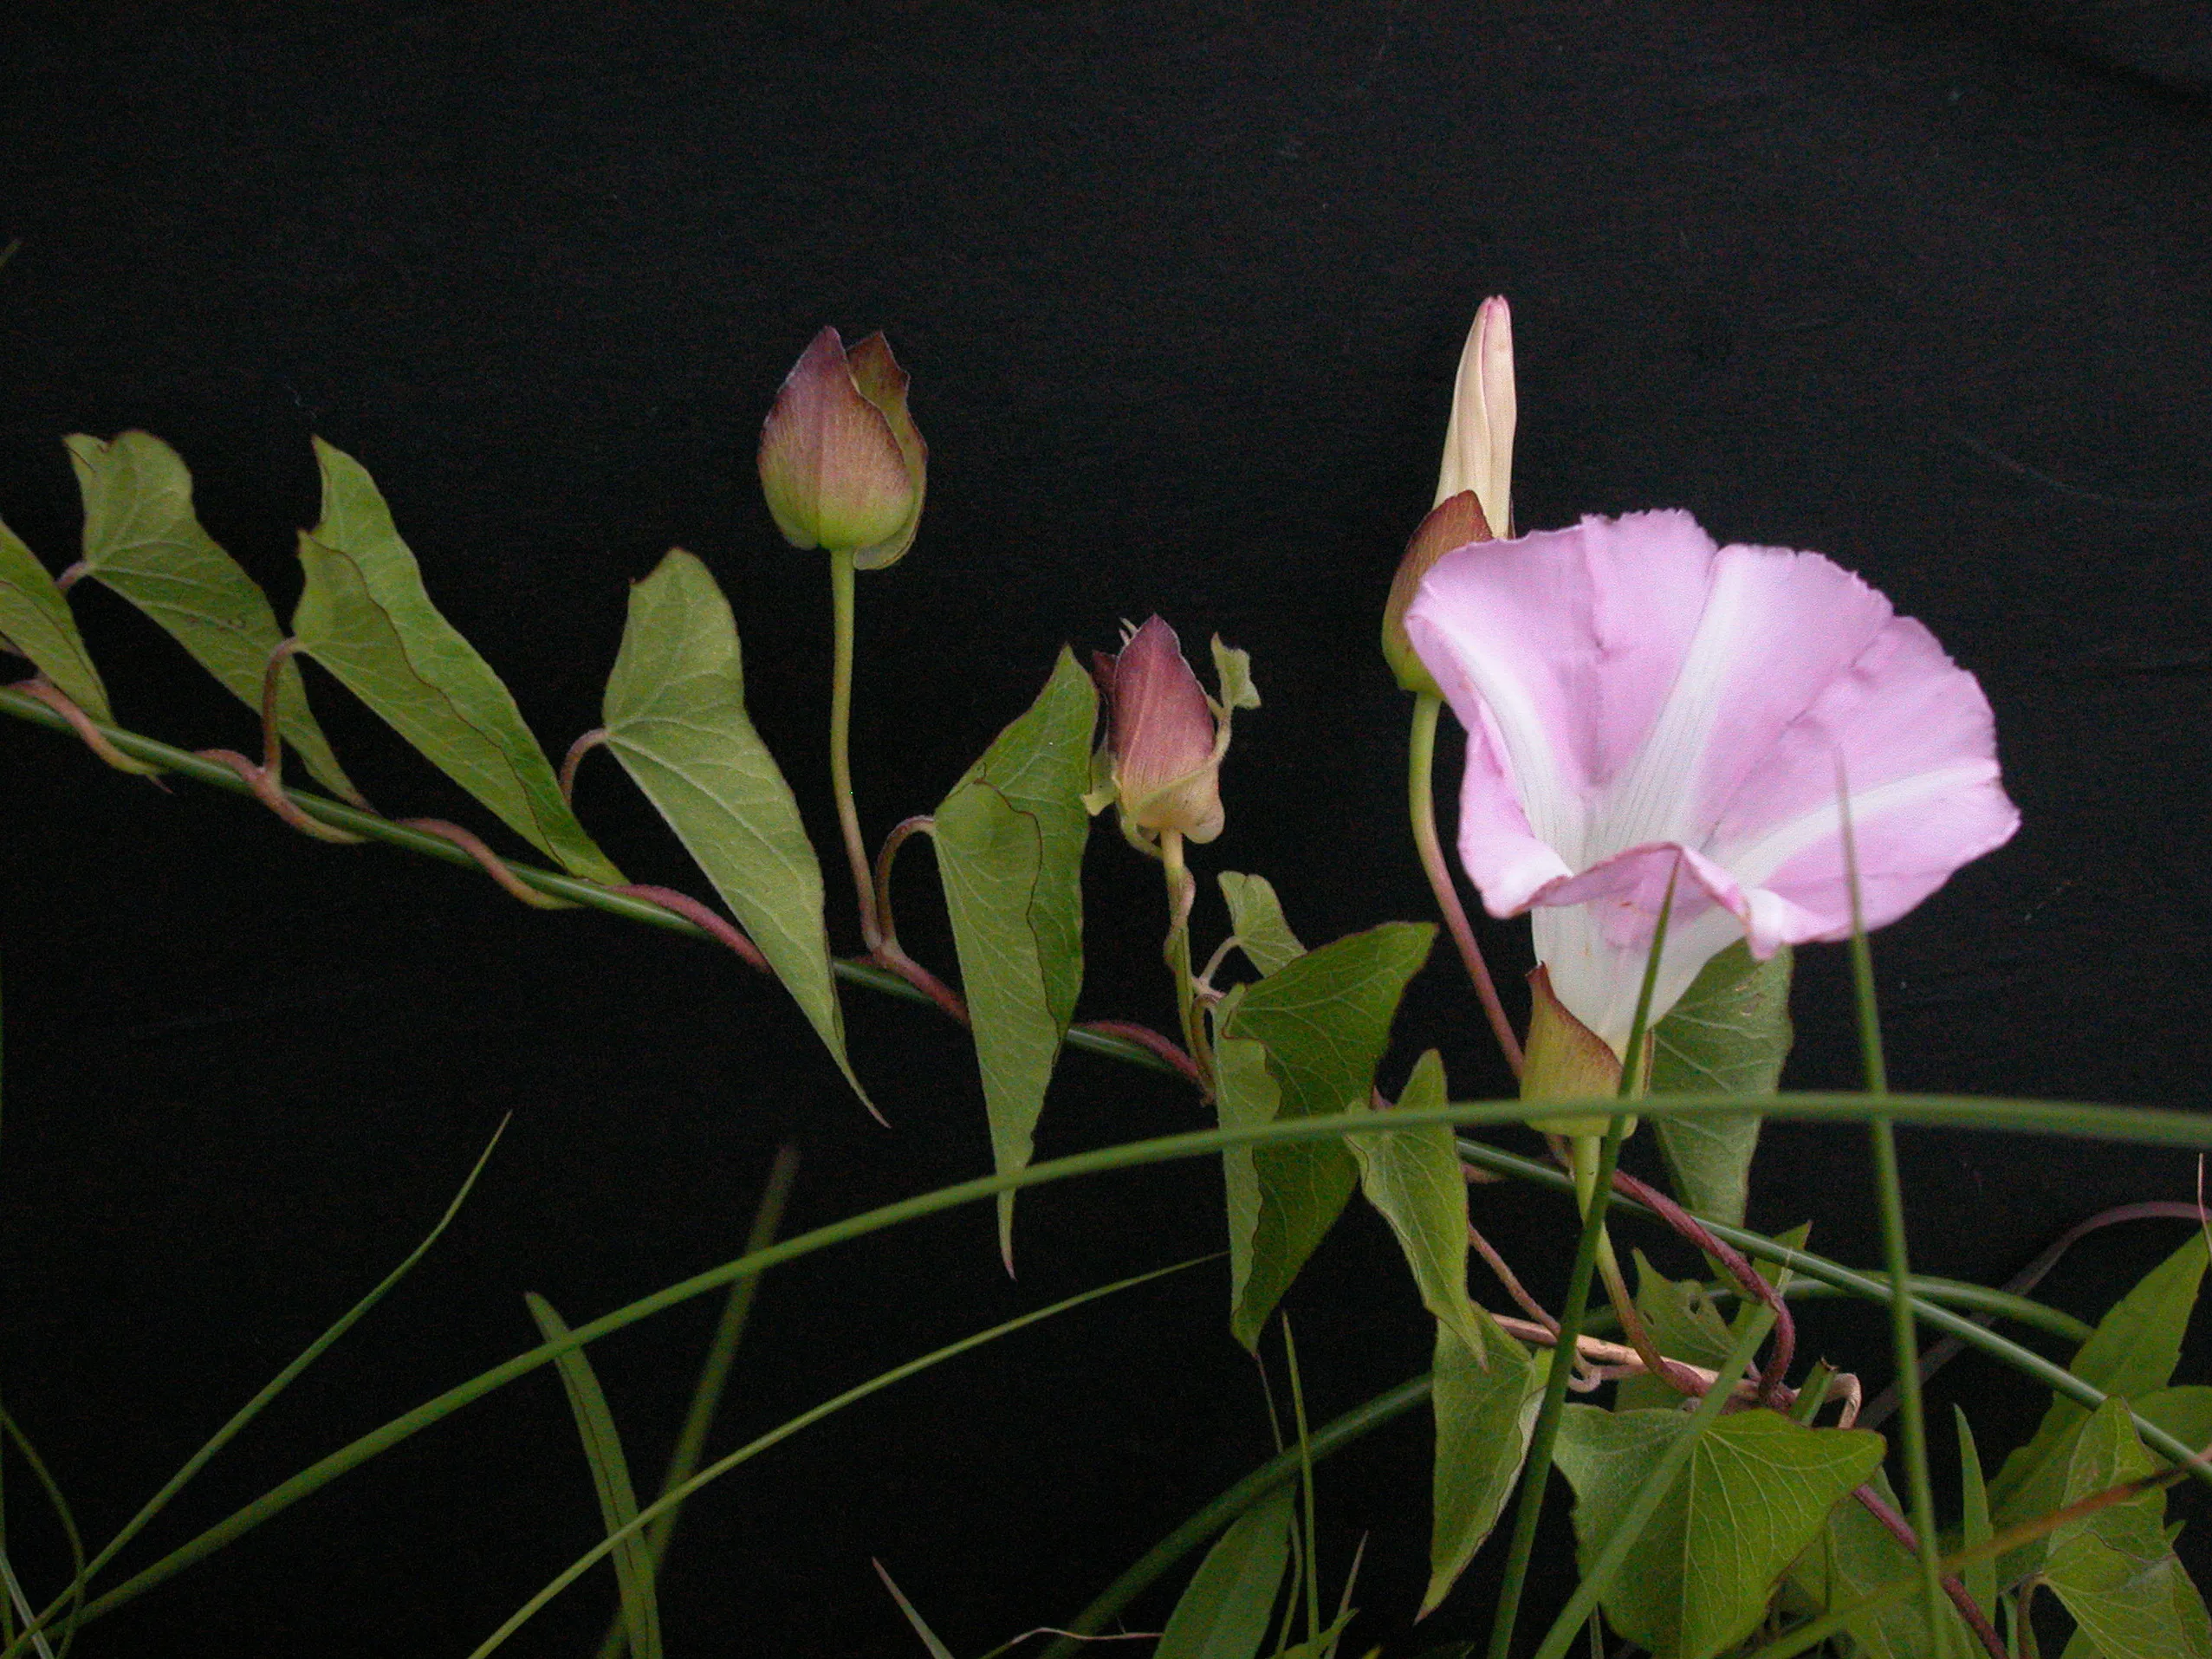
Meet the culprit: bindweed vs morning glory
Before you go to war, make sure you are battling the right plant. Bindweed is closely related to morning glory, and they can look similar at a glance. Bindweed is a perennial weed with deep, spreading roots. Many garden morning glories are grown as annuals from seed, although some can self-seed heavily and return year after year.
Two common bindweeds
Gardeners usually run into one of these:
- Field bindweed (Convolvulus arvensis): smaller leaves and flowers, often the classic “stringy vine everywhere” problem.
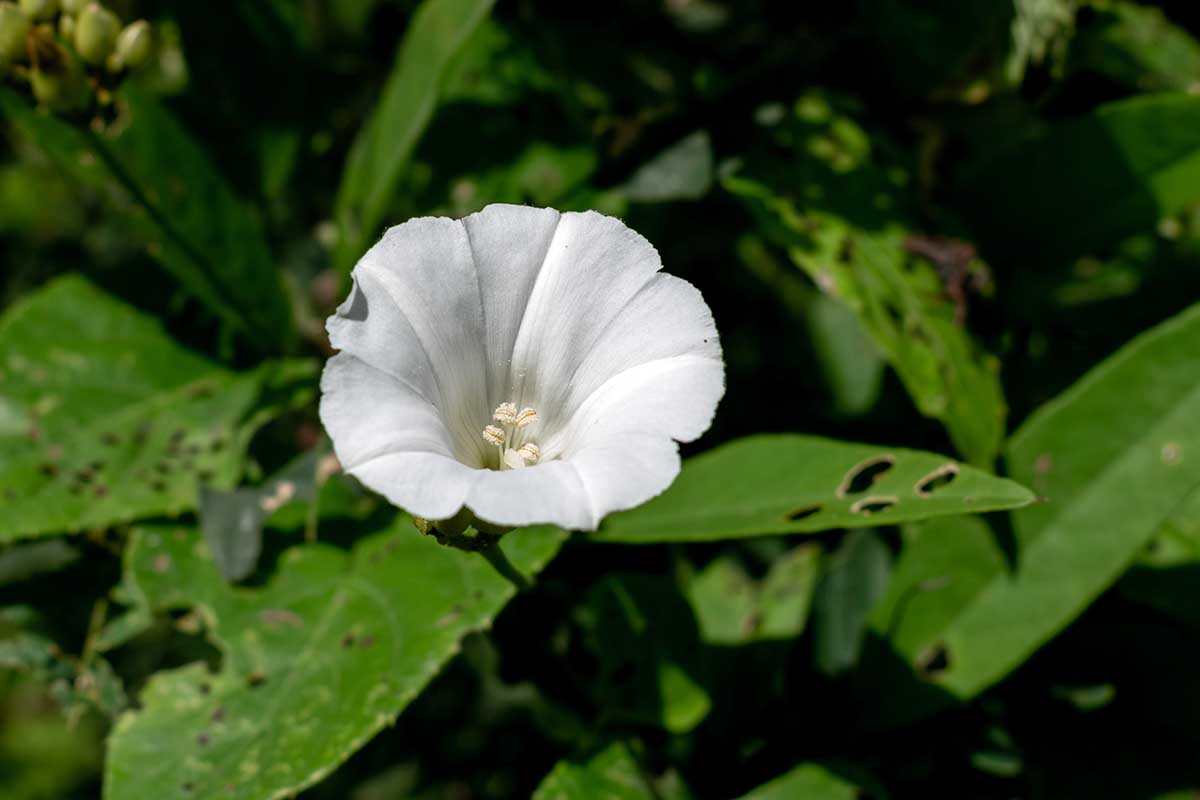
- Hedge bindweed (Calystegia sepium): often larger leaves and bigger white or pink trumpets, and it can be just as persistent.
Field marks for bindweed
- Leaves: typically arrow-shaped, with two little “ears” at the base (more spear-like than heart-like).
- Flowers: small white to pale pink trumpets, often about 1 inch across (hedge bindweed is usually larger).
- Growth habit: thin, wiry vines that wrap tightly around anything nearby.
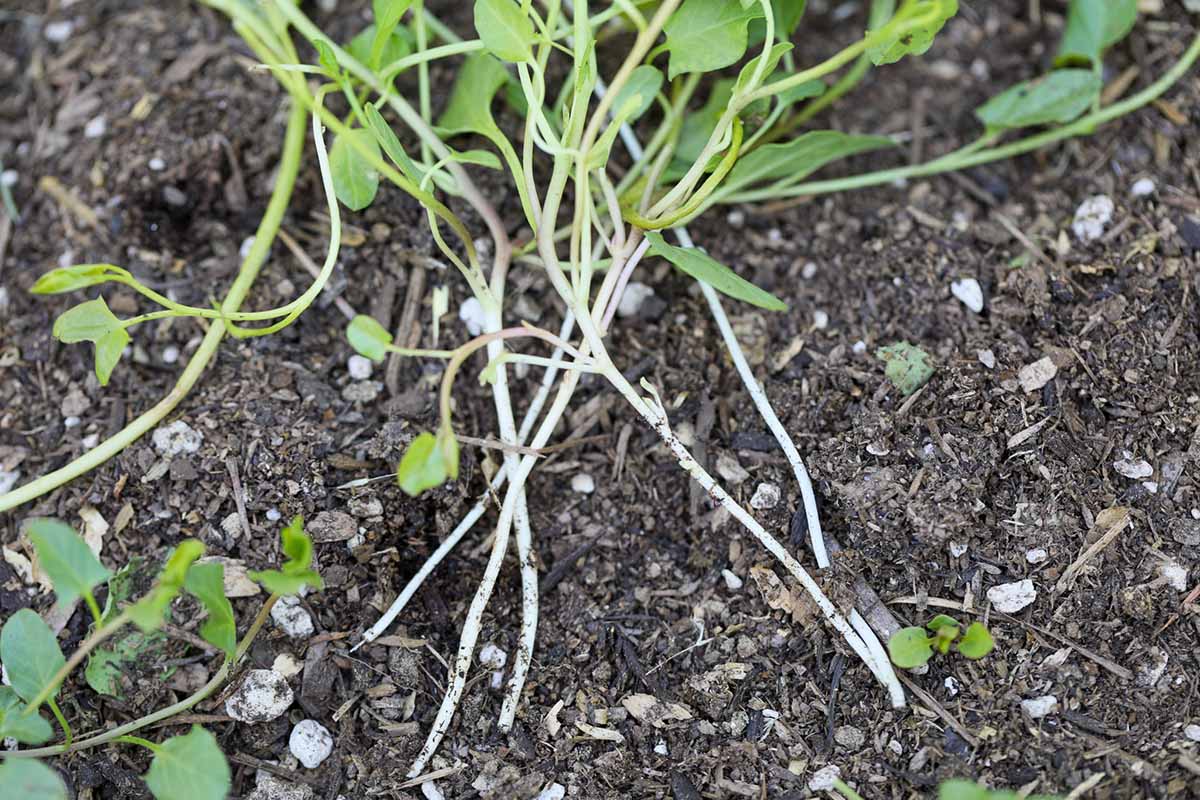
- Roots: deep perennial roots plus creeping roots and rhizomes (underground stems) that send up new shoots.
How morning glory often differs
- Leaves: often larger and more heart-shaped (varies by species, but many ornamentals are noticeably broader).
- Flowers: typically larger and showier, often blue, purple, or bright pink in common garden varieties.
- Life cycle: many common garden morning glories are grown as annuals from seed, though they may self-seed in some climates.
If you inherited a vine that appears in the same spots year after year, survives winter, and pops up far from where it started, you are likely dealing with bindweed.
Why tilling can make bindweed spread
I know the temptation. You see vines and think, “I will just till this bed and reset.” With bindweed, tilling is like taking a pair of scissors to a spool of thread and tossing the pieces around your garden.
Bindweed spreads through creeping roots, underground stems (often called rhizomes), and root fragments. When you till or aggressively chop the soil:
- You cut underground runners into pieces, and many of those pieces can sprout into brand new plants.
- You distribute fragments throughout the bed, increasing the number of growing points.
- You often miss the deep root system, which means the plant rebounds quickly with fresh growth.
To make it even more unfair, bindweed roots can travel astonishingly deep. Established plants are often reported in the 10 to 20 foot range in favorable conditions. That depth is exactly why surface digging and one-and-done efforts feel like gardening theater.
Natural bindweed control works best when you think like the plant: it survives by storing energy underground. Your job is to keep it from photosynthesizing long enough that those energy reserves run out.
The natural game plan
Bindweed control is less about one heroic afternoon and more about calm, repetitive pressure. You are aiming for three things:
- Starve it: keep removing leaves and vines so it cannot recharge its roots.
- Block it: smother areas where it is dense so shoots cannot reach light.
- Outcompete it: fill empty soil with vigorous, desirable plants and mulch.
In practice, that looks like repeated removal at the right times, combined with targeted smothering and thicker planting.
Method 1: Repeated removal
This is the most “hands in the dirt” method, and it is wildly effective when done consistently. The key is not to yank once and celebrate. The key is to never let bindweed keep a set of leaves for long.
How to pull or pinch without wrecking your plants
- Go after young growth: when shoots are small, they snap off cleanly and you prevent tangling around your plants.
- Loosen soil first: if the ground is dry, water lightly or weed after rain. You will get longer sections of root and fewer breakoffs.
- Pull slowly and follow the vine: tease it out like you are unthreading a needle, especially around perennials.
- If it is wrapped tightly: do not rip your plant (or your hands). Snip the bindweed at soil level and remove the top growth. Then come back for regrowth.
- Protect shrubs and thorny plants: if it is threaded through roses or prickly stems, cutting and returning for the resprout is often safer than wrestling it out.
How often should you do it?
For active infestations, aim for:
- Every 7 to 10 days during peak spring and early summer growth.
- Every 2 weeks later in the season, as long as you are not letting it flower and leaf out heavily.
Think of it as draining a battery. Each time you remove the green growth, the plant spends stored energy to resprout. If you keep denying it sunlight, it eventually runs out of savings.
Do not let it set seed
Bindweed can also spread by seed. If you see buds forming, treat that as a timer. Remove the vine before flowers mature and definitely before seed capsules form.
Dispose of vines like they can crawl back
Because they sometimes can. Bindweed can re-root from nodes if the pulled vines stay in contact with moist soil. Do this instead:
- Do not leave fresh vines lying on the bed.
- Dry them completely on a hard surface in the sun, then trash them, or hot-compost only if your pile reliably heats up.
- If in doubt, bag it and remove it.

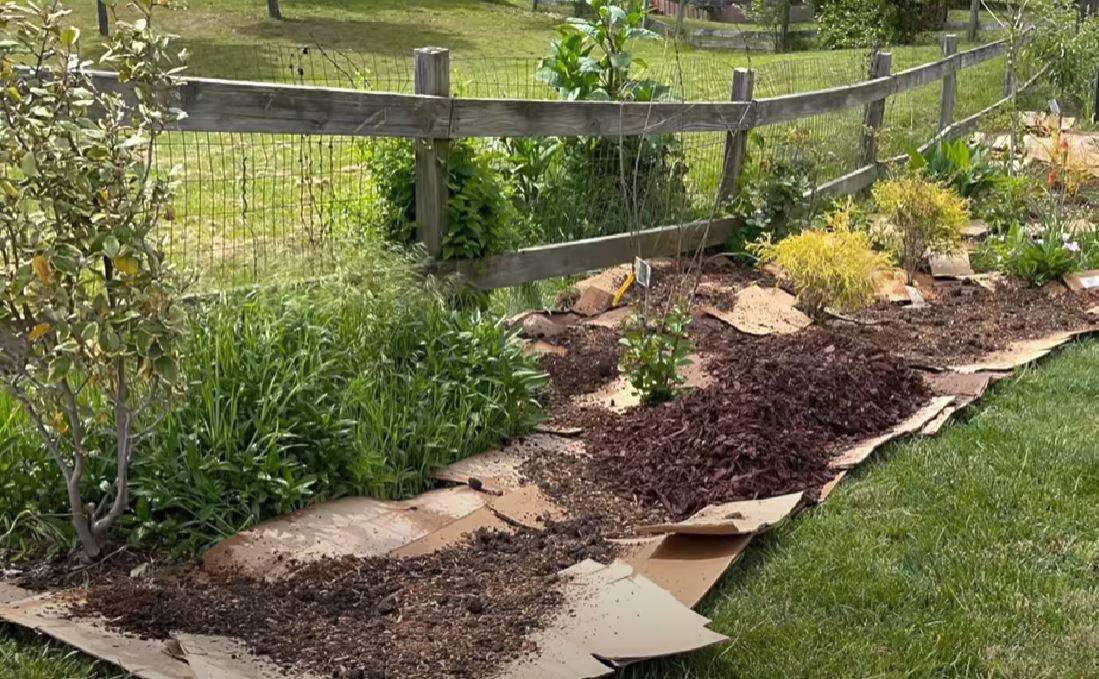
Method 2: Smothering
Smothering is my favorite option for areas you can temporarily take out of production, like an empty bed, a future vegetable patch, or a weedy strip along a fence.
Best smother materials
- Plain brown cardboard (remove tape and glossy printing).
- Multiple layers of newspaper (non-glossy, thickly layered).
- Top with mulch: 3 to 6 inches of wood chips, shredded leaves, or straw to hold it down and keep it moist.
Step-by-step smothering
- Cut bindweed to ground level. You do not need to dig first.
- Water the area well. Moisture helps the cardboard conform and begin breaking down.
- Overlap cardboard edges by at least 6 inches so vines cannot find seams.
- Go wider than the patch when you can. Extend the cardboard 12 to 24 inches beyond visible growth to catch runners.
- Cover with mulch thickly enough that sunlight cannot reach the cardboard.
- Maintain for a long stretch: leave it in place for a full growing season when possible, and longer for heavy infestations.
What to expect
Bindweed will often try to run sideways and pop out at edges. That is normal. Your job is to patrol the perimeter and pull or cut any escapes. Smothering can reduce the problem dramatically, but edges are where it tests you.
Method 3: Competitive planting
Bindweed loves bare, sunny soil and open spaces. When you fill gaps with dense, healthy growth, you reduce the light and real estate it needs to get established.
Where it helps most
- Perennial borders where bindweed weaves between plants.
- Under shrubs where you can add a living ground layer.
- Edges and fence lines where bindweed often creeps in from neighbors or neglected areas.
What “competitive” looks like
- Plant closer: follow spacing guidelines, but aim for faster canopy closure with companion plantings.
- Mulch consistently: 2 to 4 inches around ornamentals, refreshed as it breaks down.
- Use living groundcovers where appropriate for your climate and garden style.
A gentle note: avoid solving a weed problem by planting another aggressive spreader. Choose plants that behave well in your region and that you can easily thin if needed.
Reinvasion is real
If bindweed is creeping in from a neighbor’s fence line, an alley, or a neglected strip you do not control, your plan needs a border strategy. Otherwise, you are basically bailing out a bathtub with the faucet on.
- Patrol edges weekly in spring and early summer. Edges are the “on-ramp.”
- Smother a wider strip along fences or hedges, not just the obvious patch.
- Consider a physical edge barrier for beds (even a simple edging plus consistent mulching helps). Deep barriers are tricky because roots can go very deep, but shallow barriers still reduce easy surface runners and make patrol simpler.
Timeline: expect seasons, not weekends
If bindweed has been in the ground for years, it has a deep reserve of energy and possibly a pipeline to other areas. Natural control is absolutely doable, but it is rarely instant, and results vary with species, soil, watering, and reinvasion pressure.
- After 4 to 6 weeks of consistent removal, you may see thinner vines and fewer long runners.
- By the end of one growing season, many gardeners see major reduction, especially where smothering was used.
- Over 2 to 3 seasons, you can often move from “constant battle” to “occasional spot pull,” as long as you stay vigilant about edges and new sprouts.
The win is not perfection. The win is shrinking the bindweed footprint until it is just another quick garden chore, like deadheading or refilling the birdbath.
Quick do and do not list
Do
- Remove bindweed growth regularly before it flowers and sets seed.
- Smother dense patches with overlapping cardboard plus deep mulch.
- Mulch and plant densely to reduce bare soil.
- Watch borders, fence lines, and pathways where it creeps in.
- Dispose of pulled vines so they cannot re-root on damp soil.
Do not
- Till bindweed patches unless you are prepared for more sprouts and a long follow-up campaign.
- Let vines climb your shrubs and perennials “until you have time.” It gets harder fast.
- Expect one weekend of weeding to solve a perennial root system.
If you can keep bindweed from holding onto sunlight, season after season, you are not just pulling weeds. You are closing its bank account.
When to escalate
If bindweed is overtaking a large area and you cannot keep up with repeated removal and smothering, it is okay to seek local extension guidance or professional advice. Even if you prefer to stay chemical-free, a realistic assessment (and a plan to stop reinvasion) can save you years of frustration.
I can help you pick a plan
Bindweed control depends on where it is growing. Is it in a vegetable bed, a lawn edge, climbing through perennials, or coming in from a fence line? If you tell me what area it is invading and your general climate, I can suggest a simple plan that fits your schedule and what you are already growing.