Dividing Hostas and Perennials

Hostas are the gentle giants of the shade garden. They also have a not-so-secret hobby: slowly taking over. If your hosta has turned into a leafy octopus, or your favorite perennial has stopped blooming like it used to, it is probably asking for a division day.
Dividing perennials is one of my favorite garden “freebies.” You get healthier plants, more flowers, and extra clumps to fill bare spots or share with a neighbor. All it takes is good timing, a sharp spade, and a willingness to get a little muddy.
When to divide
The best time to divide is when the plant can recover quickly. Think cool air, moist soil, and lower stress on leaves and roots.
Quick regional note: Timing varies a bit by climate. In very hot-summer areas, early fall often beats spring. In very cold zones, aim for the earlier end of the fall window so roots can re-establish before freeze-up.
Hostas
- Early spring is ideal, right as the “eyes” (little pointed shoots) emerge 1 to 3 inches tall. The plant has plenty of energy stored in the crown, and there is minimal leaf mass to wilt.
- Early fall works well too, about 4 to 6 weeks before your ground typically freezes. The soil is still warm enough for roots to re-establish.
Other perennials
- Spring bloomers (peonies, iris, creeping phlox): divide after flowering or in late summer to early fall.
- Summer and fall bloomers (daylilies, coneflowers, black-eyed Susans, asters): divide in spring or early fall.
- Ornamental grasses: usually best in spring before active growth is tall and floppy.
A gentle exception: Some perennials resent being disturbed, like butterfly weed (Asclepias tuberosa) and many poppies. If a plant has a deep taproot or is labeled “do not divide,” believe it.
Signs it is crowded
You do not have to divide on a strict schedule. Let the plant tell you.
- Smaller leaves or a “tired” look even with decent care
- Fewer blooms than previous years
- A dead center or hollow ring in the middle of the clump
- Competition creep: the plant is nudging neighbors out of their personal space
- Water runs off the crown because the clump has domed up over time
Hostas often benefit every 3 to 5 years, but plenty can go longer. I divide when a clump starts shading out everything in a 2-foot radius, or when the center looks like it is clocking out early.
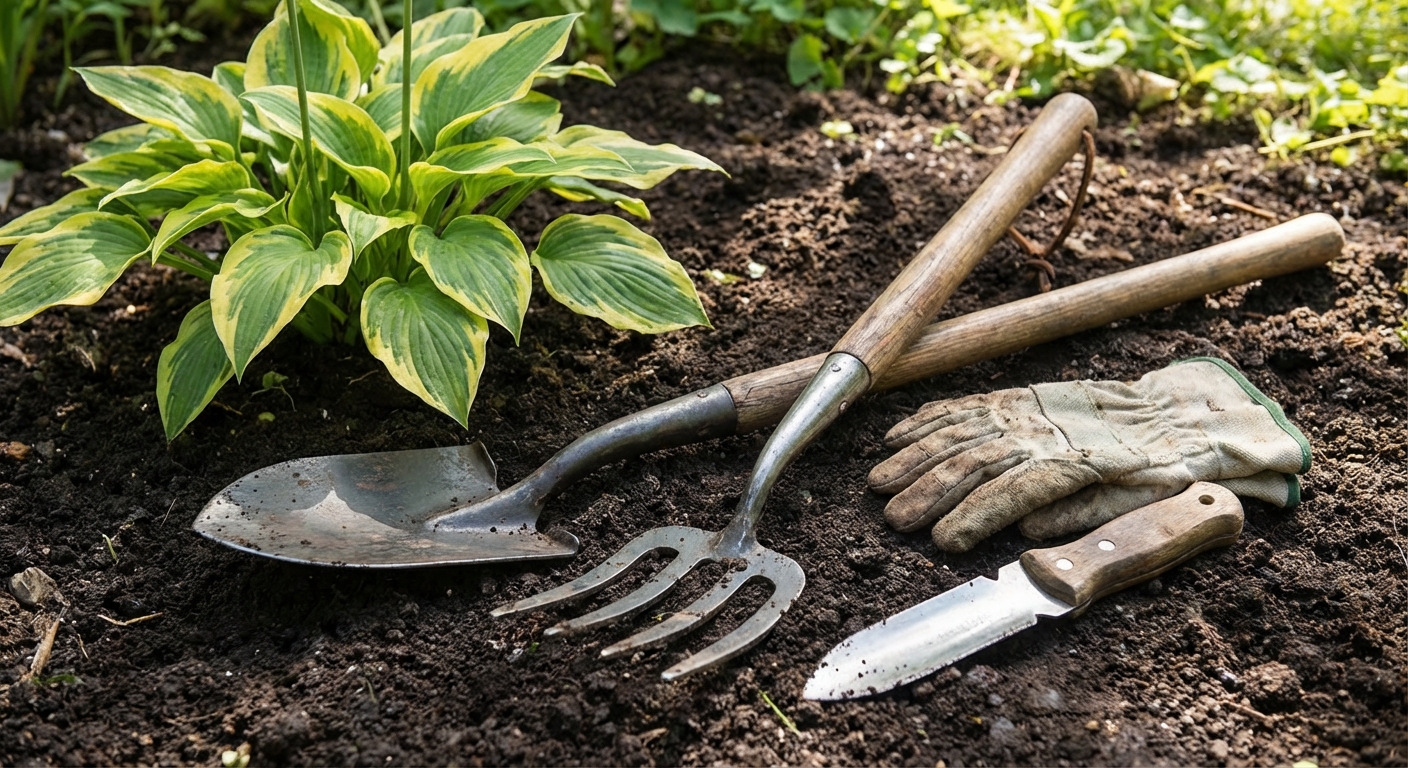
Tools and supplies
You do not need a fancy setup. You do need a clean, sharp edge and a plan for where the divisions will go.
- Spade with a sharp blade (flat spade is great)
- Garden fork (optional, helpful for lifting)
- Hori-hori knife or sturdy garden knife
- Hand pruners (for trimming damaged roots or foliage)
- Bucket or tarp (to keep roots shaded and moist)
- Watering can or hose with gentle nozzle
- Compost or leaf mold (optional, for planting holes)
- Gloves (recommended, hosta sap can irritate sensitive skin)
- Plant labels and a marker (optional, but very helpful for named hosta cultivars)
Quick sanitation tip: If you are dividing multiple plants, especially anything that has shown rot or leaf spot, wipe blades between plants with rubbing alcohol. For best results, knock off soil first and let the alcohol sit for a brief moment before you move on. It is a small habit that prevents big heartbreak.
Before you dig
1) Water the day before
Moist soil holds together, roots slide out more easily, and the plant is hydrated going into the “operation.” If the soil is bone-dry, you will tear more roots than you need to.
2) Pick calm weather
Overcast days are perfect. Avoid dividing during a heat wave or right before a hard freeze. Windy, hot afternoons are rough on freshly disturbed roots.
3) Prep new spots
If divisions sit around while you decide where they should live, the roots dry out fast. Dig the new holes first, or at least have pots and moist potting mix on standby.
4) Plan the lift
Big clumps can be surprisingly heavy. Bend your knees, keep your back straight, and do not be shy about asking for a second set of hands.
How to divide hostas
This is my favorite no-nonsense method. It is fast, it is tidy, and it keeps the crown pieces chunky enough to bounce back quickly.
Step 1: Mark your cuts
Stand over the hosta and imagine it as a pie. Decide how many slices you want. For a big, mature clump, I often take it into quarters. For a smaller plant, halves are plenty.
Step 2: Cut a circle
Push your spade straight down in a ring about 4 to 6 inches outside the crown. Go down 6 to 8 inches, or as deep as your spade allows, and work all the way around. This severs outer roots cleanly and makes lifting easier.
Step 3: Lift the clump
Slide the spade under the root mass and lever it up. A garden fork on the opposite side can help you “walk” it out without snapping roots. Lift like you mean it, but do not yank.
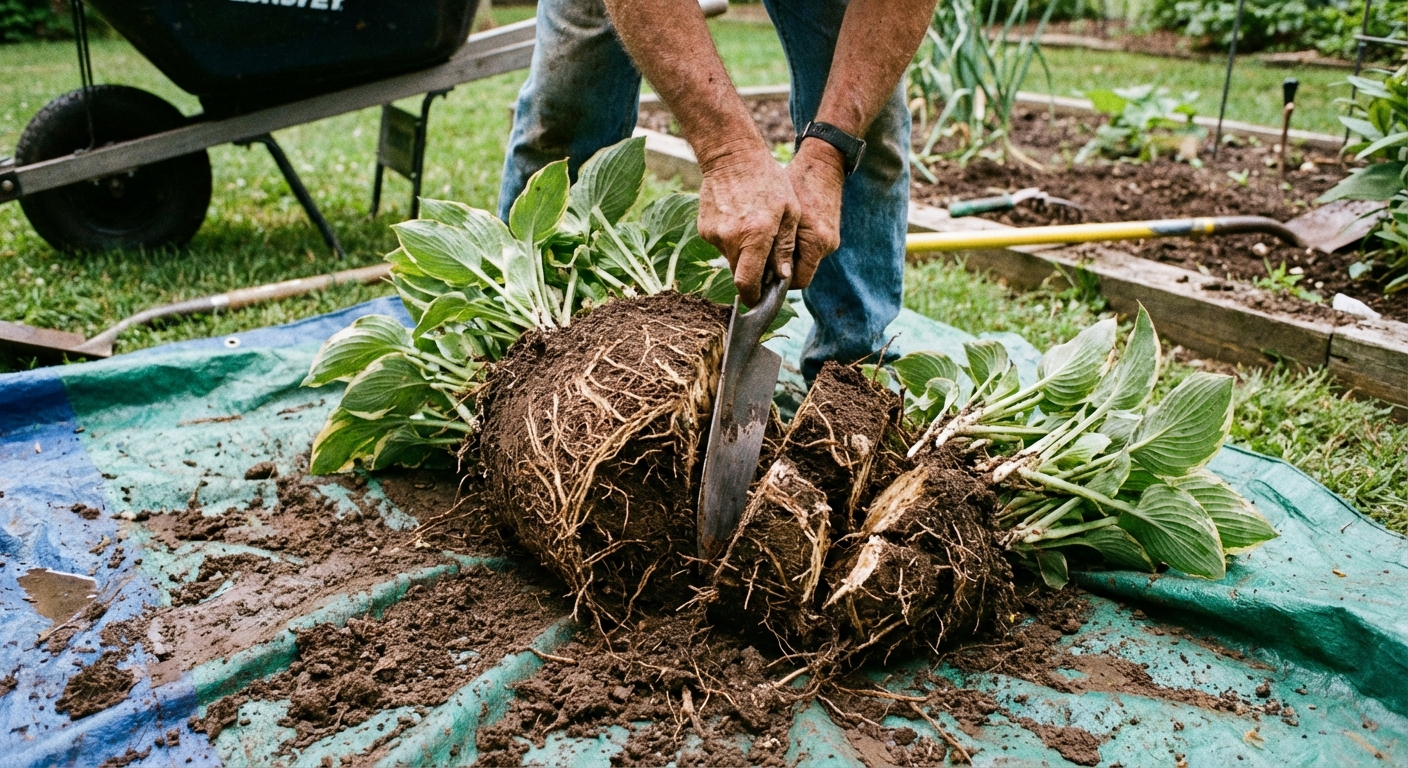
Step 4: Split the clump
Set the clump on the ground or on a tarp. Then:
- Spade split: Position the blade where you want the division, press down, and use your weight to slice through. Rock gently if needed.
- Knife split: For smaller hostas, a sturdy knife can separate crowns with less brute force.
What each division needs: Aim for at least 2 to 3 eyes (growing points) per piece. Bigger divisions establish faster. Tiny single-eye pieces can work, but they sulk longer.
Step 5: Inspect the crown
Knock off loose soil and check the crown. If you have heavy clay, do not aggressively shake. Tease soil away gently so you are not snapping roots for sport. Trim any mushy or foul-smelling sections. Healthy hosta roots are firm and pale, often creamy-white.
Step 6: Replant fast
Do not let roots bake in the sun. If you need a pause, set divisions in shade and cover with damp newspaper or a towel.
Planting depth
Most divisions fail not because the split was “too rough,” but because the replanting depth was off.
Hostas
- Plant so the crown sits at the same level it was growing before.
- In spring, keep emerging eyes just at or slightly above the soil surface.
- Do not bury the crown deeply, which invites rot.
Clumping perennials
- Set the crown at the original soil line.
- Spread roots outward in the hole like a loose fan when possible.
Bearded iris
- Rhizomes should sit at or just above soil level with some sun on the “back” of the rhizome.
Soil upgrade without overdoing it: I like to mix a few handfuls of compost into the backfill, especially in sandy or tired beds. Skip high-nitrogen fertilizer right at planting time. You want roots first, not a floppy leaf explosion.
Water in to settle: After planting, water thoroughly to eliminate air pockets. If the soil sinks, top up with a little more soil (and keep mulch pulled back from the crown).
Aftercare
Freshly divided plants are like kids after a growth spurt. They need snacks (steady moisture), a nap (low stress), and time to settle.
Watering
- Water deeply right after planting.
- For the next 10 to 14 days, keep soil evenly moist. Not soggy, just reliably damp.
- Mulch with 1 to 2 inches of shredded leaves or bark to hold moisture, keeping mulch pulled back from the crown.
Shade and wind
If you divided in warmer weather, temporary shade helps. A piece of shade cloth, an overturned laundry basket, or even a patio chair can reduce wilting for a day or two. I have absolutely “babysat” divisions like this, and I regret nothing.
Cutting back leaves
- Spring divisions: Usually no need. There is not much leaf mass yet.
- Fall divisions: If leaves are large and floppy, you can trim them back by about one-third to reduce water loss.
Skip feeding for now: Let the plant re-root. If you want to fertilize, wait until you see fresh growth resuming, or top-dress with compost instead.
Slug note for hostas
Tender new hosta growth can be a slug and snail magnet, especially after division when everything is extra juicy. If you typically battle them, start protection early (hand-picking at dusk, iron phosphate bait, or your favorite low-drama approach).
Other perennials
The basic rhythm is the same: lift, split, replant, water. Here are the small differences that make a big difference.
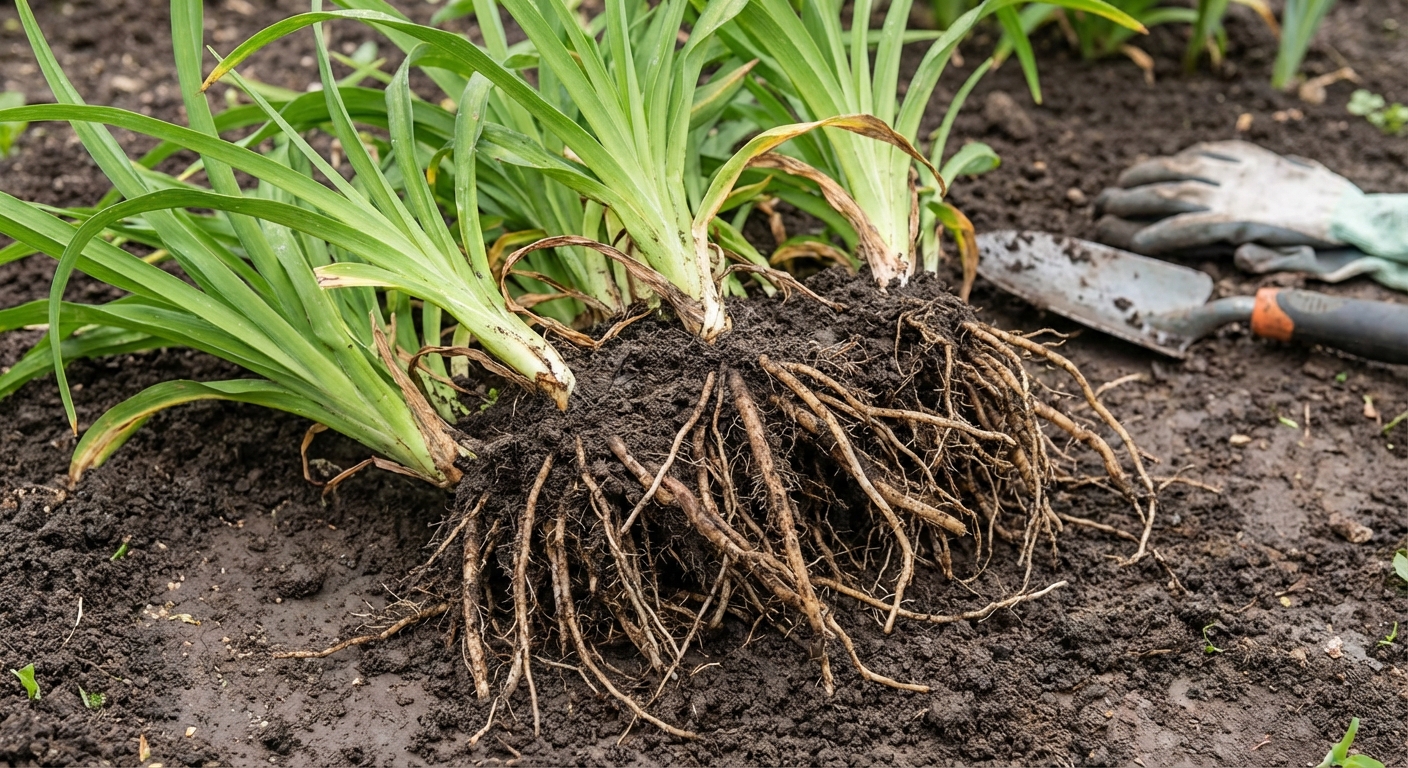
Daylilies
- Lift the clump and pull fans apart by hand when possible.
- Each division should have 2 to 3 fans and a healthy chunk of roots.
- Replant so the crown sits at soil level, with the white-to-green transition about 1 inch below the surface.
Ornamental grasses
- Cut the foliage back to 6 to 10 inches before digging so you can see what you are doing.
- Expect a tough root mass. A spade, pruning saw, or even a hatchet can be needed for old clumps.
Bearded iris
- Divide in late summer.
- Keep the firm, younger rhizomes and discard old, depleted sections.
- Trim leaves into a fan shape to reduce wind rock.
Peonies
- Divide only when necessary, in fall.
- Each division should have 3 to 5 eyes.
- Plant eyes 1 to 2 inches deep. In warmer zones, slightly shallower is often better. Too-deep planting often means no blooms.
Common mistakes
- Dividing in high heat: If you must, do it early morning, keep roots shaded, and water diligently.
- Making divisions too small: Tiny pieces survive, but they take longer to look good. For instant impact, keep divisions generous.
- Letting roots dry out: This is the fastest way to lose plants. Keep divisions covered and replant quickly.
- Planting too deep: Especially with hostas and iris. Match the original soil line.
- Over-fertilizing right away: It can push weak top growth before roots re-establish.
- Ignoring spacing: Give your new clumps room so you are not repeating the same problem in 2 years.
- Not labeling: If you divide named hostas, label the divisions right away. “Green one by the fence” is not a reliable long-term system.
Spacing
I know it is tempting to plant divisions close for that lush, filled-in look. Future-you will appreciate a little restraint.
- Small hostas: 12 to 18 inches apart
- Medium hostas: 18 to 30 inches apart
- Large hostas: 30 to 48 inches apart (yes, really, some get enormous)
- Most clumping perennials: space according to mature width, typically 18 to 24 inches for many garden favorites
If you are unsure, plant a little wider and use mulch or an annual to fill the gap for a season. Plants expand faster than you think when their roots are happy.
FAQ
Can I divide hostas in summer?
You can, but it is harder on the plant. If summer is your only option, do it on a cool, cloudy day, cut back some leaf mass, keep roots moist the entire time, and water consistently for 10 to 14 days.
Will dividing hostas spread disease?
Potentially, yes. Clean tools between plants, avoid dividing plants that look unhealthy, and discard any divisions with soft, rotting crowns.
One disease worth naming: Hosta Virus X (HVX) can spread through sap on tools while dividing. It is another reason to wipe blades between plants, and to do it after removing soil so the disinfectant can actually touch the metal. If you suspect HVX, do not share divisions from that plant, and bag and trash affected material (do not compost).
How long until divided plants look normal again?
Hostas divided in early spring often look normal in the same season. Fall divisions usually settle in and look their best the next year. Some perennials sulk a bit, but healthy soil and steady moisture speed things up.
Final pep talk
Dividing perennials feels a little dramatic the first time. I promise your hosta is tougher than it looks. Once you do it, you will start seeing your garden differently: not as something you have to buy more plants for, but as a living community that can multiply with a little care and a sharp spade.
If you want, tell me what you are dividing and your general climate zone, and I will help you pick the best timing and spacing for your specific plants.