Divide Dahlia Tuber Clumps Before Spring
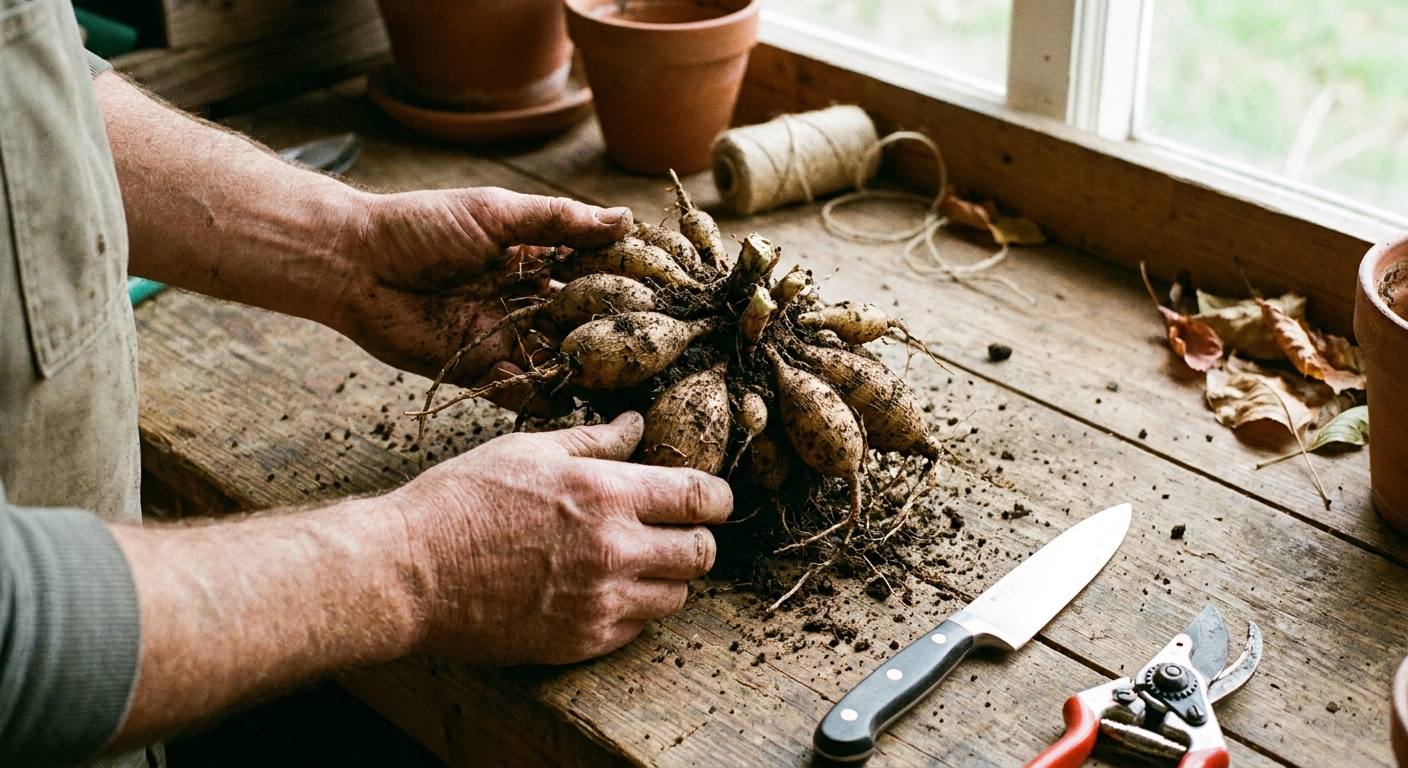
Dahlias have a funny way of making you feel both proud and slightly bullied. One season you plant a tidy little tuber, and by fall you are holding a knobby, many-legged clump that looks like it could skitter away if you blink. If your dahlia tuber clumps are getting crowded, division is the gentle reset that can help keep plants vigorous, reduce storage headaches, and give you more plants for free. Win, win, win.
This page is all about the how of dividing overgrown clumps before spring planting, plus what to do with those freshly divided pieces until they go back in the ground. If you need the bigger picture of choosing, digging, or long-term storage, those topics pair beautifully with this one, but we will stay focused on clean, confident dividing here.

When division makes sense
You do not have to divide every dahlia every year. Some gardeners do, and some only divide when a clump starts acting like a crowded apartment.
Good reasons to divide
- The clump is huge and tangled. Dense clumps can be harder to dry, inspect, and store well, which can increase rot risk if moisture gets trapped or damage is missed.
- Performance dipped last season. An overcrowded clump can contribute to weaker growth or smaller blooms, but it is not the only culprit. Light, watering, fertility, spacing, pinching, pests, disease, and variety all matter too.
- You want more plants. Division is propagation with a very satisfying success rate when done correctly.
- You need to remove damaged parts. Soft, moldy, or broken tubers should be cut away so they do not spread problems.
Times to hold off
- A very small clump with only a few tubers. If it already looks like 1 to 2 strong divisions, do not force it into tiny pieces.
- No visible eyes yet and you are not sure what you are doing. You can still divide in fall or winter, but it is easier for many gardeners to spot eyes in late winter when they begin to swell.
- The plant struggled all season. Weak plants can produce weak tubers. In that case, be conservative and keep a larger division.
Best timing before spring
There are two common windows: dividing in the fall right after digging, or dividing in late winter to early spring, closer to planting time.
For many home gardeners, late winter to early spring is the sweet spot because the eyes start to wake up and become easier to identify. You are also shortening the time the fresh cuts need to sit in storage.
A simple schedule
- 4 to 8 weeks before your last frost date: Pull clumps from storage, inspect, and divide.
- After dividing: Let cuts dry and callus, then store cool and dry until outdoor planting conditions are right.
- At planting time: Plant divisions once soil has warmed and frost risk has passed.
If you live in a short-season area and like to pre-sprout dahlias indoors, you can divide a bit earlier and pot them up after callusing.
Tools and sanitation
Dahlia division is part gardening, part minor surgery. Clean tools matter because tubers are living storage organs, and fresh cuts are open doors for pathogens.
What you will want
- Sharp pruning shears and/or a sturdy garden knife
- A small hand saw (helpful for woody crowns)
- A stiff brush or old toothbrush for cleaning crevices
- Disposable gloves if you prefer, plus eye protection if you are sawing
- Paper towels or clean rags
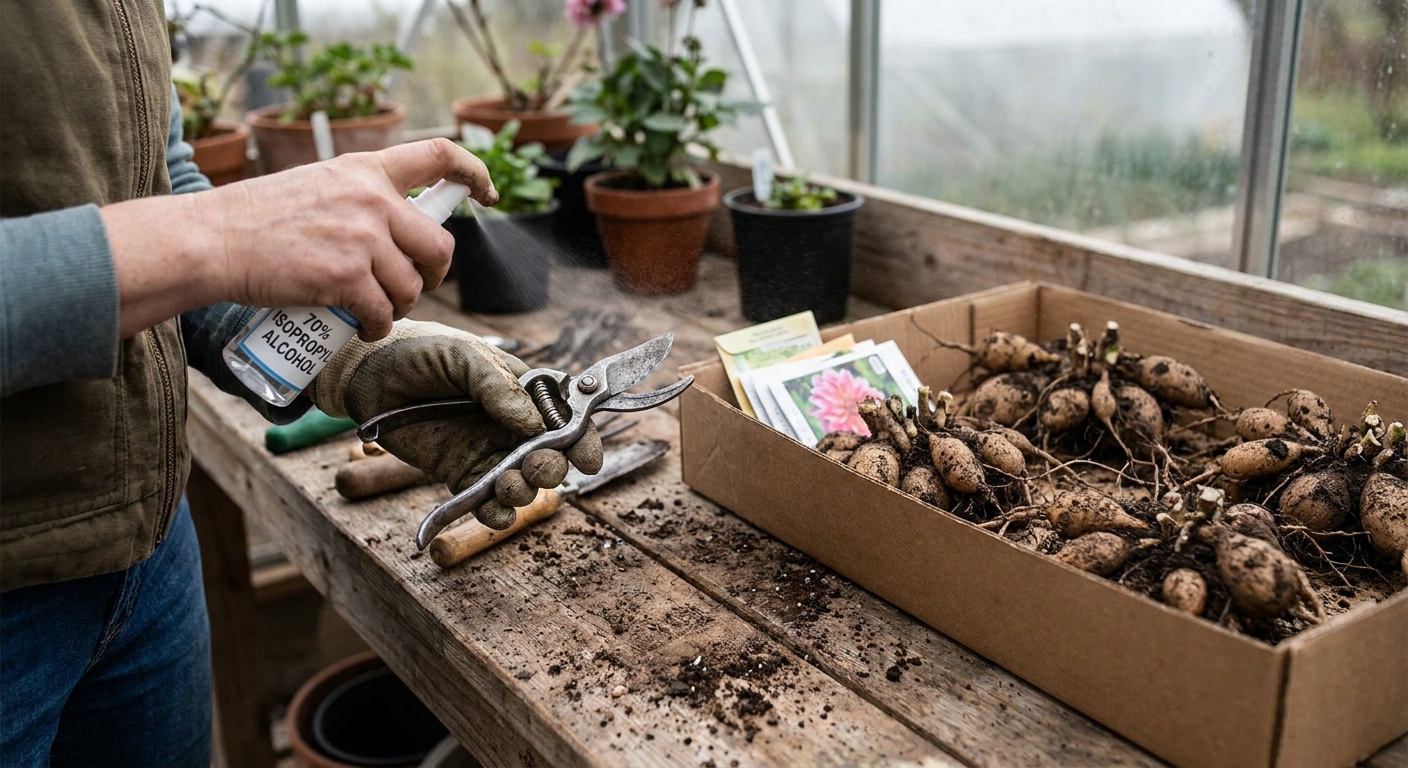
- Isopropyl alcohol (70 percent) or a disinfecting solution for tools
- Permanent marker and labels (future-you will be grateful)
How to sanitize fast
Wipe blades with 70 percent isopropyl alcohol before you start and between clumps. If you suspect any rot, sanitize between each cut section as well. Let alcohol air-dry; it is fast and effective.
Also, work on a surface you can clean. I like a tray, a plastic potting bench, or a dedicated cutting board that is not used for food.
Know the parts
This is the part that dissolves most black-thumb anxiety, so take a breath with me.
- Tubers are the plump storage roots. They hold energy, but they do not reliably sprout on their own.
- The crown is the knobby central base where last year’s stem was attached.
- Necks connect individual tubers to the crown. Necks can snap easily on dry clumps.
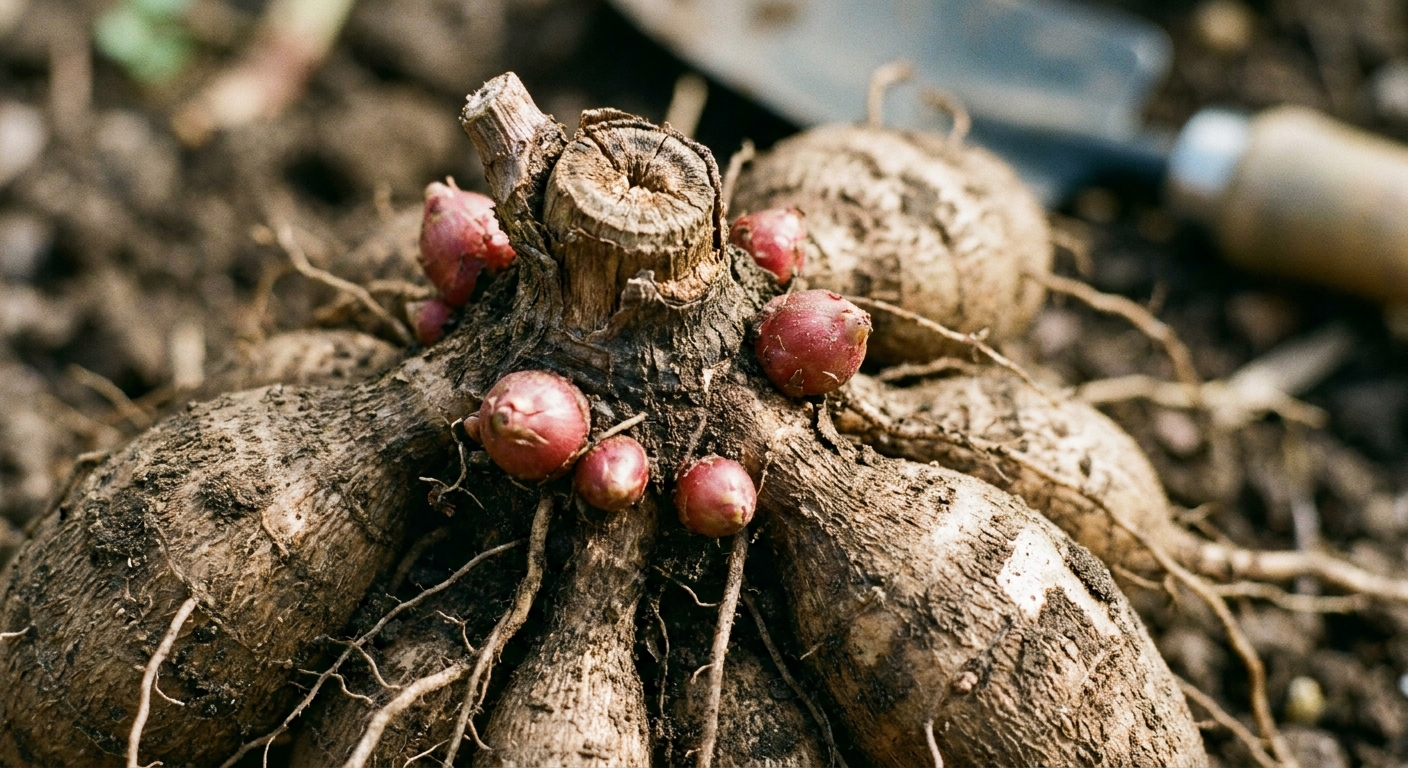
- Eyes are the little growth buds that become stems. Eyes are usually found on the crown, near the old stem, not on the tuber body.
A division needs at least one healthy eye attached to a piece of crown, plus at least one firm tuber to fuel early growth.
What eyes look like
Depending on variety and timing, eyes can look like tiny pale bumps, pinkish nubs, or little pointed growth nodes clustered around the crown. In late winter, they often swell and get easier to spot.
Step-by-step division
There is a calm rhythm to good division. Clean, look, plan, then cut.
1) Clean the clump
Brush off old soil and dried debris so you can see where tubers attach. If the clump is very dirty, you can rinse briefly and let it dry thoroughly before cutting. Water plus storage is a rot invitation, so dry matters.
2) Remove obvious problems
Cut away any tubers that are mushy, hollow, or smell foul. Firm tubers feel like a potato. A little wrinkling can be normal after storage, but they should not be squishy.
3) Find the crown and eyes
Hold the clump so you can see the old stem stub. Eyes are usually clustered around that area. Rotate the clump in good light. I sometimes whisper encouragement to mine. The tubers do not seem to mind.
4) Plan cuts first
Look for natural fault lines where groups of tubers meet. Your goal is to create sturdy divisions, not tiny fragments. For most home gardens, divisions with 1 to 3 tubers each are a very practical size.
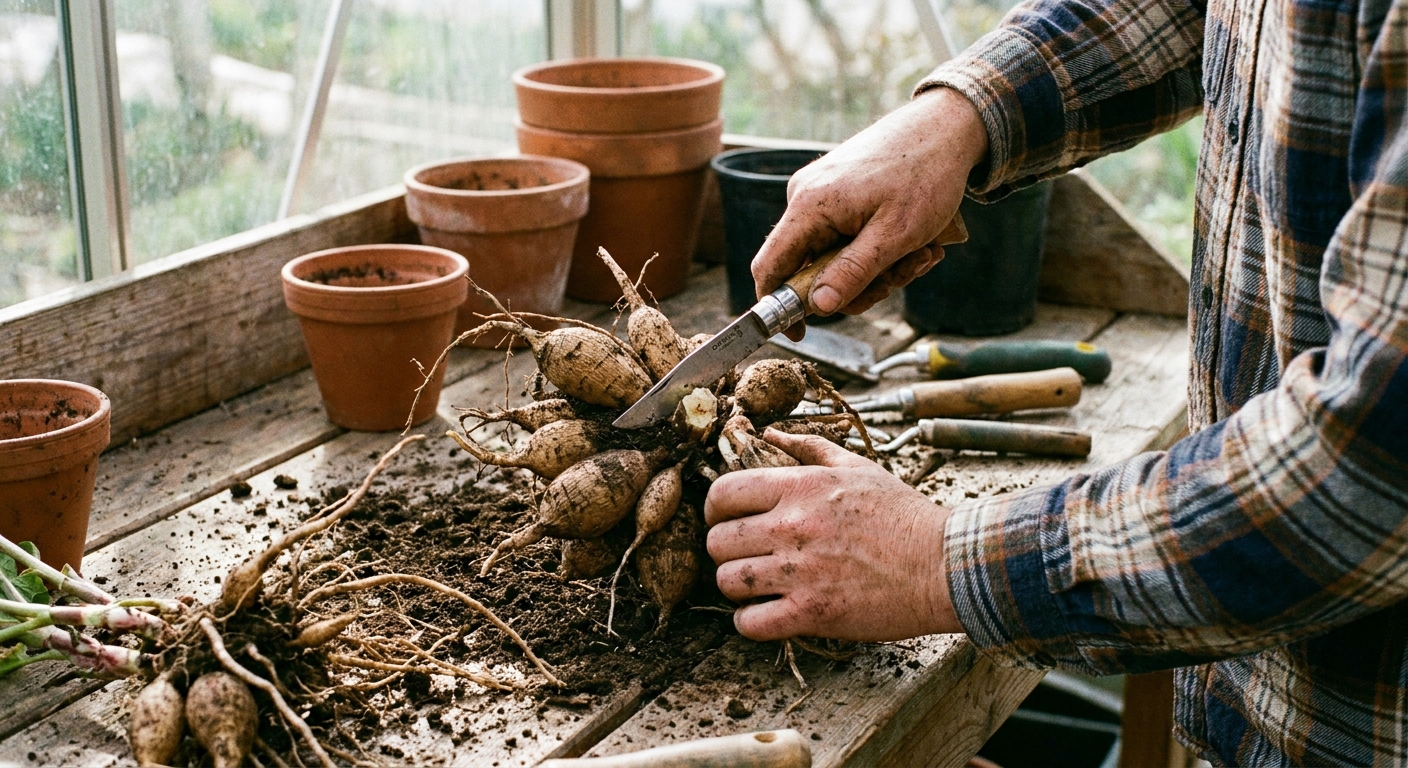
5) Cut through the crown
When possible, slice the crown so each piece keeps an eye. If you cut off a tuber with no eye attached to crown tissue, it likely will not sprout.
- If the crown is soft enough, a knife or pruners can do it.
- If it is woody and stubborn, use a small saw and go slowly.
6) Protect the necks
Dry tuber necks can snap if you twist and pull. Instead, support the tubers with one hand and cut with the other. If a tuber breaks off cleanly but takes crown tissue and an eye with it, it may still be viable. If it breaks with no crown, compost it and do not feel guilty.
7) Check each division
Before you set a division aside, ask two questions:
- Do I see at least one eye on the crown piece?
- Is there at least one firm tuber attached?
If yes to both, you likely have a viable plant, assuming the crown tissue is healthy and not quietly rotting.
If you cannot see eyes
Sometimes the crown looks like a blank, knobby mystery and the eyes are playing hard to get. Before you start making random cuts, try this:
- Warm it up slightly for a few days. Move clumps to a brighter, slightly warmer spot (room temperature is fine) so eyes can swell and show themselves.
- Keep it dry, not damp. If you must, you can very lightly mist the crown area, then let it dry again. Do not moisten packing material or wrap in plastic “to help.” That is how rot gets invited to the party.
Once eyes are visible, dividing becomes much more straightforward.
How small is too small?
In theory, a single eye with one tuber can grow a full dahlia. In practice, tiny divisions dry out faster, are easier to damage, and can be slower to establish.
For stress-free success, I like:
- At least 1 clear eye
- 1 to 2 healthy tubers attached
- A solid chunk of crown so the eye is not hanging on by a thread
If your clump has many eyes but the tubers are skinny, keep larger divisions. Let the plant rebuild strength for a season.
Aftercare and callusing
Fresh cuts are juicy, and dahlias are not immune to rot. Giving cut surfaces time to dry and callus is simple insurance.
Callusing basics
- Place divisions in a single layer in a cool, dry, well-ventilated spot out of direct sun.
- Let them sit 24 to 72 hours, depending on humidity and how thick the cuts are. In cool or humid spaces it can take longer.
- They are ready when cut surfaces feel dry to the touch and look slightly corky or sealed.
Avoid sealing them in plastic during this step. Trapped moisture is the enemy.
Hold until planting
If you divide close to planting time, storage is short and sweet. If you divide earlier, you will need a reliable holding pattern until outdoor conditions are warm enough.
Good storage conditions
- Temperature: cool, ideally around 40 to 45°F (4 to 7°C). Up to about 50°F (10°C) can work if everything else is dialed in.
- Darkness: reduces premature sprouting
- Moderate humidity, not wet: enough to prevent shrivel, but never so much that you get condensation
- Airflow: keeps mold in check
Simple storage method
- Label each division with cultivar name and color. If you are unsure, label the whole batch “mystery sunset mix” and enjoy the surprise later.
- Pack loosely in a breathable container like a cardboard box, paper bag, or crate.
- Use a mostly dry packing material such as wood shavings, peat moss, or vermiculite. If your storage area is very dry, make it barely damp, not wet. You want “prevents shrivel,” not “creates condensation.”
- Check every 2 to 3 weeks. Remove any pieces that are soft or moldy. If tubers are shriveling badly, lightly increase humidity by barely moistening the packing material.
If a division starts sprouting early, you can either keep it cool to slow growth or pot it up and grow it on indoors under bright light, depending on your setup.
Planting tie-in
When it is finally time to put them back in the ground, a couple of simple benchmarks help:
- Soil temperature: many growers aim to plant when soil is about 60°F (15 to 16°C) and frost risk has passed.
- Orientation: set the tuber horizontally with the crown and eye(s) angled upward.
- Depth: plant so the crown sits a few inches below the soil surface, then backfill. (If you are in very heavy soil, err a little shallower and prioritize drainage.)
If you pre-sprout in pots, treat that sprout gently like a handle made of glass. Because it is.
Mistakes and safety
Safety first
- Watch your hands when cutting. Tubers are slippery and knives are enthusiastic.
- Use eye protection if you are sawing through tough crowns.
- Lift smart if you are handling very large clumps. They can be heavier than they look.
Common mistakes (and yes, I have made them)
- Dividing into tubers with no eyes. No eye usually means no plant.
- Storing wet tubers. Moisture plus time equals rot.
- Forgetting to label. It is all fun and games until you are trying to separate red from magenta in midsummer.
- Keeping every questionable piece. One rotting tuber can spread trouble. Be politely ruthless.
Quick checklist
- Firm tuber, no mush, no bad smell
- Neck intact and attached to crown tissue
- At least one visible eye on the crown
- Clean cut surfaces allowed to callus
- Labeled and stored cool, dark, and moderately dry
If you do all that, you are not just dividing tubers. You are setting up your future self for a summer full of blooms, and maybe a few extra to share with neighbors who swear they “cannot grow anything.” I love proving them wrong, one dahlia at a time.