Deter Carpenter Bees Naturally
If you have a deck, fascia board, pergola, or porch railing, you have probably had that moment: you hear a loud, friendly-sounding buzz, look up, and see a big bee hovering like a tiny helicopter near your woodwork. If it is a carpenter bee, it is usually not looking for a fight. It is looking for real estate. Females can sting if handled or cornered, but they are typically non-aggressive around people.
The good news is you can protect your home and respect pollinators at the same time. In much of North America, carpenter bees are native bees and important for ecosystems. The goal is not to wipe them out. It is to make your wood a terrible place to raise the next generation.
One more calming note: the bees that hover and act “territorial” are often males. They can be obnoxiously brave, but they do not have stingers.

Carpenter bee or bumblebee?
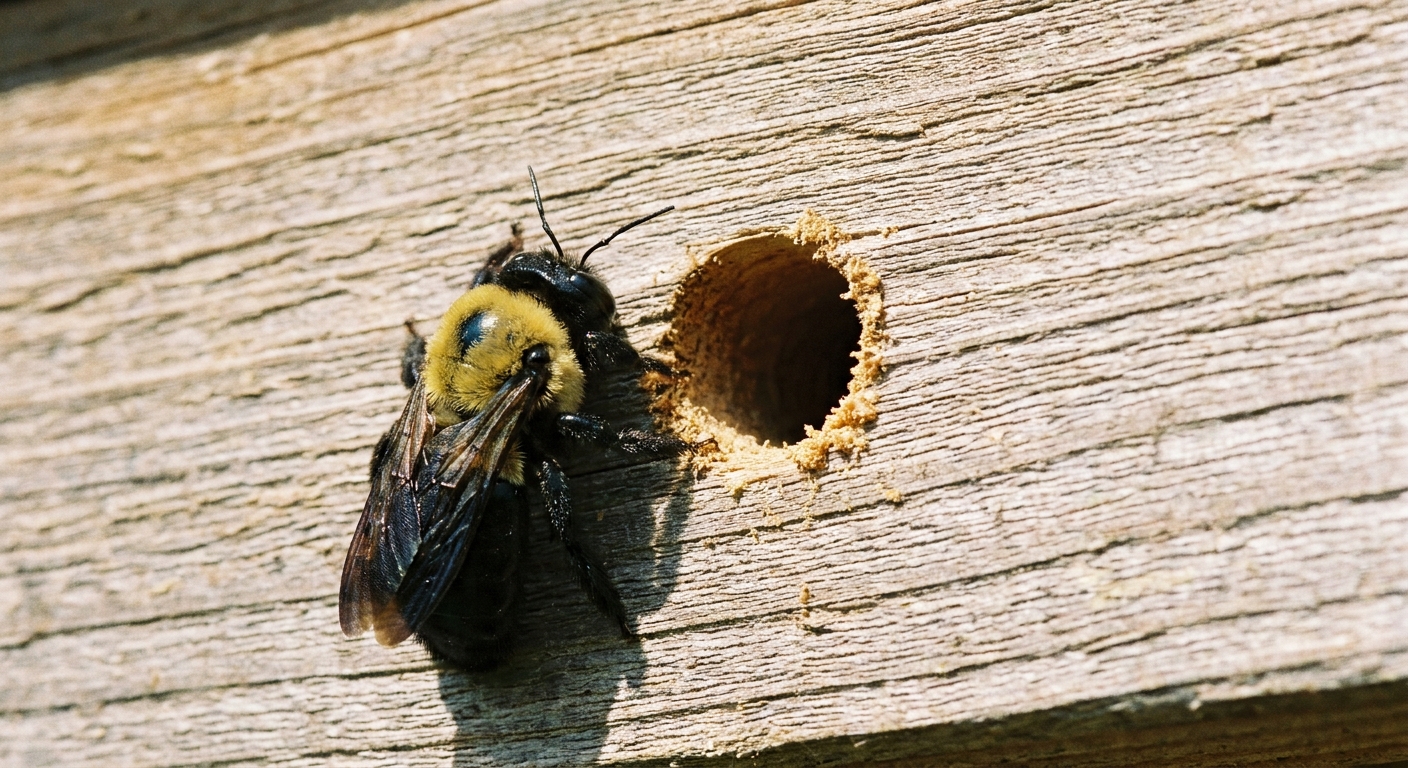
Before you do anything, confirm what you are dealing with. Bumblebees are chunky, fuzzy, and often nest in the ground or in dense grass. Carpenter bees are also chunky, but the difference is usually on their backsides.
Quick ID checks
- Carpenter bee: shiny, mostly hairless black abdomen (it can look smooth and glossy). Often hovers near wood. Females make tunnels in wood.
- Bumblebee: fuzzy abdomen with visible hairs and often more banding. More likely to disappear into a burrow or thick vegetation.
What carpenter bee damage looks like
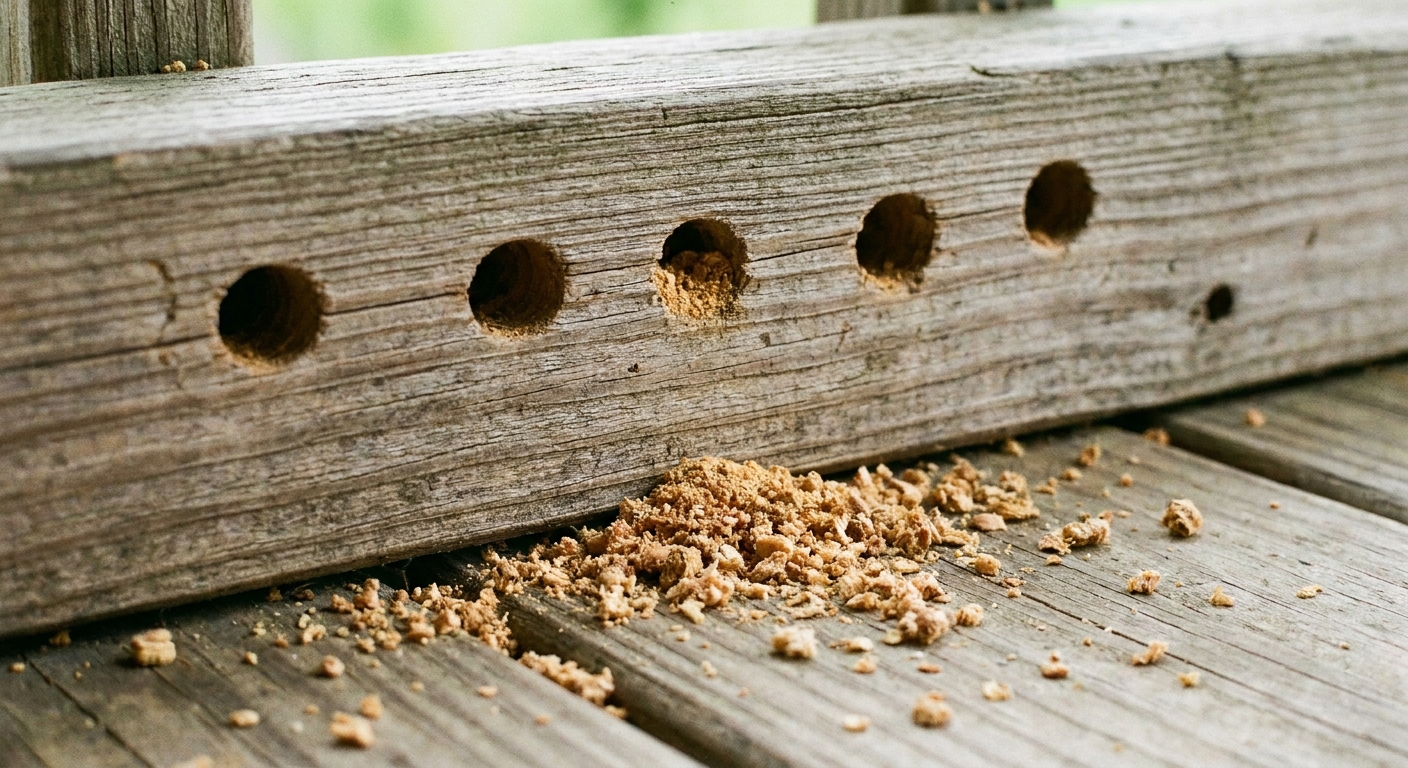
- Round entrance holes: nearly perfect circles about the size of a pencil eraser (often around 3/8 inch).
- Sawdust or “frass”: pale wood shavings sprinkled beneath the hole.
- Yellowish streaks: active holes can sometimes leave staining or droppings below the entrance (and weathering can mimic this too).
- Hollow-sounding wood: in heavier infestations, galleries can make boards sound thin when tapped.
One or two holes are usually cosmetic at first. The real risk comes when tunnels are reused and expanded year after year, especially in softwoods and unpainted, weathered areas. They often prefer softer woods like pine, cedar, and fir, but any wood can become “worth it” if it is exposed and easy to work.
Timing matters
If I could tuck one carpenter bee tip into everyone’s garden glove, it would be this: work with their seasonal rhythm. Timing varies by region and by species, so let local activity be your guide.
- Early spring: adults emerge and start scouting. This is your best window to deter and prevent new tunneling.
- Mid to late spring: females bore tunnels, lay eggs, and provision chambers with pollen.
- Summer: activity continues, and new adults may emerge later in the season.
- Fall: depending on your climate, bees may shelter in old tunnels to overwinter.
Best time to seal holes: after you are confident the tunnel is inactive. In many areas, late summer is a safer window because young have emerged and daytime activity is easier to observe. In some climates, sealing too late into fall can trap overwintering adults inside. That is one reason a physical barrier inside the hole (covered below) is so helpful: it prevents an angry escape route through your patch.
Seal and finish wood
Carpenter bees prefer bare, weathered, unpainted softwood. Your most reliable natural deterrent is simply good exterior maintenance. Not glamorous, but incredibly effective.
Step 1: Inspect and mark
On a dry day, walk your deck edges, railings, joists, fascia boards, eaves, pergola beams, and any exposed trim. Mark holes with painter’s tape so you can find them again easily.
Step 2: Watch for activity
Look for fresh sawdust, hovering bees returning to the same spot, or new staining. If it is active, focus first on deterrence and protection (below), then return to sealing when activity stops.
Step 3: Fill holes the right way
Here is the practical detail most DIY guides skip: carpenter bees have strong mandibles, and they can chew through standard wood filler, putty, or caulk over time. To make a repair that actually holds, you want a physical barrier inside the entrance.
When you are ready to seal:
- Clear loose debris at the entrance with a small brush.
- Pack the entrance with a small plug of steel wool, copper mesh, or even tightly crumpled aluminum foil. Use just enough to fill the opening firmly without blowing out the wood around it.
- Cap it with an exterior-grade wood filler (or wood putty rated for outdoor use), pressing it in well.
- Sand smooth after it cures.
If you can access the gallery beyond the entrance (some tunnels run along the grain), packing the first inch or so is the key part for chew resistance. You do not need to excavate your trim like a surgeon. You just need a barrier they cannot casually bite through.
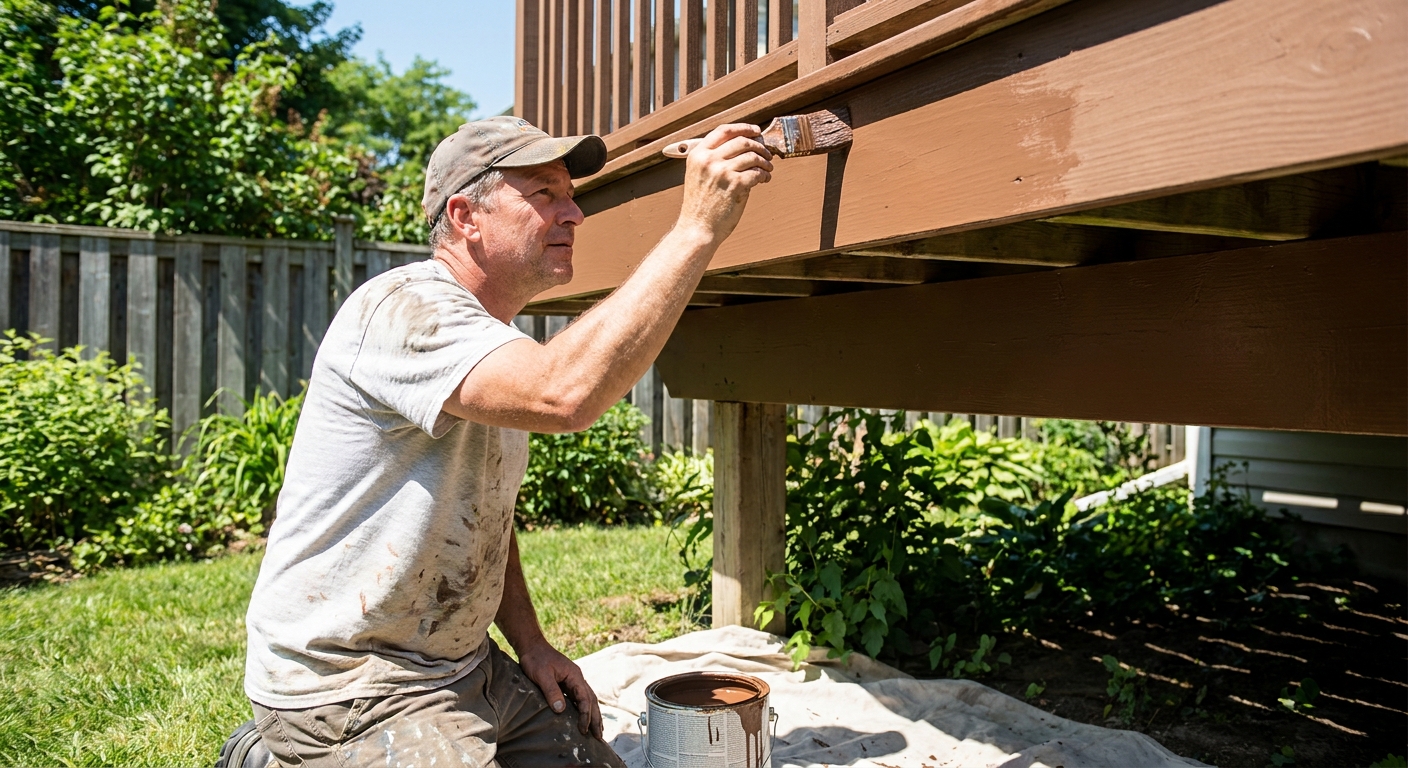
Step 4: Prime and paint or use solid stain
Carpenter bees are generally far less interested in painted wood than stained or raw wood. A clear sealer can help protect wood, but it is often less effective as a deterrent than paint or a solid-color finish.
- For trim and fascia: prime and paint with quality exterior paint.
- For decks: a solid-color deck stain tends to be more deterrent-friendly than a clear sealer. If you prefer a natural look, keep up with a durable sealant and inspect more often.
- Do not skip end-grain: bees often start at edges, undersides, and end-grain where wood is most exposed.
If you are building new, consider naturally durable materials for exposed areas (like cedar) and finish them well, or wrap fascia with metal where appropriate.
Scent deterrents
Carpenter bees use scent cues when they return to old nesting sites. Some homeowners find that gentle, plant-based aromas help make a spot less inviting, especially when paired with sealing and painting. Evidence is mixed and often anecdotal, so think of these as optional support, not the foundation.
Citrus oil
Some people report that citrus scents help reduce hovering and scouting. A simple approach:
- Mix 10 to 20 drops of citrus essential oil in 1 cup of water with a tiny splash of mild soap (as an emulsifier).
- Shake well and lightly spray around entrances and along likely nesting edges, focusing on undersides and corners.
- Reapply after rain and sun exposure, often every few days during peak activity.
Safety notes: Essential oils are concentrated and can irritate skin and noses (including pets). Test a small, hidden area first to make sure it does not spot or dull a finished surface. Use a light hand, avoid soaking wood, and do not spray directly on bees or flowers.
Almond oil
Many homeowners also report success using almond oil as a “this place feels wrong” scent. You can:
- Dab a few drops onto a cloth and wipe along rails, joists, and fascia where bees hover.
- Refresh weekly, or after heavy rain.
Almond oil is best as a supporting actor, not the whole play. Think of it as your temporary bouncer while paint and a solid finish do the long-term job.
Physical deterrents
Sometimes you need a non-chemical nudge that is more mechanical than scent. These are my favorite options because they reduce conflict without creating a toxic yard.
Protect vulnerable spots
- Repair split or rotting wood and replace boards that are already heavily tunneled.
- Use metal or vinyl wraps on fascia where possible.
- Screen in problem areas under eaves or in open rafters if it fits your home style and ventilation needs.
Temporary exclusion
If you have an active season and need a stopgap while you plan repairs, you can sometimes block access with fine mesh or netting stapled or tacked in place over the problem area. Leave space for airflow and avoid trapping bees inside. This is most useful for open, reachable areas and is not always practical around vents or complex trim.
Offer an alternative away from the house
This can be surprisingly effective: place untreated lumber or a “bee block” style habitat well away from the home, near flowering plants. You are not feeding an infestation. You are guiding nesting pressure away from vulnerable structural wood. Keep it at least 20 to 30 feet from the house if you can.
Traps
I will be honest in my gardener way: I do not reach for traps first. Carpenter bees are pollinators, and trapping can catch non-target insects if used carelessly. That said, if you have persistent, repeated tunneling year after year and preventative steps are not keeping up, a trap can reduce pressure while you repair and finish wood.
Use traps thoughtfully
- Place traps near the problem wood but not right on top of flowers or vegetable beds.
- Use them short-term, during peak activity, then remove once the situation calms down.
- Pair with repairs. Traps without sealing and finishing just turn into a seasonal routine.
If you are uncomfortable with any lethal method, focus on exclusion, finishing wood, and redirecting nesting sites. Those steps are the backbone either way.
When to call a pro
Most carpenter bee situations are manageable for homeowners, especially early. Call a pro if:
- You have many active holes across multiple areas of the home, especially fascia and structural members.
- Wood sounds hollow or shows visible sagging, cracking, or softness.
- Bees are nesting near electrical, lighting, or hard-to-access roof areas where ladders create risk.
- You are also seeing woodpecker damage. Woodpeckers may tear open galleries to eat larvae, which can escalate destruction fast.
Ask for an approach that prioritizes exclusion, repair, and prevention, not just repeated treatments. A good wildlife-focused pest professional will explain timing, sealing, and protective coatings as part of the plan.
Simple homeowner plan
If you want a calm, realistic checklist, here is the one I would hand you at the garden gate.
This week
- Identify holes and watch for activity.
- Optionally apply a light citrus or almond oil deterrent to high-activity areas (not on flowers, not on bees).
- Plan materials: exterior wood filler, sandpaper, primer, paint or solid stain, plus steel wool, copper mesh, or aluminum foil for packing.
When activity slows
- Pack entrances with steel wool, copper mesh, or foil, then fill and sand smooth.
- Prime and paint or apply solid stain to exposed surfaces, especially undersides and end-grain.
- Replace badly damaged boards.
Next spring
- Do a quick inspection in early spring.
- Touch up peeling paint and recoat high-wear areas as needed.
And if you catch yourself feeling guilty for not wanting bees in your fascia, let me gently reassure you: you can adore pollinators and still draw a firm boundary around your home. That is not a black thumb. That is good stewardship.
