Damping Off in Seedlings
If you have ever walked in to check your seed trays and found a row of seedlings mysteriously folded over like tiny felled trees, you have met one of the most heartbreaking rite-of-passage problems in seed starting: damping off. It feels personal. It is not. It is biology doing what it does best when we accidentally hand it the perfect conditions.
The good news is that damping off is far more preventable than it is treatable. Once you know the triggers, you can set up your seed-starting space so those fungi and fungus-like organisms never get the upper hand.

What damping off is
Damping off is a catch-all term for a group of soilborne pathogens that attack seeds and seedlings right as they germinate and in the first couple of weeks of life. The most common culprits are fungal and fungus-like organisms such as Pythium, Rhizoctonia, and Fusarium.
It usually shows up in two ways:
- Pre-emergent damping off: the seed germinates but never makes it above the soil surface. You see gaps where you expected sprouts.
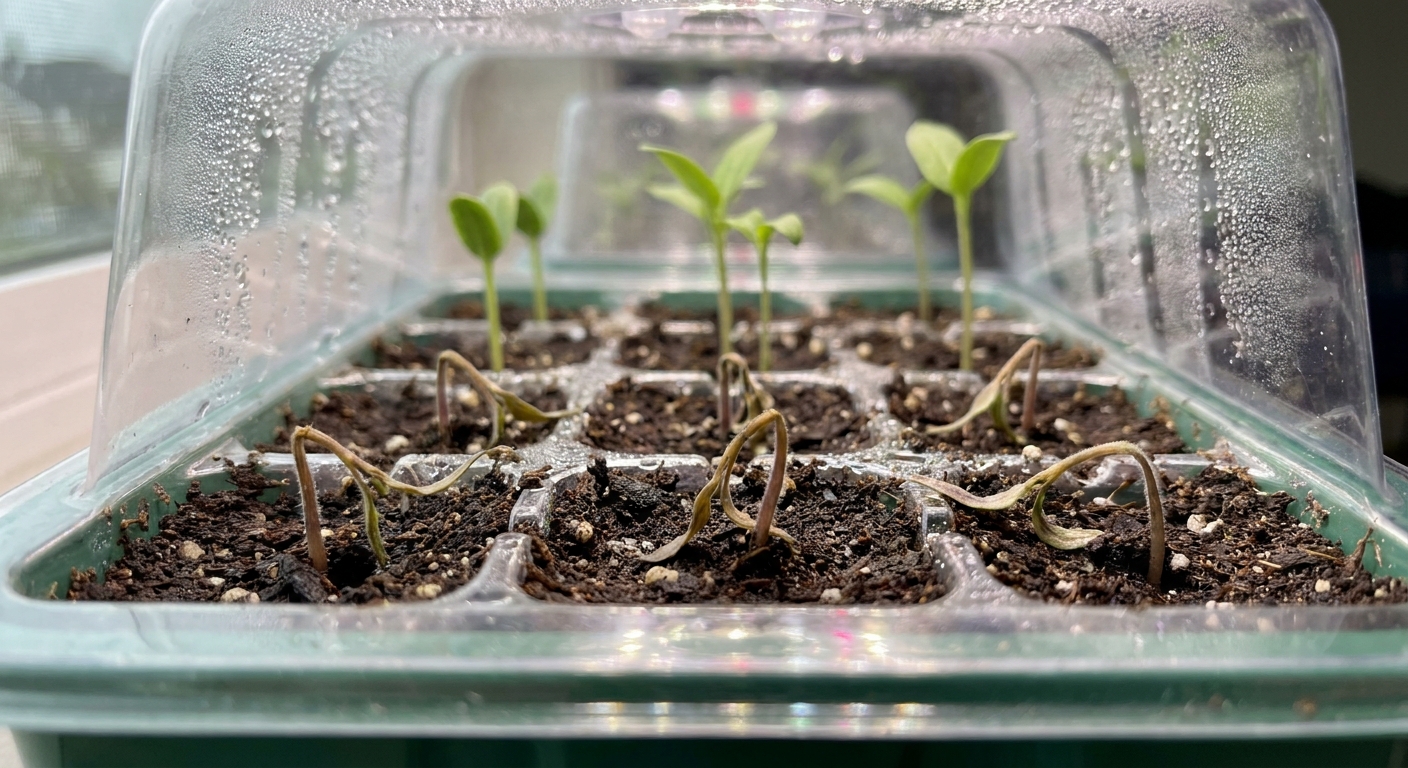
- Post-emergent damping off: seedlings emerge, look fine, then suddenly collapse. The stem at the soil line looks pinched, water-soaked, or thin like a thread.
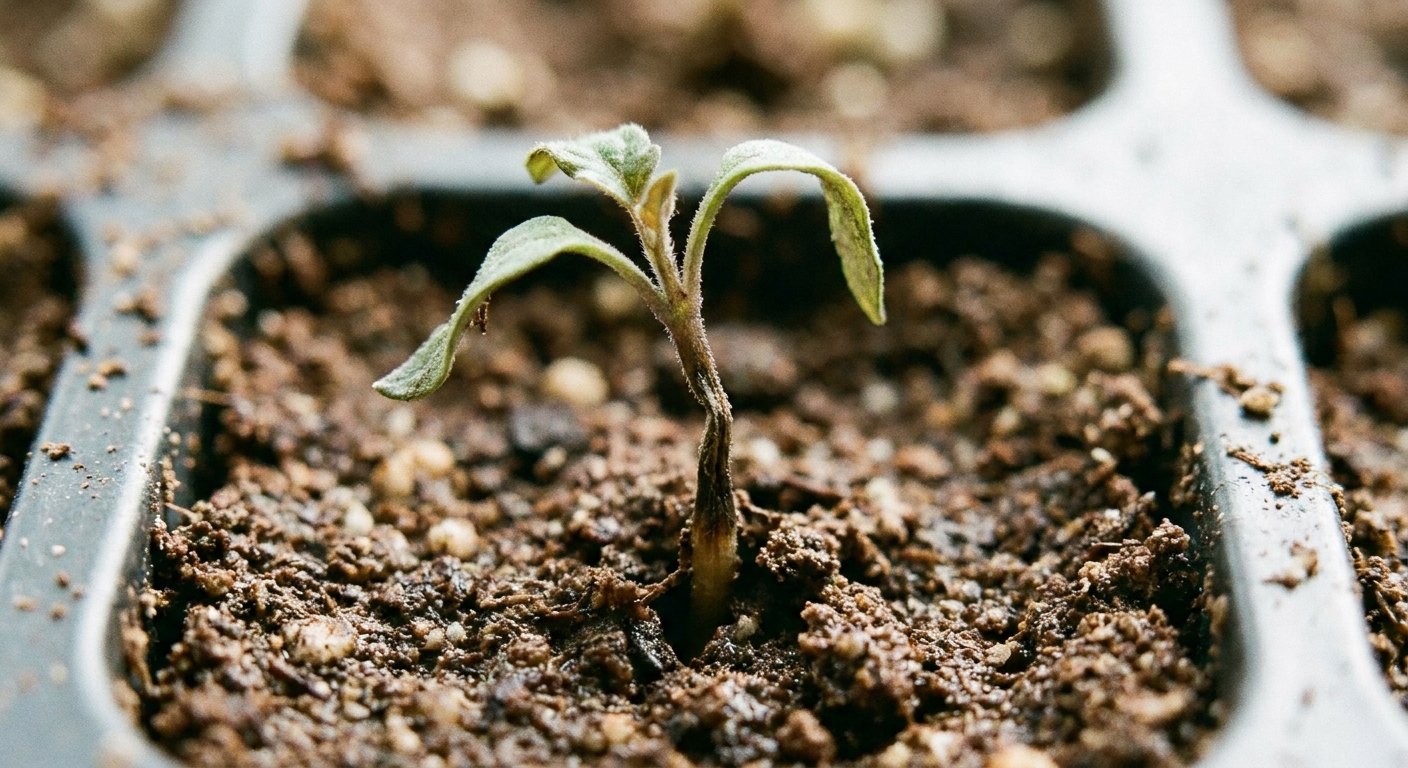
Important note: damping off is not the same as leggy seedlings. Leggy seedlings stretch tall and flop because of low light. Damping off typically involves a stem lesion at the soil line and a rapid collapse.
Also worth saying out loud: once a seedling has classic post-emergent damping off, it typically will not recover. Your best move is to protect the ones that are still healthy.
What it looks like
Classic signs
- Seedlings topple over at the soil surface even though the leaves still look green.
- A narrow, darkened, mushy, or translucent band forms at the base of the stem.
- Seedlings wilt despite the soil being moist.
- Patchy losses that seem to spread across a tray over a few days.
Look-alikes
- Legginess: thin, stretched stems with no pinched lesion. Usually improves with stronger light and a little airflow.
- Underwatering: seedlings droop, but perk up after watering and stems are not rotted at the base.
- Salt or fertilizer burn: crispy leaf edges or stalled growth, often after feeding too early or too strong.
- Cutworms (more common outdoors): seedlings are severed cleanly at the base, like snipped with scissors.
Why it happens
Damping off organisms are common in the environment. The goal is not to create a sterile planet. The goal is to avoid the cozy conditions that let them explode.
- Too much moisture: constantly wet media deprives roots of oxygen and favors pathogens.
- High humidity with still air: especially under domes that never get vented.
- Cool, wet conditions: these slow seedlings down and can favor damping-off pathogens.
- Overcrowding: dense sowing reduces airflow at the soil surface and keeps everything damp longer.
- Reused, dirty trays and tools: pathogens hitchhike from last season into this one.
- Damp, poorly stored seed-starting mix: mix stored open or in humid spots can become contaminated and can also become a cozy place for fungus gnats to breed.
In other words, damping off is often a stress-plus-opportunity problem. Stressed seedlings, wet surfaces, and a pathogen with time to multiply.
Prevention setup
1) Use a clean seed-starting mix
Start with a commercial seed-starting mix designed for germination. Many are pasteurized or produced to be low in pathogens, but not all are truly sterile. Garden soil and backyard compost are wonderful in the garden, but indoors in a tray they bring an entire microbial universe right up against baby stems.
- Choose a fine-textured mix labeled for seed starting.
- If you have fungus gnats or past issues, consider buying a new bag each season and storing it sealed and dry.
- Avoid mixes that feel heavy, clumpy, or stay soggy for days.
2) Sanitize trays
If you reuse cell packs, humidity domes, or bottom trays, clean them before sowing. Soap and water removes grime. Sanitizing knocks back pathogens.
- Wash first with hot soapy water, then rinse.
- Sanitize with either a 10% bleach solution (1 part unscented household bleach to 9 parts water) or 3% hydrogen peroxide. Let it sit for the recommended contact time (10 minutes is a common greenhouse rule of thumb), then rinse well.
- Let trays dry fully before filling them.
If you are an organic purist, I get it. I grow organically too. But I am also realistic about indoor seed-starting: a quick sanitation step prevents a lot of heartbreak.
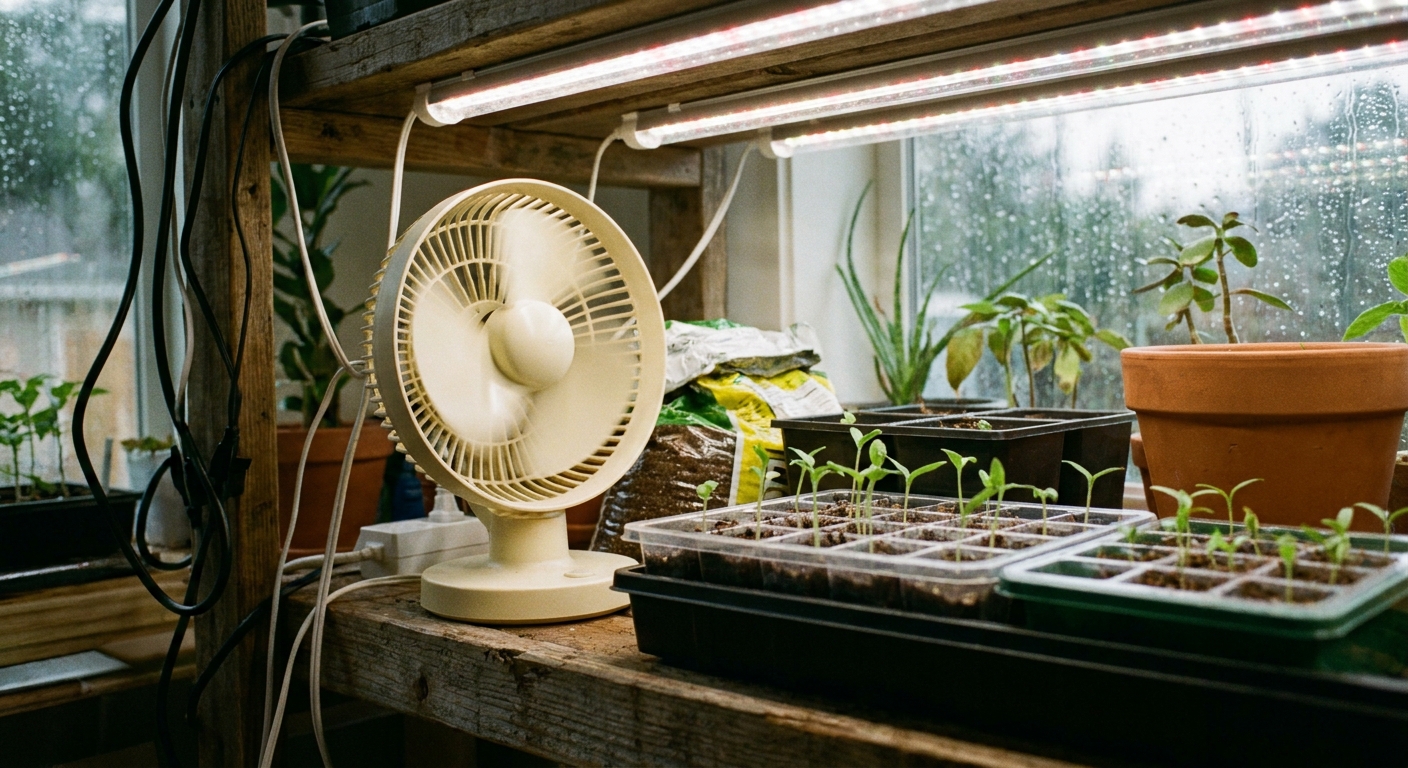
3) Add airflow early
A small fan is one of the simplest, most effective damping-off tools. You are not trying to blast seedlings. You are trying to keep the air gently moving so the surface dries between waterings.
- Run a fan on low aimed past the trays, not directly into them.
- Remove humidity domes as soon as most seeds have sprouted. If you must keep a dome, vent it daily.
- Give seedlings space. If you sow thickly, plan to thin early.
Watering
Watering is where most of us accidentally invite damping off to dinner. The seedlings do not need a swamp. They need consistent moisture and oxygen.
Bottom watering
Bottom watering is great because it keeps the stem area drier, but it can still go wrong if the tray sits in water too long.
- Add water to the bottom tray and let cells wick moisture until the mix is evenly moist and the surface just begins to darken. This is often about 10 to 20 minutes, depending on cell size and your mix.
- Remove any remaining water. Do not let cells soak for hours.
- Wait until the surface is slightly lighter in color before watering again.
Top watering
- Use a fine-rose watering can, squeeze bottle, or mister that does not crater the mix.
- Aim for the media, not the stems.
- Water earlier in the day so the surface has time to dry before night.
Simple moisture check
Pick up a cell pack. If it feels heavy and cool, you can usually wait. If it feels light and the surface is dry to the touch, it is time.
Temperature and light
Vigorous seedlings resist disease better. Damping off loves slow, stressed growth.
Warm to sprout, then steady
- Use a heat mat for warmth-loving crops during germination, then remove it once most seeds sprout.
- After emergence, aim for stable room temperatures and avoid cold windowsills at night.
Strong light
While legginess is not damping off, weak, stretched seedlings are easier targets. Keep grow lights close (follow your specific light’s guidance) and give seedlings a proper day length.
Cinnamon and drenches
Let us talk honestly, like we are standing in the aisle at the garden center with a cart full of seed packets and hope.
Cinnamon
Cinnamon is often recommended because it has some antifungal properties. In practice, it can be a light surface deterrent and may help slightly by drying the surface. Evidence for cinnamon as a damping-off preventative is mostly anecdotal and mixed. It is not a cure for an active outbreak in the root zone.
- How to use: dust a very thin layer on the soil surface after sowing or after removing a collapsed seedling.
- Limitations: it will not sterilize a tray and can clump if the surface is very wet.
Dilute hydrogen peroxide
A dilute hydrogen peroxide drench is one of the most common, consumer-friendly home remedies people use for surface fungus, algae, and early damping-off concerns. It can help reduce microbial load at the surface, but it is still best viewed as a support act, not the headliner.
- Typical approach: many gardeners dilute 3% hydrogen peroxide with water (often around 1 part peroxide to 3 parts water) and apply as a light soil drench.
- Use with care: test on a small area first, avoid overuse, and do not combine with other treatments unless you know they are compatible.
- If you want maximum certainty, follow a labeled product or university extension guidance for your crop and setup.
Fungicides and biologicals
There are seed-starting products labeled to help prevent damping off. These are typically used as a soil drench and are preventative more than curative. Some products are biological (beneficial microbes) and some are chemical fungicides.
- Use only products specifically labeled for damping off and for indoor seed-starting use.
- Follow label directions exactly for dilution, timing, and safety.
- Do not mix home remedies with fungicides unless the label says it is compatible.
If you want the most organic-leaning approach, look for products based on beneficial microbes that help occupy the root zone. They can be a nice addition, but airflow and watering habits still do most of the heavy lifting.
What to do fast
When damping off appears, speed matters. Think of it like a spill in the kitchen: you clean it up before it spreads across the counter.
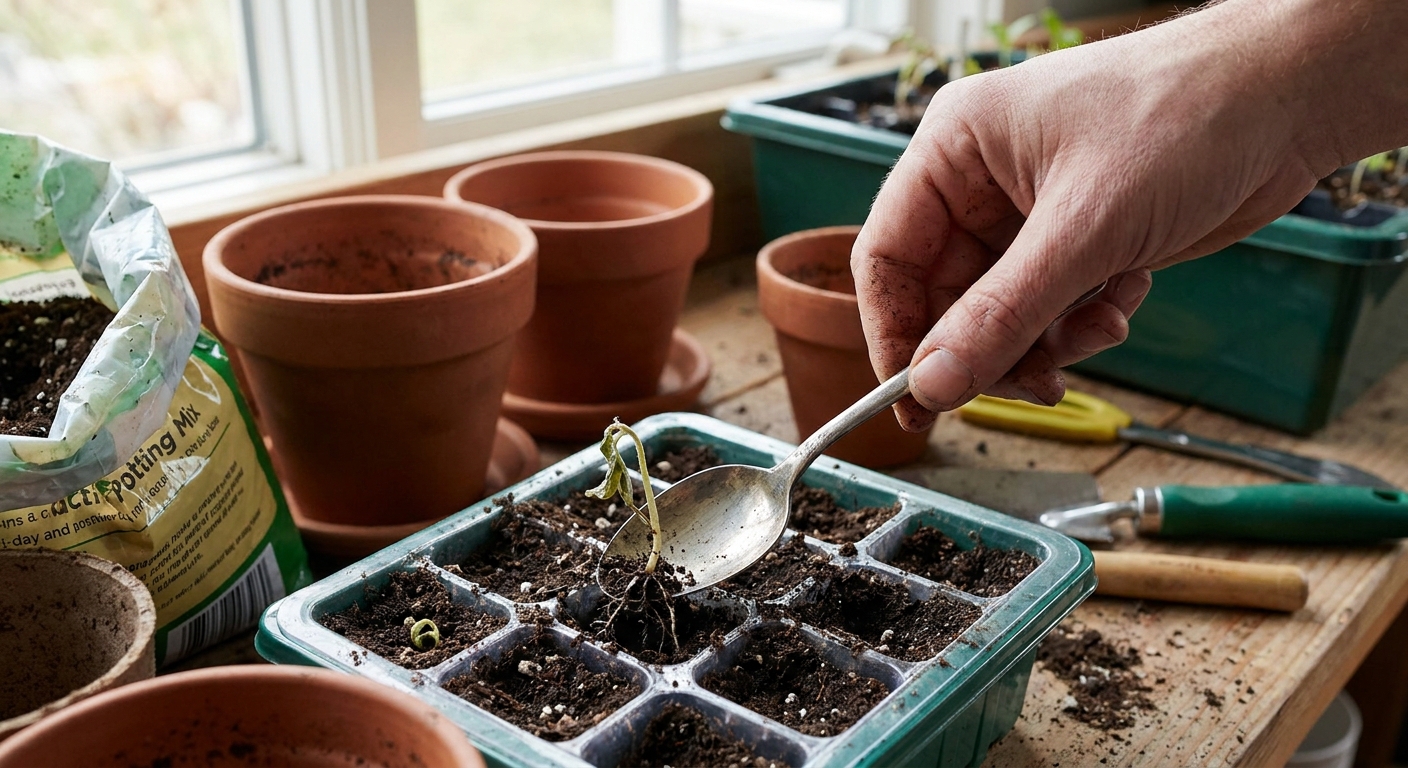
Triage steps
- Remove affected seedlings immediately. Lift the entire seedling and surrounding mix if possible. Bag it and toss it. Do not compost it, especially not in cool or slow compost piles.
- Improve airflow. Remove the dome, turn on a fan, and space trays out.
- Let the surface dry a bit. Skip the next watering if the media is still moist.
- Increase light and reduce stress. Keep seedlings growing steadily.
- Consider a labeled preventative drench if you have a history of recurring losses.
If you only lose one or two seedlings and the rest look sturdy, you may be able to stabilize the tray with the changes above.
Stop it spreading
Damping off pathogens move with water, media, and our very helpful human hands. A few small habits make a big difference, especially if you are running multiple trays close together under lights.
- Do not share bottom water. If one tray is suspect, do not let its runoff sit in a shared flat with other trays.
- Label and isolate. Move the questionable tray to a separate area if you can.
- Use separate tools or wash tools between trays, especially if you are pricking out seedlings.
- Water carefully. Avoid splashing soil from one cell to another.
- Clean surfaces. Wipe down shelves and waterproof mats if you have an outbreak.
It sounds fussy, but it is less work than re-sowing three times. Ask me how I know.
When to start over
This is the part where I put my hand on your shoulder in the potting shed and tell you the truth: sometimes the kindest thing you can do is start over.
Start over if
- More than 25 to 50 percent of the seedlings in a tray have collapsed and new ones keep falling daily.
- The mix smells sour, stays wet for days, or has visible mold across the surface.
- You see damping off across multiple trays, which often points to a sanitation or watering issue.
- You are early enough in the season that re-sowing still fits your planting schedule.
Restart steps
- Discard the old mix. Do not reuse it.
- Wash and sanitize trays, domes, and bottom flats.
- Switch to fresh seed-starting mix.
- Sow a little thinner than last time.
- Bottom water briefly, then drain.
- Add gentle airflow once seedlings emerge.
- Remove domes promptly.
Re-sowing is not failure. It is gardening. Even master gardeners re-sow. The difference is we do it faster, with fewer tears, and usually with better snacks.
Quick checklist
- Fresh seed-starting mix, not garden soil.
- Clean and sanitize trays and tools.
- Sow thinly and thin early.
- Bottom water until evenly moist, then drain.
- Remove humidity domes soon after germination.
- Run a small fan for gentle airflow.
- Keep seedlings under strong light to avoid stress.
- Isolate any tray that looks suspicious.
One last reminder
If damping off got you this year, you are in excellent company. Seed starting is a tiny ecosystem, and it takes a season or two to learn how your home’s light, humidity, and habits interact. Make one or two changes, not ten. Keep notes. And next time you see those seedlings standing up straight and sturdy, you will feel that quiet little thrill that makes all the fuss worth it.