Dahlia Tubers
Dahlias have a way of making even a small garden feel like it is putting on a party. And it all starts with something that looks a little unimpressive: a knobby, sweet-potato-like cluster called a tuber. If you have ever bought a bag of dahlia tubers, stared at it, and wondered which end is up, you are in the right place.
Below is my dirt-under-the-fingernails, no-fuss walkthrough for picking good tubers, planting them at the right time, and storing them so you can replant next year with even more confidence.

What dahlia tubers are (and why the eye matters)
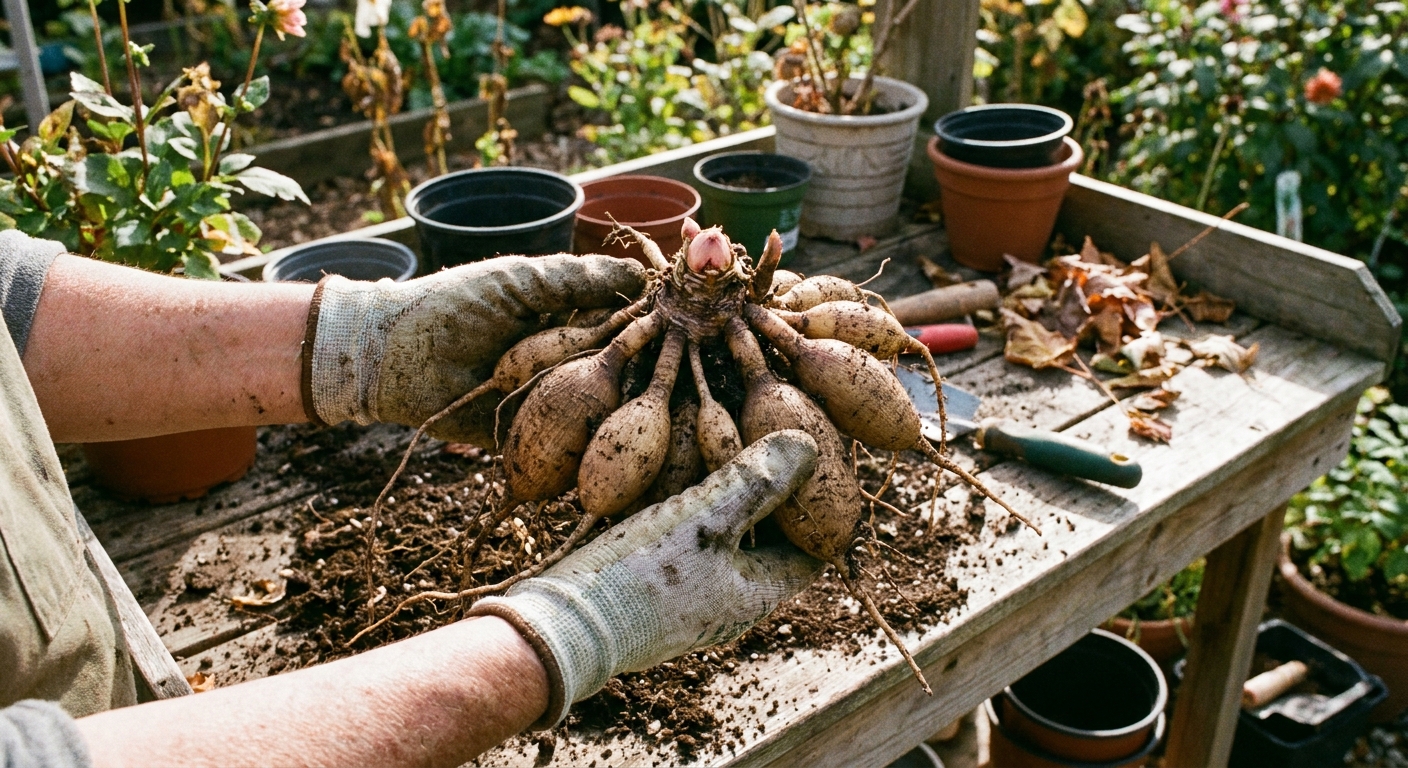
Dahlia tubers are storage roots. They hold energy the plant uses to sprout and grow. The important detail is this: new growth comes from the crown, where the tubers join together, and specifically from tiny buds called eyes.
- The tuber body: the plump root that stores food.
- The neck: the narrow connector between tuber and crown. If a neck snaps and there is no crown tissue with an eye attached, that tuber is unlikely to sprout.
- The crown: the central knob where the stems were last year and where eyes form.
- The eye: a small bump or dot on the crown that becomes a sprout.
If you remember one thing: a single loose tuber without a piece of crown and an eye is usually just a snack for the compost pile.
How to choose healthy dahlia tubers
Whether you are shopping online, at a big box store, or at your local nursery, look for tubers that feel like they want to live.
What to look for
- Firm, not squishy. Slight wrinkles are fine. Mushy spots are not.
- Intact necks connecting to the crown.
- Visible eye(s) if possible. Early in the season, eyes can be hard to see, so prioritize a solid crown.
- No mold, ooze, or strong rot smell.
What to avoid
- Completely desiccated tubers that feel papery light.
- Blackened, soft, or leaking areas.
- Single “orphan” tubers with no crown tissue.
Clara note: I would rather plant one plump, sturdy clump than three bargain-bin tubers that look like they have been on a road trip since 2019.
When to plant dahlia tubers
Dahlias hate cold soil. Plant too early and the tubers can rot before they ever wake up.
- Outdoor planting: after your last frost date, when soil is warming up. Many gardeners aim for about 60°F / 16°C for the smoothest, safest start, but you can often plant a bit cooler (around 55°F / 13°C) if drainage is good and the forecast is settled.
- Cool climates: many gardeners plant 1 to 2 weeks after last frost for safer soil warmth.
- Warm climates: you can plant earlier, but protect young growth from late cold snaps.
If you are itching to start, you can pre-sprout tubers indoors in pots 4 to 6 weeks before planting out. It is optional, but it can buy you an earlier bloom window.
Where dahlias thrive
Sunlight
6 to 8+ hours of sun is the sweet spot. In very hot areas, a bit of afternoon shade can prevent scorched petals.
Soil
Think loose, rich, and well-draining. Heavy clay holds water and encourages rot, especially early in the season.
- Aim for compost-amended garden soil that crumbles easily.
- If your soil puddles after rain, consider raised beds or containers.
Spacing and airflow
Give them room. Many varieties need 18 to 24 inches between plants, but dwarf types can be closer and dinnerplate types often want more. When in doubt, check your variety tag.
Good airflow helps reduce powdery mildew and keeps foliage happier.
How to plant dahlia tubers (step by step)
You do not need fancy tools. You need good timing and a gentle hand.
- Dig a hole about 4 to 6 inches deep. In sandy soil, you can go a little deeper. In heavier soil, stay closer to 4 inches.
- Set the tuber horizontally with the crown and eye area facing up. If you cannot find the eye, place the clump so the old stem stub is up.
- Add a stake now for tall varieties. Pounding a stake later risks spearing your tuber.
- Backfill gently. Do not compact the soil like you are sealing a time capsule.
- Water smart: if your soil is dry, water once to settle it in. Then hold off on heavy watering until you see shoots. Slightly moist is fine. Soggy is not.
Container planting: Choose a pot at least 12 to 16 inches wide (bigger is better for tall varieties), use a high-quality potting mix, and plan to stake or cage the plant.
Watering and feeding without overdoing it
Watering
- Before sprouting: keep soil only lightly moist.
- After sprouting: water deeply when the top 1 to 2 inches of soil feels dry.
- Heat waves: containers may need daily watering.
Mulch helps keep moisture even and soil life thriving. I love shredded leaves, clean straw, or compost. In cooler climates, wait to mulch until shoots are up and the soil has warmed, so you do not accidentally keep things cold and wet.
Fertilizer
Dahlias appreciate nutrients, but too much nitrogen can mean huge leaves and fewer flowers.
- Mix compost into the planting area.
- Once plants are 12 to 18 inches tall, feed with a lower-nitrogen fertilizer (something like 5-10-10 or similar).
- Repeat every 3 to 4 weeks through peak bloom if needed, especially in containers.
Pinching, staking, and deadheading for more blooms
Pinch for bushier plants
When the plant is about 12 to 16 inches tall and has 3 to 4 sets of leaves, pinch the growing tip just above a leaf set. It feels scary. It works. You get more branching and more flowers.
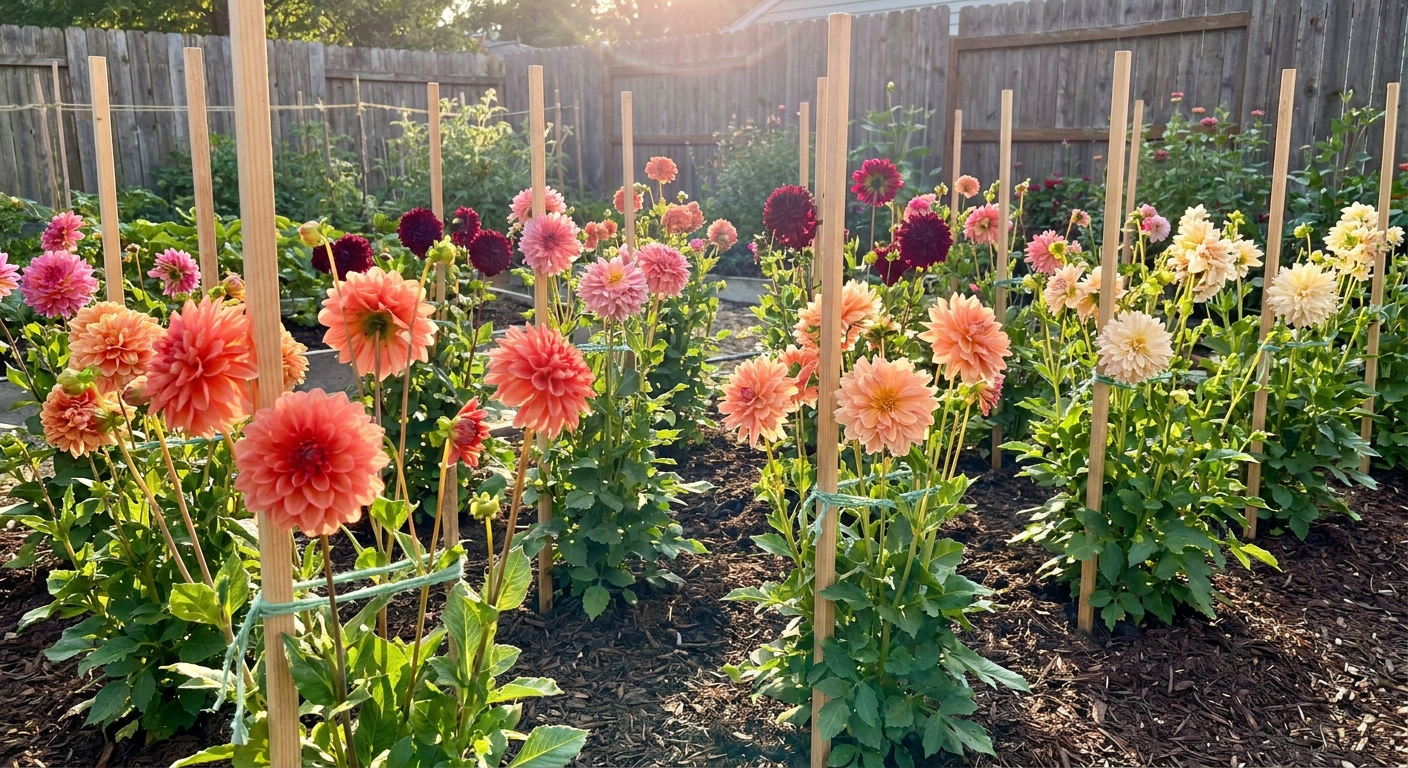
Stake early
Many dahlias are top-heavy, especially dinnerplate types. Use a sturdy stake and soft ties. Check ties as stems thicken so they do not girdle the plant.
Deadhead like you mean it
Remove spent blooms to keep flowers coming. Snip back to a leaf node or branching point. If you are unsure whether a head is spent, look for petals that are fading and a center that is starting to dry and open up.
Common problems (and what to do)
Tubers rot in the ground
- Cause: cold, wet soil; planting too early; poor drainage.
- Fix: plant later, improve drainage, use raised beds, and avoid overwatering before sprouting.
No sprouts after a few weeks
- Possible reasons: tuber dried out, broken neck with no crown attached, no viable eye, soil too cold.
- Fix: wait for warmer soil, gently dig and inspect if it has been 4 to 6 weeks in warm conditions.
Slugs and earwigs chew new shoots
- Fix: hand-pick at dusk, use iron phosphate slug bait if needed, reduce hiding spots like thick boards right near stems.
Aphids or spider mites
- Fix: blast with water, encourage beneficial insects, and use insecticidal soap if pressure is high. Check the undersides of leaves.
Powdery mildew in late summer
- Fix: improve airflow, water at soil level, remove heavily infected leaves, avoid excess nitrogen.
Virus concerns
If you see persistent leaf mottling, stunted growth, or weirdly distorted blooms, do not take cuttings from that plant. Sanitize tools, and consider removing the plant to protect the rest of your patch.
Digging and storing tubers for winter
If you garden where dahlias are not winter-hardy, you will want to lift and store tubers after frost. As a general rule, many gardeners in zones 7 and colder dig tubers, while zones 8 and warmer may be able to overwinter in the ground with protection, especially in well-draining soil. Winter wet is often the real troublemaker.
When to dig
- Wait until a light frost blackens the foliage.
- Give it a few days after frost if the ground is not frozen. This gives the plant time to send remaining energy down to the tubers and helps the skins toughen up a bit.
Label now, thank yourself later
Before you cut everything down, label varieties. Tags disappear. Sharpie fades. A quick label tied to the stem stub saves spring confusion, especially if you are storing multiple colors that all look identical in tuber form.
How to dig without heartbreak
- Cut stems to about 4 to 6 inches.
- Use a fork or shovel to dig a wide circle 8 to 12 inches away from the stem.
- Lift gently and shake off excess soil.
- Let clumps dry in a sheltered spot with airflow for a day or two.
To wash or not to wash
Both methods work. Washing lets you inspect for rot and makes dividing easier. Leaving soil on can reduce dehydration for some gardeners. If you wash, let tubers dry thoroughly before storage.
Storage basics
- Temperature: ideally 40 to 50°F / 4 to 10°C.
- Humidity: slightly humid, not wet. Too dry shrivels tubers, too wet invites rot.
- Medium: store in a breathable box with slightly damp wood shavings, peat-free coir, or vermiculite.
- Check monthly: remove rotten tubers, lightly mist medium if everything is shriveling.

Dividing tubers (so you get more plants)
You can divide in fall or spring. I tend to divide in spring because eyes are easier to see, but fall dividing can be convenient if you are storing lots of clumps.
Rules for a successful division
- Each division needs at least one eye on the crown.
- Each division should include a healthy tuber with an intact neck connected to that crown piece.
- Use a clean, sharp knife or pruners. Sanitize between plants if you suspect disease.
Let cut surfaces dry and callus before packing for storage, especially if you divide in fall.
Quick checklist
- Plant after last frost when soil is warming (60°F / 16°C is a great target).
- Prioritize drainage and avoid overwatering before sprouting.
- Stake at planting time for tall varieties.
- Pinch at 12 to 16 inches for more blooms.
- Deadhead regularly.
- Label varieties before digging.
- Dig after frost, dry, and store cool with moderate humidity.
- Divide with an eye on every piece.