Cold Frames and Mini Greenhouses
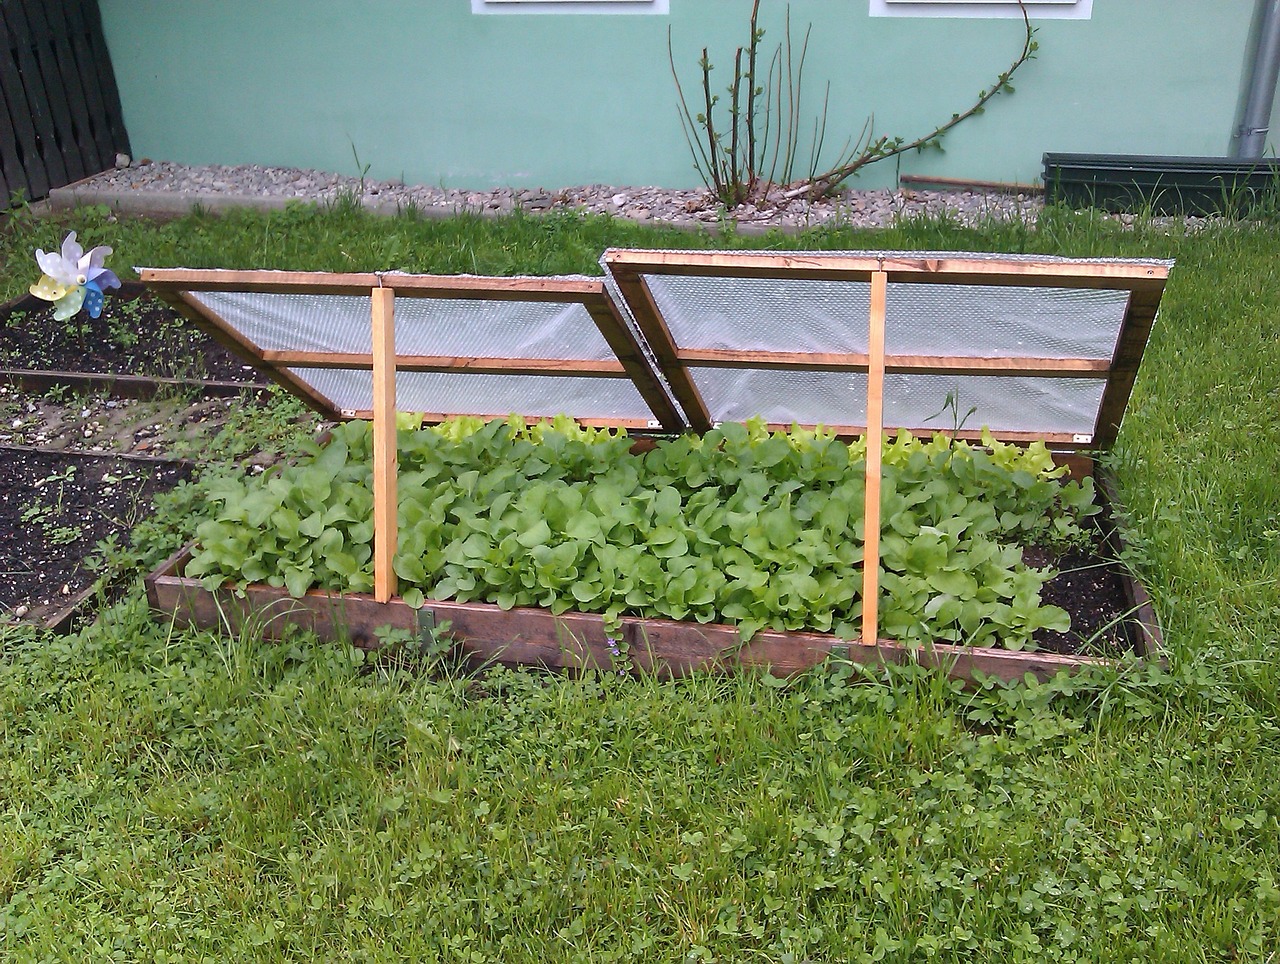
There is a particular kind of garden joy that happens when your neighbors are still staring at frozen beds and you are out there, quietly harvesting spinach like it is no big deal. Cold frames and mini greenhouses make that possible. They are simple tools, but they work because they do two powerful things: they trap solar heat and they block drying wind.
Want to start earlier in spring, keep greens going deeper into fall, or harden off seedlings without babying them hour by hour? This page will walk you through a setup that actually works in real life.

Cold frame or mini greenhouse
Both are season extenders, but they shine in different situations.
Choose a cold frame if you want
- Low-profile protection that handles wind well and sits right on the soil
- Soil warming for earlier planting in the ground
- A low-maintenance “set it and vent it” routine for cool-season crops (think: prop the lid open 1 to 6 inches on sunny days)
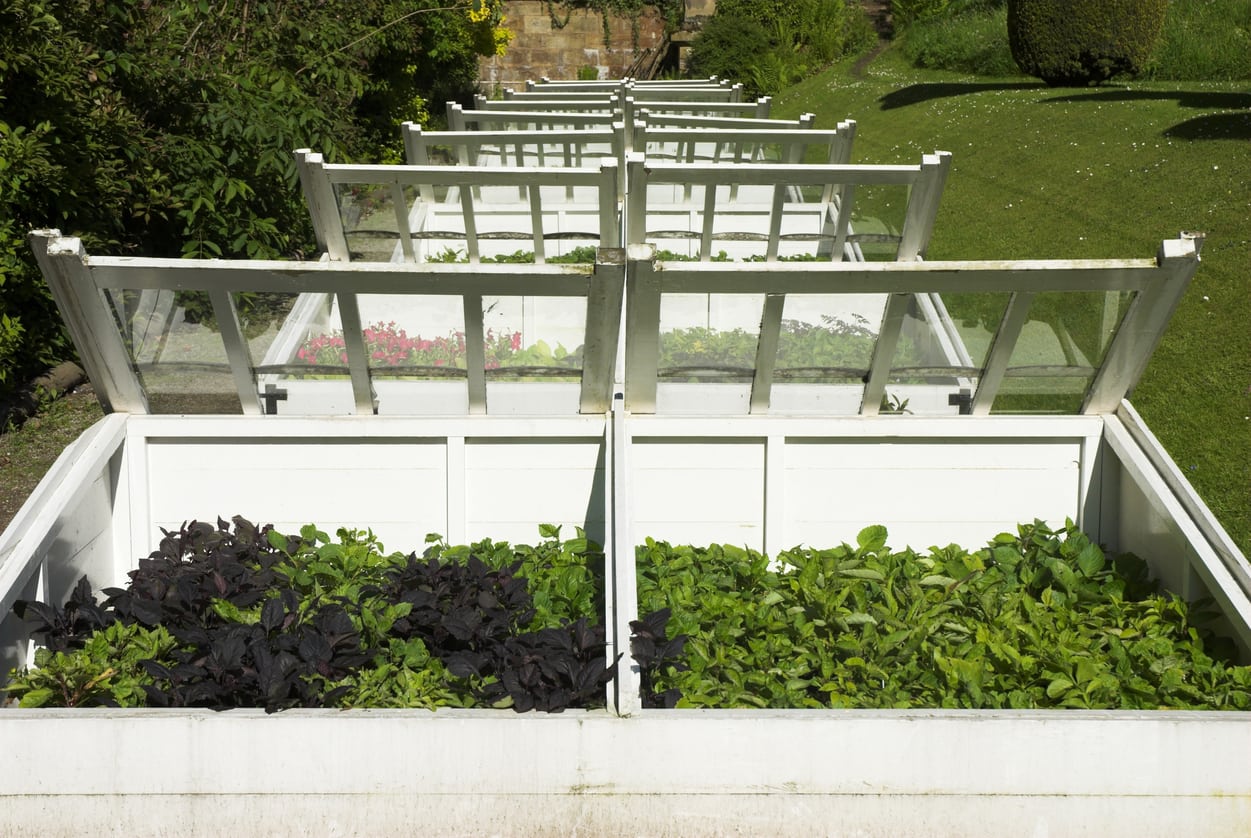
- A long-lived structure you can keep in one spot
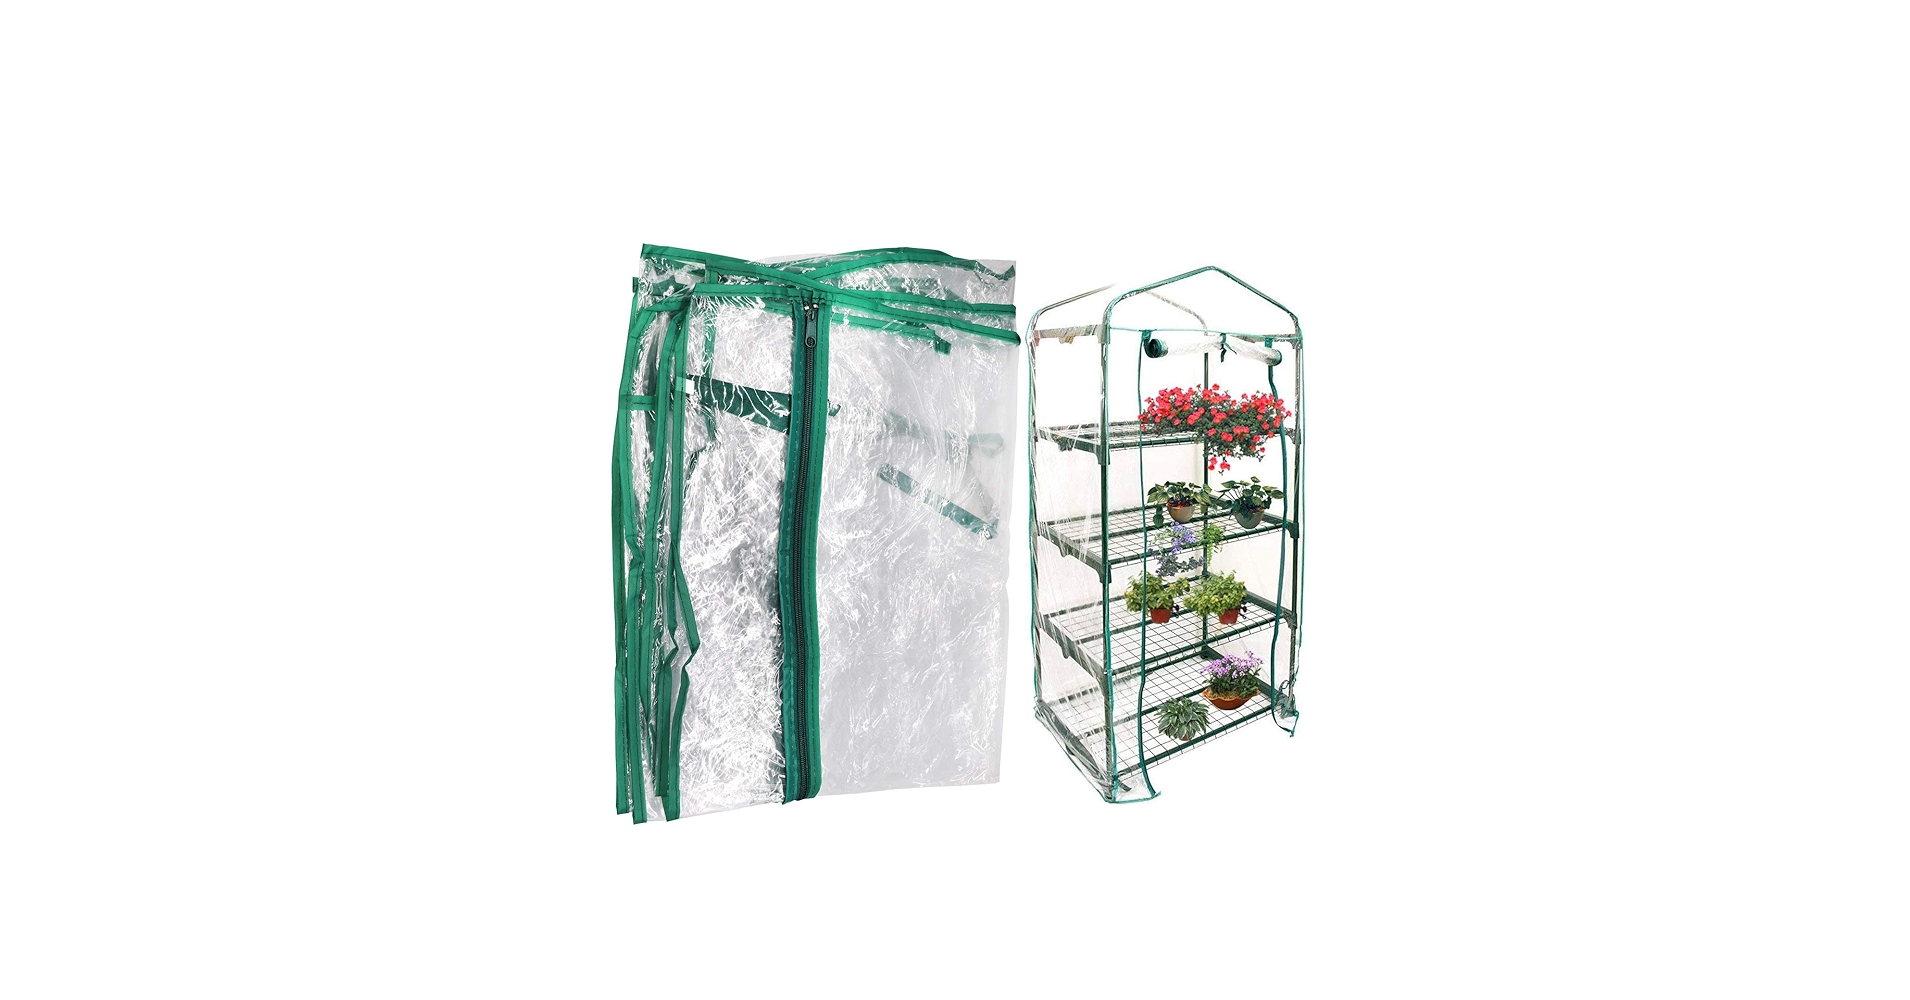
Choose a mini greenhouse if you want
- Vertical space for trays, pots, and taller starts
- Portability so you can chase sun or dodge storms
- Seedling management when you are growing lots of starts
- Extra warmth with a simple, lightweight cover, especially for short bursts of cold
If you are on a balcony or patio, a compact mini greenhouse often wins. If you have beds and want earlier carrots, greens, or transplants directly in the soil, a cold frame is hard to beat.
Picking size and materials
Season extension works best when it matches your habits. The “best” unit is the one you will actually vent, water, and use consistently.
Size: think in crops
- For hardening off seedlings: choose a unit that fits your standard trays without stacking. Stacked trays block airflow and invite damping off.
- For salad greens: a cold frame that covers a common module (like a 2x4 section, or half of a 4x8 bed) is plenty. Even a 2 by 4 foot frame can keep you in greens for weeks.
- For mixed use: go bigger than you think. Extra headspace reduces overheating and allows better airflow.
Materials: what matters
In plain terms, you want sturdy framing and a clear cover that lets in light while holding warmth.
- Wood frames (cedar, redwood, or sealed lumber): warm-looking, easy to build, and insulating. Use non-toxic exterior sealants if you seal it at all.
- Treated lumber: modern pressure-treated wood is commonly used in food gardens, but if you prefer to avoid it where it contacts soil, use naturally rot-resistant wood or add a liner.
- Metal frames: durable and tidy, but can swing temperatures faster. Great for mini greenhouses and low tunnels.
- Polycarbonate panels: my favorite for lids and sides. They are tough, hold heat well, and do not shatter like glass.
- Old windows: charming and effective, but heavy and breakable. Only use if you can secure the lid safely and lift it without strain.
- Clear plastic film: budget-friendly for mini greenhouses and tunnels. It degrades in sun, so plan on replacement.
Light note: clarity matters. Hazy plastic reduces growth and makes seedlings stretch. If your cover looks cloudy, you are losing more than you think.
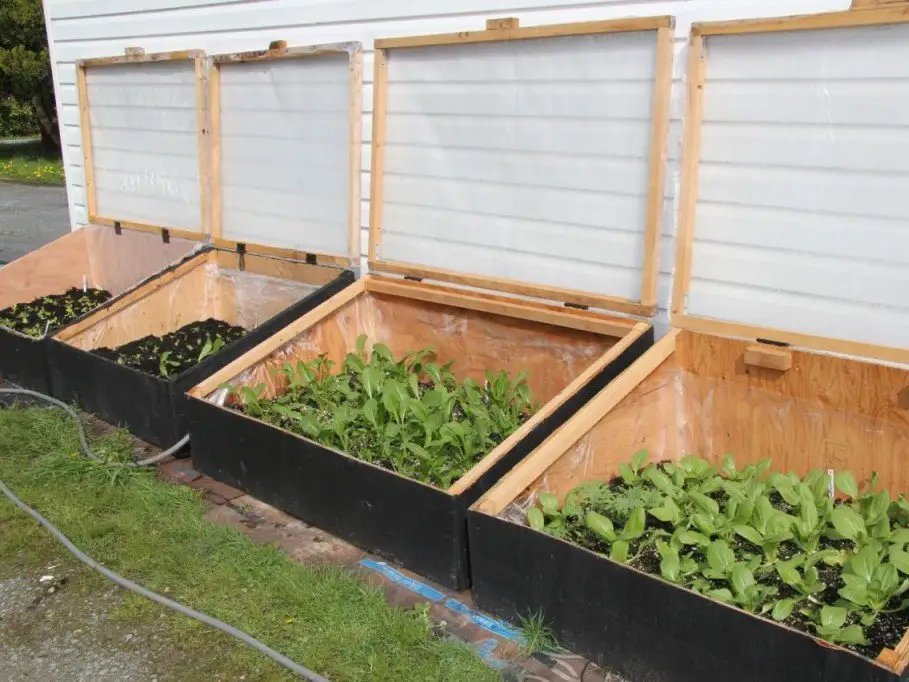
Placement: make or break
If your season extender is in the wrong spot, you will fight it all year. Put it where it will get maximum winter and shoulder-season sun.
- Face a cold frame south in the Northern Hemisphere so it catches low-angle sunlight.
- Protect from north winds if possible, using a fence, hedge, or the lee side of a building.
- Keep it accessible because you will be opening and closing it often.
- Level the base so the lid seals evenly and rainwater does not pool on one side.
For cold frames sitting directly on soil, scrape the area flat and snug the frame down tight. Gaps let heat leak out and invite slugs to move in like they pay rent.
Ventilation: the main job
In spring and fall, one of the most common failures with cold frames and mini greenhouses is not cold, it is overheating. A sunny 45°F day can turn a closed frame into a plant sauna, depending on sun intensity, insulation, and how much air space you have.
Simple vent rules
- Crack it open when the sun is strong, even if the air feels chilly.
- Open more than you think. Stagnant warm air encourages fungal issues.
- Close before evening to trap warmth for the night.
What temps to aim for
- Cool-season greens: try to keep it below about 80 to 85°F on sunny days. If it is climbing fast, vent earlier and wider.
- Seedlings in trays: they heat up and dry out quickly. Treat them like the canary in the coal mine.
Tools that help
- Automatic vent openers: usually wax-cylinder style. Mount them correctly and test them so they start opening at the temperature you want.
- Clips and roll-up sides on mini greenhouses: they give you multiple airflow settings.
- A max-min thermometer: it tells you how hot it got when you were not looking.
Condensation is normal. Leaves that stay wet for long stretches are not. Late-morning venting (once things warm up a bit) helps dry the space and keeps disease pressure down.
If you only remember one thing: sun plus plastic equals rapid heat. Venting is plant care, not optional fussing.
Soil warming
Cold air is one thing. Cold soil is the real slowdown. A cold frame shines because it warms the ground itself, which helps seeds germinate and roots grow.
Ways to warm soil faster
- Install the cold frame 2 to 4 weeks before planting so the soil has time to warm.
- Water lightly in the morning. Moist soil holds heat better than bone-dry soil, but soggy soil can warm more slowly and it increases rot risk.
- Add compost. Dark, crumbly compost absorbs heat and improves drainage.
- Use a dark mulch temporarily like compost or dark leaf mold, then move it aside to seed.
Reality check: a cold frame will not turn frozen ground into summer in a week. But it can absolutely nudge you into earlier sowing, especially for greens, radishes, and hardy seedlings.
Cold nights: hold heat
Shoulder seasons love to surprise you. Warm sun, sharp nights. If your forecast is flirting with hard freezes, add a little backup so your plants are not doing survival math at 2 a.m.
- Add thermal mass: tuck a few water jugs inside (black or dark helps). They soak up heat by day and release it slowly at night.
- Use an inner layer: drape frost cloth over plants inside the frame, or lay it under the lid at night for extra protection.
- Close early: shutting the lid before sunset traps more of the day’s warmth.
In very cold climates and midwinter weather, cold damage is still a real risk. Use a thermometer and your forecast, not wishful thinking.
Hardening off
Hardening off is the gentle process of introducing indoor-grown seedlings to outdoor sun, wind, and temperature swings. A cold frame or mini greenhouse is the perfect halfway house: sheltered, but still real-world.
A simple 7 to 10 day routine
- Days 1 to 2: Place seedlings inside with the lid open a crack or the mini greenhouse unzipped a little. Avoid harsh midday sun.
- Days 3 to 5: Increase ventilation and introduce more morning sun. Keep an eye on drying. Covered spaces can be surprisingly thirsty.
- Days 6 to 7: Leave the lid open wider during the day. If nights are mild for the crop, you can close at night for protection.
- Days 8 to 10: Expose seedlings to near-full outdoor conditions, using the cover mainly as wind and cold insurance.
Seedlings that harden off properly transplant faster and sulk less. It is like the difference between stepping out for a short walk versus sprinting straight into a marathon.
What to grow
Think of cold frames and mini greenhouses as a way to stretch cool-season crops and protect tender transplants during shoulder seasons. Timing varies by climate, so use a thermometer and soil temps as your guide, not the calendar alone.
Great cold frame crops
- Spinach, mâche, arugula, lettuce mixes
- Green onions, scallions, small bunching onions
- Radishes and baby turnips
- Hardy herbs like parsley and cilantro in cool weather
Great mini greenhouse uses
- Starting trays of brassicas, lettuces, and flowers early
- Holding transplants before planting out
- Protecting potted herbs and tender perennials during light frosts
For warm-season crops like tomatoes and peppers, use these structures mainly for hardening off and short-term frost protection. They love warmth, but they do not love wild temperature swings or poorly ventilated heat.
Common mistakes
Mistake 1: cooking plants on a sunny day
Fix: Vent early. If you tend to forget, an automatic opener or a phone reminder saves seedlings.
Mistake 2: setting it on soggy soil
Fix: Improve drainage with compost, avoid low spots, and do not overwater. Cold plus wet is a rot recipe.
Mistake 3: starting too tender, too early
Fix: Match crops to conditions. Cool-season greens tolerate cold frames beautifully. Basil does not.
Mistake 4: not sealing the base
Fix: Make the frame sit snug. Add soil along the outside edge if needed to block drafts and pests.
Mistake 5: forgetting pests still exist
Fix: Check for slugs, aphids, and fungus gnats. Remove plant debris, water in the morning, and keep airflow moving.
Mini greenhouse safety
Lightweight mini greenhouses are wonderfully convenient, right up until the wind treats them like a sail.
- Anchor it: use ground stakes, weights, or tie-downs to a railing or fence.
- Respect snow load: brush off snow and ice. Many zip-up covers and thin frames are not built for heavy weight.
- Zip it smart: in storms, close it fully so the cover does not flap itself to pieces.
Cold frames vs low tunnels
If you are extending rows of crops, low tunnels might be your best friend. They use hoops and row cover or plastic to protect a long stretch of bed.
Low tunnels are good for
- Covering an entire bed of greens or carrots
- Fast setup and takedown
- Flexible protection during surprise cold snaps
Cold frames are good for
- More stable temperature control
- Easy access for harvesting and tending a small space
- Hardening off trays close to planting time
If you are a small-space gardener, a single cold frame can be the whole operation. If you are growing in rows, low tunnels let you scale up your season extension without building multiple boxes.
Setup checklist
- Choose the sunniest spot you can manage
- Pick a durable cover with good light transmission
- Seal the base to prevent heat loss and pest entry
- Add a thermometer so you can learn your microclimate
- Plan ventilation before you need it
- Add thermal mass or frost cloth for rough nights
- Start with cool-season crops for easy early wins
If you are new to season extension, start simple. One cold frame, one bed of greens, one spring. You will learn more from that little patch of protected soil than from any gadget. And once you feel that first warm breath when you lift the lid on a cold morning, you might catch yourself talking to your plants too. I will not judge.