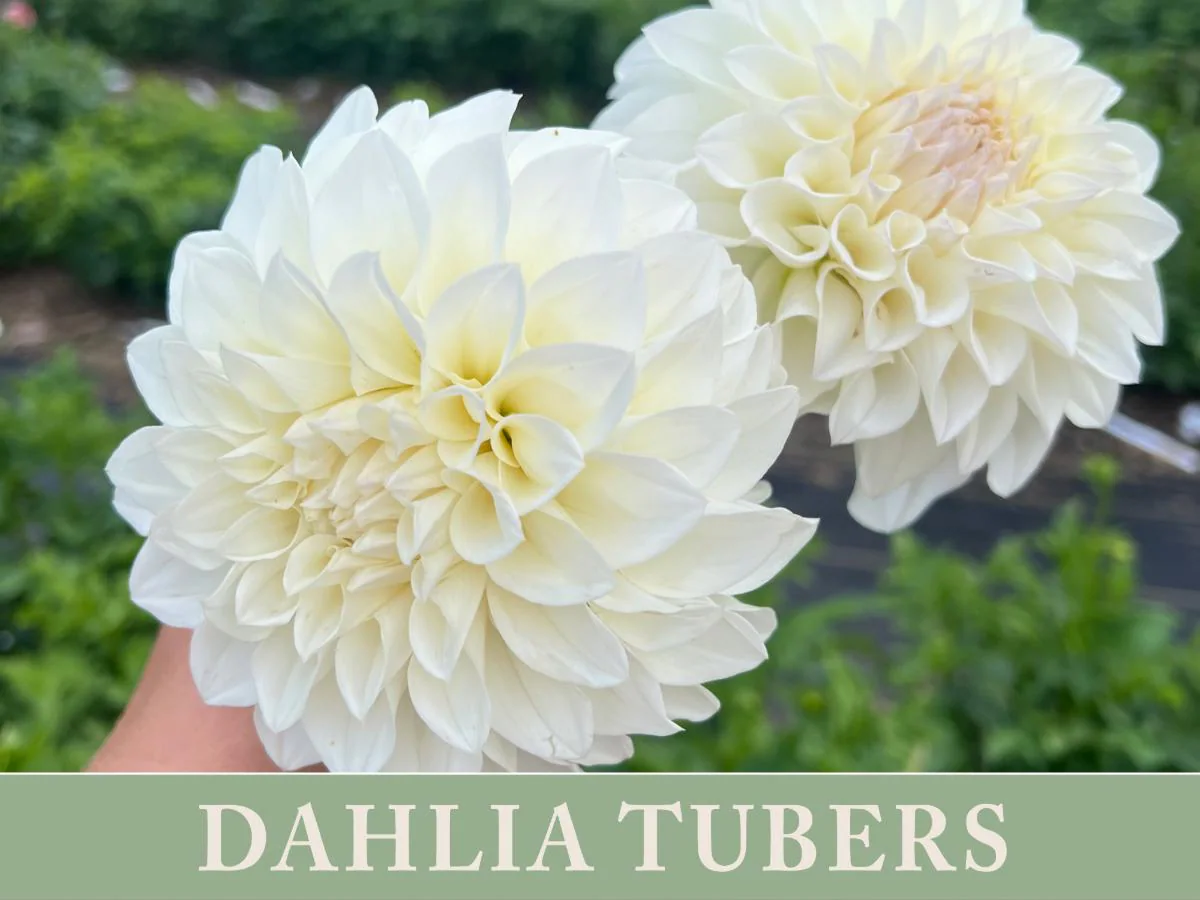
Choosing, Inspecting, and Storing Dahlia Tubers
If dahlias are the fireworks of the late-summer garden, tubers are the quiet little promises we tuck away in spring. And because those promises can be pricey, I want you to feel confident before you hand over your money or slice open that shipping box.
Below is exactly how I choose dahlia tubers, what I look for when inspecting them at home, and how I store them safely until planting day. This is the “pre-plant” window, not long-term winter storage. If you are packing tubers away for months, hop over to our overwintering guide on Leafy Zen for the deeper dive.

What a healthy dahlia tuber looks like
Let’s demystify what you are actually buying. A dahlia “tuber” is often sold as a cluster: a piece of last year’s stem base called the crown (the hard knobby connector) with one or more sausage-shaped tubers attached. The crown is the critical part because that’s where the growth points live, usually near the old stem stub.
1) Eyes: the non-negotiable detail
Eyes are small buds on the crown, typically near where last year’s stem was attached. They can look like tiny raised bumps, pale nubs, or a little pinkish dot, depending on variety and storage conditions.
- Best case: you can clearly see at least one eye on the crown.
- Still fine: the eyes are not obvious yet, but the crown is plump and intact (many eyes “wake up” as temperatures warm).
- Problem: a tuber body with no crown tissue or eye node attached. A tuber without crown tissue and an eye will not sprout.
2) Firmness: think “potato,” not “spongy”
Gently squeeze the tuber body.
- Healthy: firm, dense, and slightly yielding, like a fresh potato.
- Too dry: shriveled, lightweight, deeply wrinkled. Mild wrinkling can still grow, but it is a gamble.
- Too wet or rotting: soft spots, squishiness, or seepage.
3) Skin: small scuffs are OK
Tubers get bumped around. I do not panic about superficial scrapes. What you want to avoid is damage that invites rot.
- OK: dry scarring, corky patches, minor abrasions, or dry, callused nicks.
- Red flag: fresh or open cuts that look wet, soft, or sticky; black, sunken areas; fuzzy mold; or a strong rotten smell.
4) Crown: the “brain”
The crown should look like a solid, woody knuckle where everything connects. If the crown is cracked, crushed, or missing, I pass.
Shopping smart
Where you buy matters, especially for cultivar accuracy and storage quality. Here is what I watch for in each scenario.
Mail-order tubers
Mail-order is wonderful for variety selection. It is also where you may run into “looks fine in the listing photo” reality checks.
- Check the ship window: reputable sellers time shipping closer to planting season in your region.
- Look for clear policies: do they replace rotten tubers or mislabels? Do they require photos within a certain number of days?
- Expect dormancy: not seeing a sprout is normal. You are looking for crown integrity and overall firmness.
- Open immediately: especially if temperatures are warm. Do not let tubers sit in a hot mailbox or in a sealed box for days.
Big-box and bagged tubers
Bagged tubers can be a bargain, but they are often stored too warm, too damp, or too long under bright store lights.
- Avoid condensation: if the inside of the bag looks wet, rot risk is high.
- Feel through the packaging: you want firm tubers, not mushy or hollow-feeling ones.
- Check the crown area: if you cannot find any crown tissue, skip it.
- Watch for mold: visible fuzzy mold inside the bag is a hard no.
Local growers and swaps
My favorite way to buy dahlias is from a local grower who digs and divides their own stock. You often get better labeling accuracy, fresher tubers, and climate-adapted plants.
- Ask how the tubers were stored: cool, dark, and ventilated is what you want.
- Ask about viruses: not everyone tests, but a thoughtful grower will tell you what they do to prevent problems, like rogueing out symptomatic plants and keeping clean stock.
Red flags to avoid
I am all for giving plants a chance, but tubers are living storage organs. If they are already failing, they rarely bounce back into a strong plant.
- No crown, no eyes: a tuber body with no crown tissue is almost always a dud.
- Rot smell: sour, swampy, or “compost bin” odor usually means bacteria or active rot.
- Oozing or wet lesions: anything wet on a tuber is trouble in progress.
- Severe shrivel: deeply wrinkled and lightweight tubers may be too desiccated to power growth.
- Crushed crown: even if tubers look fine, a damaged crown can fail to sprout.
- Suspicious growths: tumor-like, knobby swellings on the crown or neck can indicate gall. This is a hard no.
- Active mold: fuzzy mold plus softness is a strong sign of poor storage conditions. A tiny surface patch on an otherwise firm tuber can sometimes be monitored, but anything spreading or paired with soft tissue is a pass.
If you bought mail-order and something looks off, photograph it right away in good light. Most reputable sellers want clear photos of the whole clump plus close-ups of the problem areas.
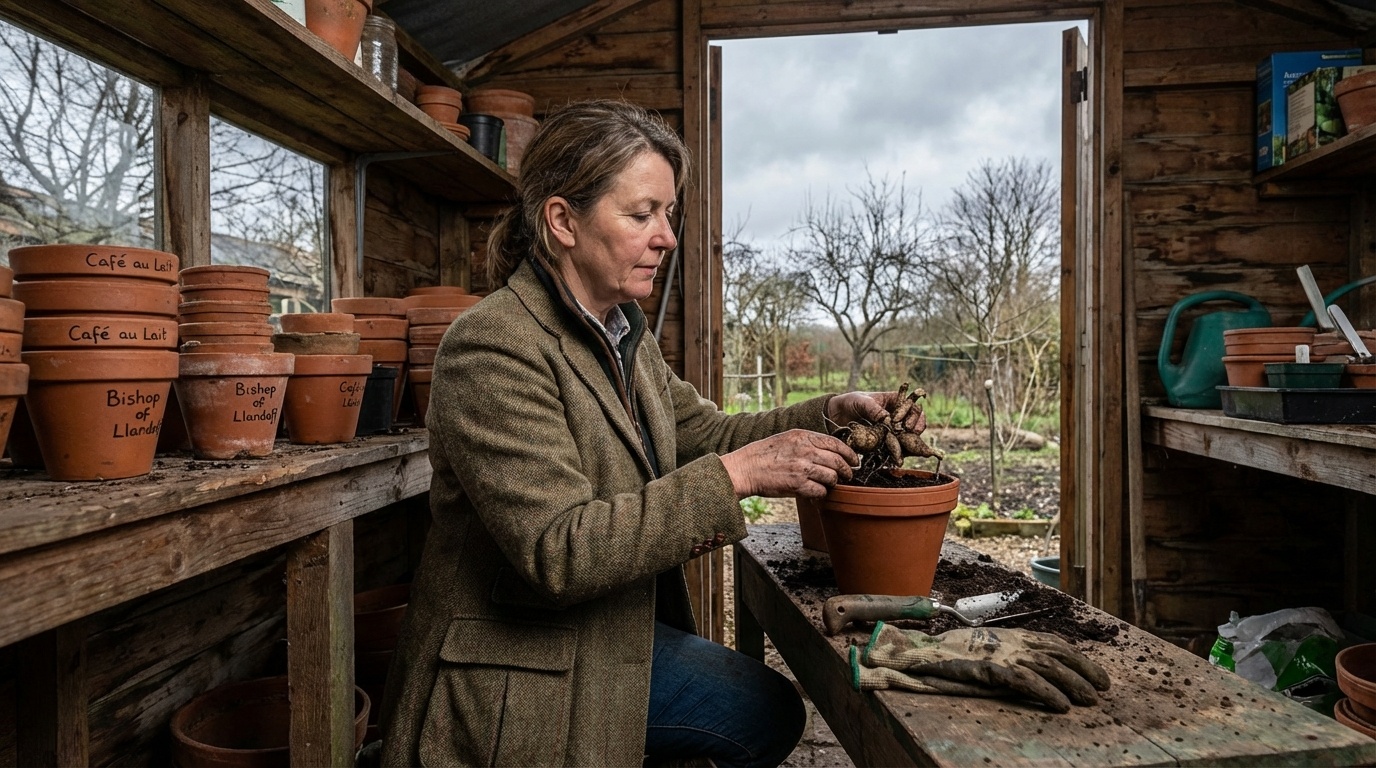
How to inspect tubers at home
When tubers arrive, I do a simple “kitchen counter check” before they go anywhere near my seed-starting area.
Step 1: Unpack and let them breathe
Remove plastic wrap or tight bags. Lay tubers on dry newspaper or cardboard for an hour so surface moisture can evaporate.
Step 2: Find the crown and eyes
Hold the clump and find the old stem stub. Eyes are usually near that area on the crown. If you are unsure, do not cut anything yet. Warmth and a little time often make eyes more obvious.
Step 3: Check for soft spots
Gently press along each tuber. If one tuber is soft but the rest of the clump is solid, you can sometimes salvage the clump by removing the rotten piece with a clean knife.
Step 4: Trim only if needed
- Leave it alone if everything is firm and clean. Less handling is often best.
- Trim only if there is active rot. Cut back to clean, firm tissue.
Step 5: Let cuts callus
If you cut anything, let the wound dry in open air for 24 to 48 hours in a cool, shaded place. This helps prevent rot during storage.
Sanitation note: if you are trimming multiple tubers, wipe your blade between plants with isopropyl alcohol and let it stay wet for a moment before the next cut. A 10% bleach solution is also commonly used.
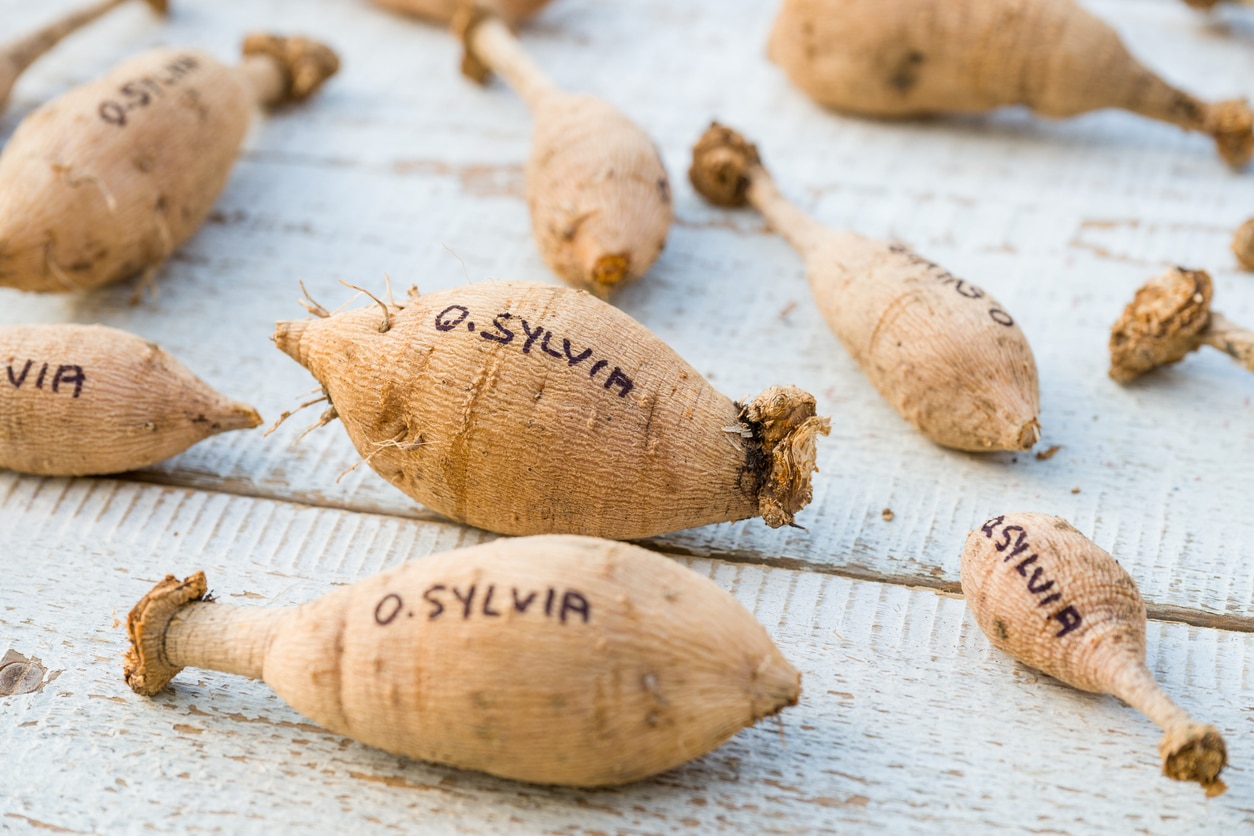
Labeling and tracking
Dahlia season has a way of turning into a joyful blur. Then fall comes, and suddenly every tuber looks like every other tuber. A simple labeling system prevents mix-ups and heartbreak.
When to label
- At purchase: keep the original tag or invoice with the tuber until planting day.
- At pot-up or planting: label the pot or planting spot immediately.
- At bloom: confirm the variety while flowers are present. This is the moment to catch mislabels.
What to include
- Cultivar name (spelled exactly as sold)
- Color and form notes (for quick visual confirmation)
- Source and year (helpful for troubleshooting and future reordering)
My low-fuss options
- Weatherproof plant tags tied to the tuber clump with soft twine during storage.
- A notebook or notes app with a simple list: cultivar, source, where planted.
- Photo proof: take one photo of the tuber next to its label when it arrives, and another photo when it blooms.
Short-term storage before planting
Most gardeners are storing tubers for a few days to a few weeks before outdoor planting. The goal is to keep tubers dormant, dry, and cool, without dehydrating them to dust.
Ideal conditions
- Temperature: cool, generally around 45 to 55°F (7 to 13°C) is a comfortable range for short-term holding. 40 to 50°F (4 to 10°C) can work too, as long as there is zero risk of freezing.
- Light: dark or dim. Bright warmth encourages early sprouting.
- Airflow: breathable packaging is key. Avoid sealed plastic.
- Moisture: slightly dry is safer than slightly wet.
Easy storage setups
- Cardboard box with dry packing material: nestle tubers in dry peat-free coco coir, wood shavings, or crumpled paper.
- Paper bags: great for small orders, especially if your space is naturally cool.
- Open trays: fine for a week or two in a cool room, as long as pets and curious toddlers are not involved.
If they are a bit wrinkled
If a tuber is slightly shriveled but still firm, I do not soak it. Instead, store it in a box with packing material that is barely moist to the touch (not wet), then recheck in a few days. The goal is “less dry,” not “damp.”
Quick do-not list
- Do not store in a sealed plastic bag where condensation can build.
- Do not store near heaters, water heaters, or sunny windows.
- Do not mist tubers “to keep them fresh.” Excess moisture is the rot invitation.
- Do not let them freeze.
If you need true long-term storage after digging in fall, head to our Leafy Zen guide on overwintering dahlia tubers for temperature ranges, humidity targets, and packing methods that are meant for months, not weeks.
When to pot up indoors
Potting up is the in-between option: you are not planting outside yet, but you are also not keeping tubers fully dormant. I like this when I want earlier blooms, or when I need to confirm a tuber is viable before it earns a prime spot in the bed.
Pot up early if
- Your growing season is short and you want a head start.
- You received tubers very early and they are starting to sprout in storage.
- You want to take cuttings from a favorite variety.
- You want to verify eyes and vigor before planting outdoors.
When not to pot up
- You do not have bright light. Leggy indoor dahlias are frustrating.
- Your tubers are already stressed (very shriveled or recently trimmed for rot). Keep them cool and stable instead.
A simple method
- Choose a container with drainage holes (1 to 2 gallons is a comfortable starting size).
- Use a light potting mix with good drainage. Avoid heavy garden soil indoors.
- Position the tuber horizontally with the crown just under the surface, about 1 to 2 inches deep.
- Water lightly once to settle the mix, then wait. Overwatering before strong growth is the most common indoor failure point.
- Provide strong light and cool-ish indoor temps. Rotate pots so stems grow straight.
Transplant outdoors only after your last frost is truly behind you and the soil has warmed (many gardeners aim for about 60°F or 15 to 16°C). Move plants gently, disturbing roots as little as possible.
FAQ
Should my tuber already have a sprout?
Not necessarily. Dormant tubers can be perfectly healthy. Sprouts are nice, but firmness and crown integrity matter more.
Can I plant a broken tuber?
If the break still includes part of the crown with an eye, it can grow. If it is just a tuber body snapped off with no crown tissue, it will not.
What if my tuber has a little mold?
Dry, surface-level residue that wipes away and does not smell bad can be monitored, especially if the tuber is firm. Fuzzy mold, spreading mold, or anything paired with soft spots means you should request a replacement or trim back to clean tissue if salvageable.
How long can I store tubers before planting?
A few weeks is typically fine if conditions stay cool, dim, and breathable. If you are holding them longer and they start sprouting, consider potting up to avoid weak, pale shoots.
A simple tuber-day checklist
If you only remember one thing, let it be this: crown plus eye plus firmness. Everything else is negotiable.
- Confirm there is crown tissue (not just a lone tuber body).
- Look for at least one eye, or at minimum a plump, intact crown likely to push eyes soon.
- Choose tubers that feel firm and smell neutral.
- Avoid wet packaging, condensation, and anything slimy or oozing.
- Skip tubers with tumor-like growths (possible gall).
- Label immediately and keep the name attached through planting.
- Store cool, dim, and breathable until outdoor planting time, and never let them freeze.
- Pot up indoors only if you have strong light and a reason to wake them up.
And if you make a mistake? Welcome to gardening. Even seasoned growers occasionally bring home a dud. The win is learning to spot the signs earlier next time, and keeping your soil ready for the tubers that really want to grow.