Canna Lily Care
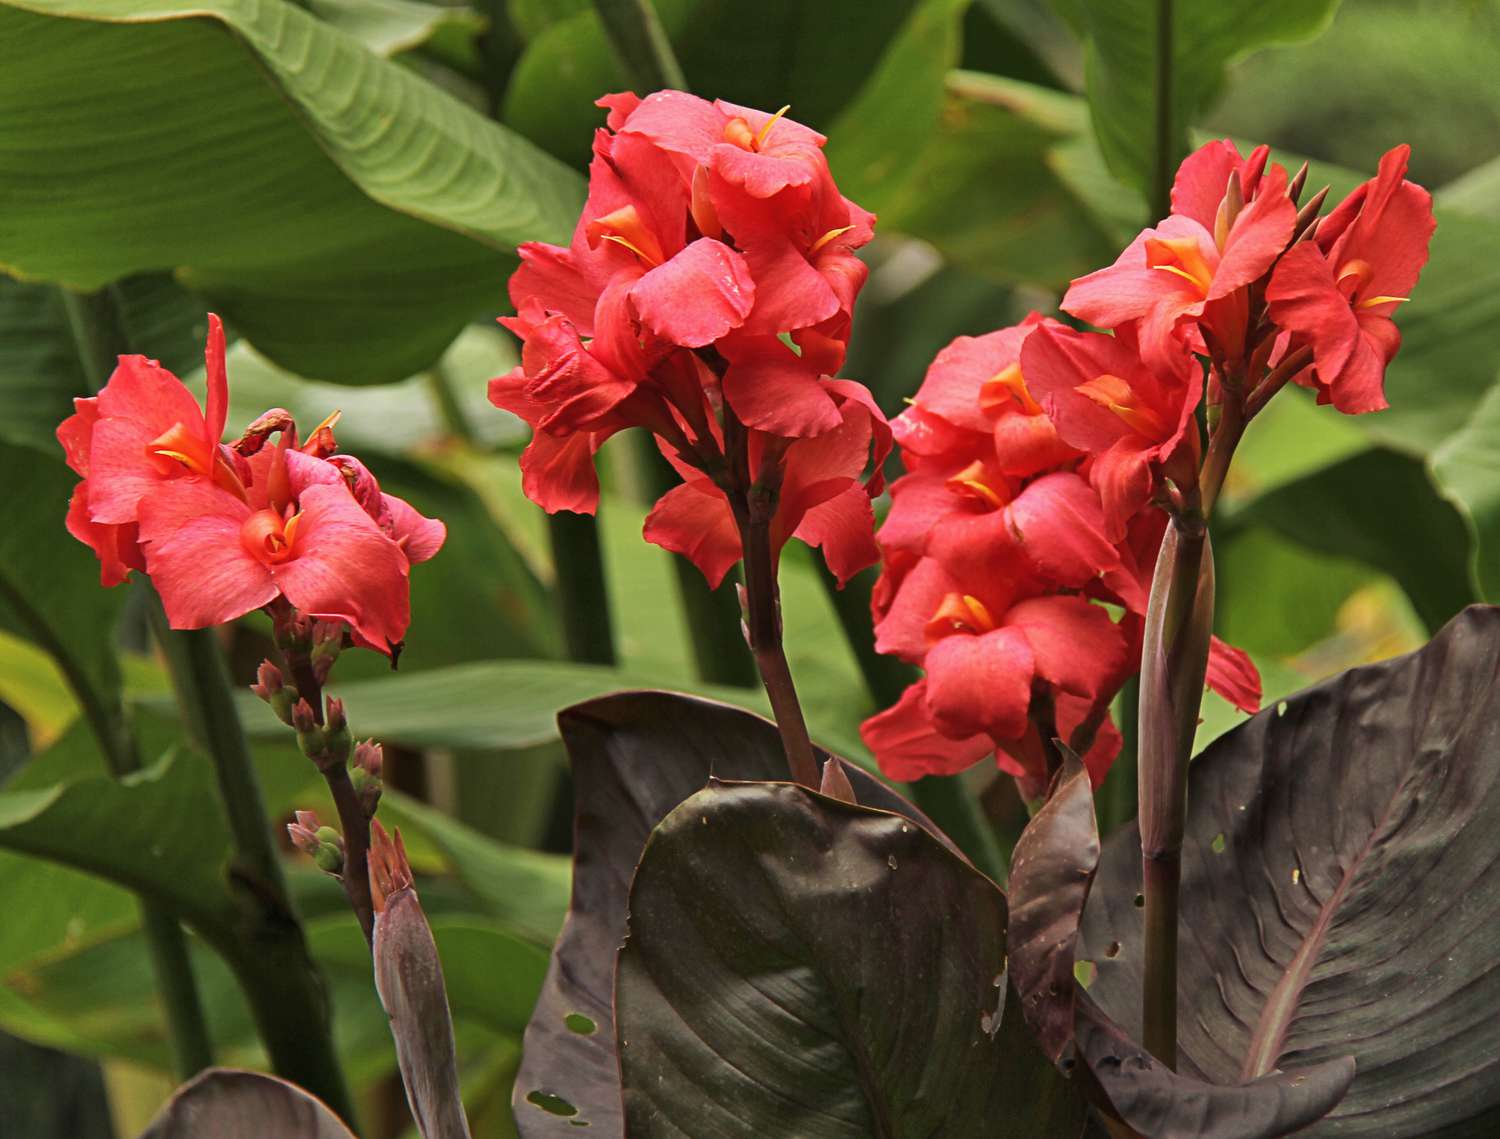
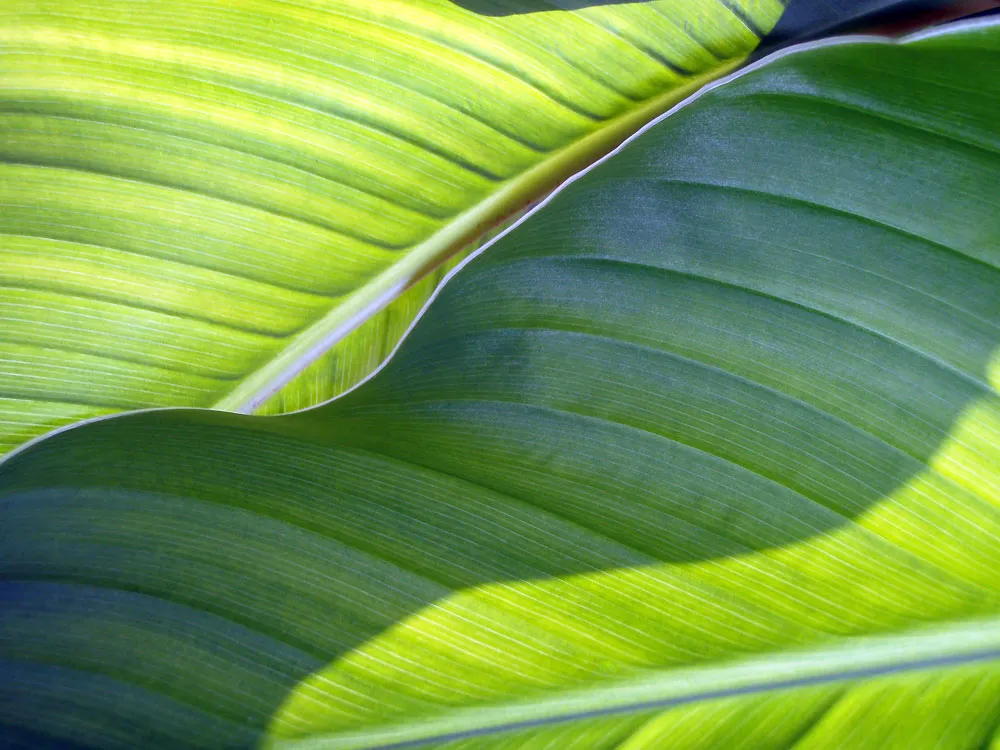
Canna lilies are the botanical equivalent of a confident, colorful friend who shows up in a great outfit and instantly makes the whole garden look more alive. Their big, paddle-like leaves create that lush, tropical vibe, and the blooms pop like little fireworks once summer heat settles in.
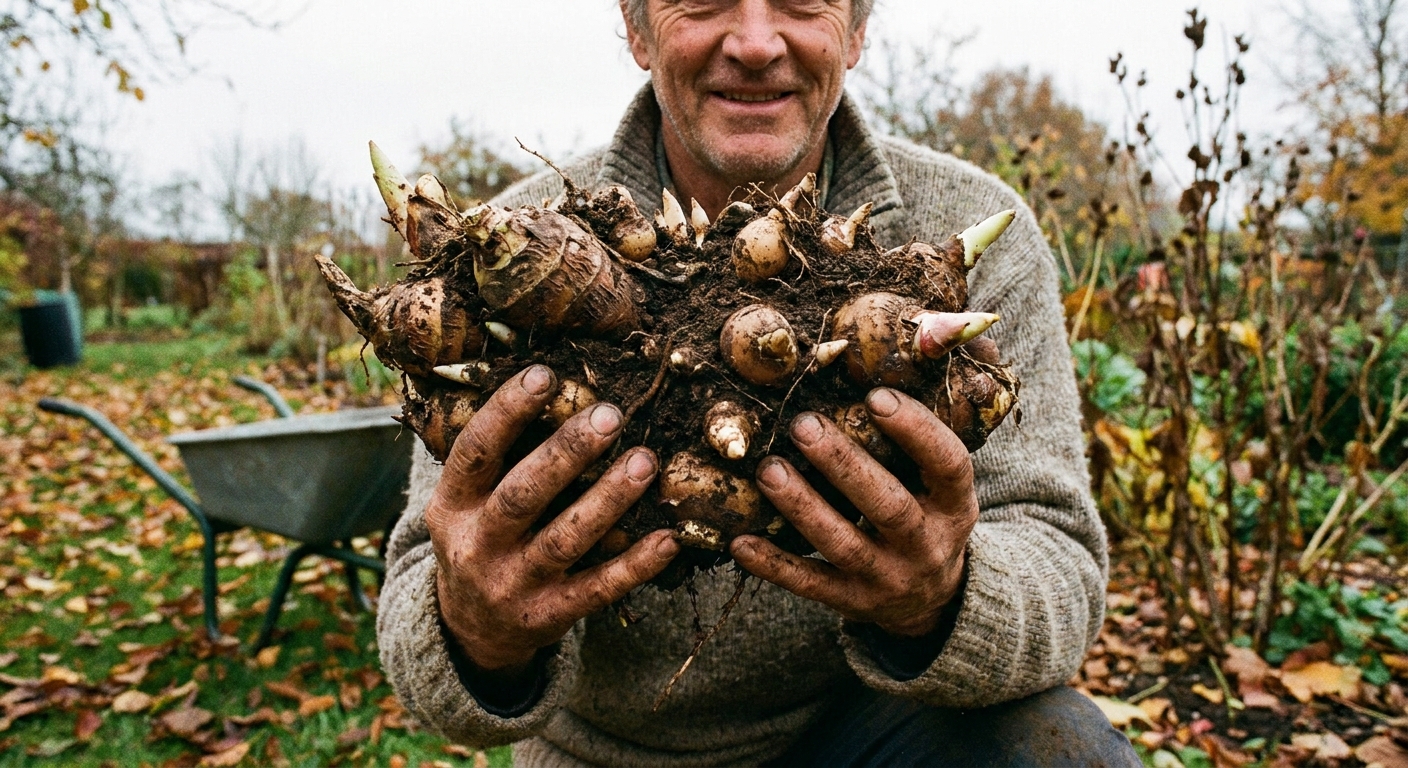
If you have ever felt intimidated by “rhizomes” or you have lost a canna to winter, you are not alone. I have dug up plenty of lumpy, mud-covered canna rhizomes and thought, is this really going to be a plant again? Spoiler: yes, if we give it the right timing and a cozy storage plan.

Quick canna lily basics
- Botanical name: Canna hybrids (commonly called canna lily, though they are not true lilies)
- What you plant: Rhizomes (thick underground stems)
- Light: Full sun is best for blooms, light shade is fine for foliage
- Water: Even moisture, especially during hot weather
- Hardiness: Perennial in warm zones, often grown as an annual in cold zones
- Bloom season: Summer through early fall, depending on variety and heat
One important note: In many regions, cannas are not winter-hardy and must be dug and stored. In general, you can often leave rhizomes in the ground in USDA Zones 8 to 10 with a protective mulch layer (microclimates vary, so when in doubt, dig and store).
Sun, soil, and the best spot
How much sun do cannas need?
For the most flowers, aim for 6 to 8 hours of direct sun. Cannas will still grow in partial shade, but you may get more leaves than blooms.
- Cooler summers: Give them the sunniest spot you have.
- Very hot summers: Morning sun with a little afternoon shade can prevent leaf scorch, especially for dark-leaved varieties.
Soil preferences
Cannas are adaptable, but they thrive in rich, moisture-retentive soil that still drains reasonably well. Think “composty sponge,” not “soggy soup.”
- Work in 2 to 3 inches of compost before planting.
- If your soil is heavy clay, add compost and consider planting on a slight mound to improve drainage.
- If your soil is sandy, compost helps hold moisture and nutrients so you are not constantly chasing dryness.
Planting canna rhizomes
When to plant
Plant canna rhizomes outdoors after your last frost, when the soil has warmed. Cannas love heat, and cold soil can slow them down or encourage rot.
- Soil temperature target: about 60°F and rising is a good rule of thumb.
- If you have a short summer, you can start rhizomes indoors in pots 4 to 6 weeks before the last frost.
How deep to plant
Set rhizomes 4 to 6 inches deep with any obvious “eyes” or buds facing up. If you cannot tell which way is up, plant it on its side. Cannas are forgiving.
Spacing
This is where cannas get fun. Your spacing depends on the look you want and the variety’s mature size.
- For dense foliage screens: Space plants 12 to 18 inches apart. This creates a lush, leafy wall effect, great along fences or to hide utility areas.
- For focal accents: Space 18 to 24 inches apart so each clump can arch out without crowding.
- Giant varieties: Some types get tall and wide. Give them 24 to 30 inches if the tag suggests it, or if you want maximum airflow.
Clara’s real-life tip: If you are planting cannas in a mixed bed with perennials, err toward the wider end. Cannas look tidy when they have breathing room, and airflow helps prevent leaf issues later.
Watering
Cannas are happiest when they are not allowed to completely dry out, especially once they are tall and actively blooming. Inconsistent watering often shows up as slower growth, fewer blooms, and crispy leaf edges.
- In-ground: Water deeply when the top 1 to 2 inches of soil feels dry. During heat waves, that might mean every 2 to 3 days.
- Containers: Check daily in summer. Pots dry out fast, and cannas in containers are dramatic about it.
- Mulch: A 2 to 3 inch layer of shredded leaves or bark mulch keeps roots cooler and soil moisture steadier.
If you have a naturally damp spot or a rain garden edge, cannas can be a great fit. They tolerate wetter soils better than many ornamentals, as long as they are not sitting in stagnant water for long periods.
Feeding
Cannas are hungry growers. Big leaves and bold flowers require consistent nutrition, especially in average garden soil.
Best fertilizer approach for beginners
- At planting: Mix compost into the bed. If you use a granular organic fertilizer, incorporate it into the planting area per label directions.
- During growth: Feed every 4 to 6 weeks with an all-purpose fertilizer, or use a bloom-leaning option if your soil already has enough nitrogen.
- In containers: Use a diluted liquid fertilizer every 2 to 4 weeks, because nutrients wash out of pots faster.
How to avoid “all leaves, no flowers”
Too much nitrogen can create a gorgeous leafy plant that forgets to bloom. If your cannas are very green and very tall but stingy with flowers:
- Make sure they get enough sun.
- Switch to a fertilizer with lower nitrogen and relatively higher phosphorus and potassium.
- Do not overdo rich manures mid-season.
Soil-first note: If you garden organically, slow-release sources like compost, worm castings, and balanced organic granular fertilizers often give the steadiest results without the boom-and-bust cycle.
Deadheading
If you want cannas to look sharp all season, a little trimming goes a long way. When a flower cluster finishes, snip the spent flower stalk back to the next set of leaves (or to the main stem if it is done). This keeps the plant tidy and often encourages more blooms instead of seed production.
Overwintering rhizomes
If you live where winters freeze, overwintering is the difference between buying new rhizomes every spring and building a canna collection you can divide and share.
When to dig cannas
Wait until after a light frost blackens the foliage, then dig within about a week. The frost signals the plant to slow down, but you do not want the rhizomes to sit in freezing soil.
How to dig without damage
- Cut back stalks to about 3 to 6 inches.
- Loosen soil in a wide circle 8 to 12 inches from the stems. Use a garden fork if you can, it is gentler than a shovel.
- Lift the clump and shake off loose soil.
- Let it dry in a sheltered spot with good airflow for 1 to 3 days. This “curing” helps prevent storage rot.
How to store canna rhizomes for winter
Your goal is simple: keep rhizomes cool, dark, and barely moist so they do not rot or shrivel.
- Temperature: Aim for 40 to 50°F.
- Where: Unheated basement, cool closet, attached garage that stays above freezing.
- How: Place rhizomes in a ventilated box with dry peat moss, coconut coir, sawdust, or shredded paper to buffer humidity.
Monthly winter check
Once a month, peek in like you are checking on a sleeping pet.
- If they feel soft or smell bad: Cut away rotting portions and improve airflow, reduce moisture in the packing material.
- If they look wrinkled and very dry: Lightly mist the packing material, not the rhizomes directly, and close the box again.
Leaving cannas in the ground
In many gardens, cannas can overwinter in the ground in USDA Zones 8 to 10. After cutting back foliage, cover the area with a thick mulch layer, often 4 to 6 inches of straw, shredded leaves, or pine needles. If winter rain is heavy, make sure the site drains well to reduce rhizome rot. In Zone 7 or exposed sites, treat this as a gamble and dig them up if you want to be sure.
Spring wake-up
When spring returns and your last frost is approaching, it is canna reunion season.
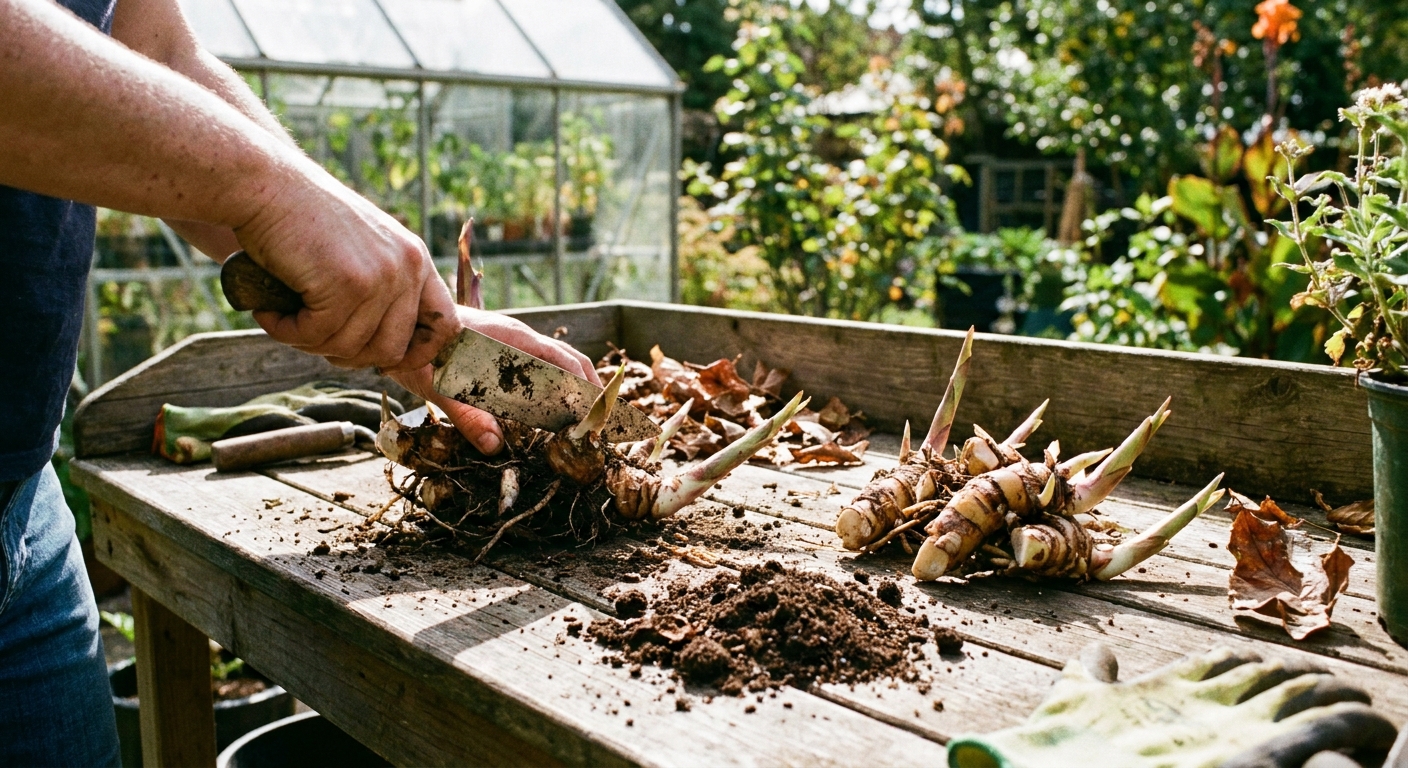
When to divide
Divide in spring as you plant, or in fall right after digging if you prefer. I usually divide in spring because it is easier to see which eyes are plump and ready.
How to divide canna rhizomes
- Use a clean knife or pruners.
- Cut clumps into sections with at least 1 to 3 eyes per piece.
- Discard any mushy or hollow parts.
- Plant divisions promptly, or keep them tucked back into storage material if it is still too cold outside.
Troubleshooting
Yellow leaves
Yellowing can happen for a few reasons. The pattern and timing tell you a lot.
- Lower leaves yellowing as the plant grows: Often normal aging. Trim them off to keep things tidy.
- Overall pale plant: Usually needs feeding, especially in containers. Add compost and a balanced fertilizer.
- Yellow leaves with soggy soil: Overwatering or poor drainage. Let the soil dry slightly and improve drainage.
- Yellow with brown tips: Inconsistent watering or heat stress. Mulch and water more deeply.
Lots of leaves, no flowers
- Not enough sun: Move to a brighter spot next season, or trim nearby plants that cast shade.
- Too much nitrogen: Switch fertilizer type and ease off feeding for a few weeks.
- Too cool: Cannas need warmth. In chilly summers, blooms can be delayed.
- Crowding: Tight clumps can reduce flowering over time. Divide in spring.
Leaves shredded or chewed
Slugs, caterpillars, and grasshoppers can all snack on cannas.
- Hand-pick pests when you see them.
- Use iron phosphate slug bait if slugs are active.
- Encourage birds and beneficial insects with diverse plantings and shallow water sources.
Leaf spots or rust-like marks
Fungal leaf spots can appear in humid weather, especially with poor airflow.
- Space plants appropriately and avoid overhead watering late in the day.
- Remove heavily spotted leaves and dispose of them, do not compost if disease pressure is high.
- Water at the base and keep mulch from touching the stems.
Mottled or streaked leaves
If leaves show yellow mottling, streaking, distorted growth, or the whole plant looks stunted even with good care, suspect a canna virus (like Canna Yellow Mottle Virus). Unfortunately, there is no cure.
- Remove the plant promptly, including the rhizome.
- Bag and trash infected material. Do not compost.
- Sanitize tools after cutting or digging to avoid spreading sap to healthy plants.
- When replacing, start with healthy stock from a reputable source and keep an eye out early in the season.
Design ideas
Cannas are versatile, but they look especially stunning when you lean into their “tropical architecture.”
- Back-of-border drama: Place taller cannas behind zinnias, salvias, or echinacea.
- Patio containers: One canna as the thriller, with trailing sweet potato vine and a filler like coleus or calibrachoa.
- Near water features: Their bold foliage echoes the feel of ponds and fountains beautifully.
- Privacy and screening: Plant in a tight row (12 to 18 inches) for a seasonal leafy screen.
If you want that lush look without chaos, repeat the same variety in a small drift rather than scattering single plants everywhere.
Canna lily care checklist
- Plant after last frost in warm soil, 4 to 6 inches deep.
- Sun for blooms: 6 to 8 hours.
- Water consistently, mulch to hold moisture.
- Feed through summer, but do not overdo nitrogen.
- Deadhead spent flower stalks to keep plants tidy and blooming.
- Space 12 to 18 inches for dense foliage, 18 to 24 inches for accents.
- Dig and store rhizomes after frost if your winters freeze.
- Check storage monthly for rot or shriveling.
- Watch for virus symptoms (mottling, streaking, stunting) and remove infected plants.
If you try cannas once and fall in love, welcome to the club. They are the kind of plant that makes you stand in the garden a little longer in the evening, just admiring the leaves like they are old friends.