Bromeliad Pups: When to Separate and How to Pot Them
Bromeliads have a sweet little life cycle secret: after the mother plant blooms, she starts putting her energy into making babies, called pups or offsets . If you have ever noticed small rosettes popping up around the base and wondered, “Do I leave them? Do I cut them? Am I about to ruin everything?” take a breath. You are right on time.
Below is my soil-under-the-fingernails method for separating pups with minimal drama, plus how to pot them up so they root fast and grow into sturdy, blooming adults.

What counts as a bromeliad pup?
A pup is a new bromeliad plant that forms from buds at the base of the mother plant after flowering. It will look like a mini version of the parent, usually emerging:
- At the base where the leaves meet the potting mix
- Between outer leaves of the mother plant, tucked in close
- Along a short stolon or “stem” depending on the genus
Many pups can make their own roots while still attached. Some have few or no roots when you separate them, and that is still okay as long as the pup is mature enough.
When to separate bromeliad pups
The most common mistake I see is separating too early, when pups are still living off the mother plant like teenagers raiding your fridge. Give them time to bulk up.
Ideal pup size
Aim to separate when the pup is about 1/3 to 1/2 the size of the mother plant . For many common house bromeliads (Guzmania, Vriesea, Aechmea), that often means a pup that is roughly 4 to 6 inches tall, but size relative to the parent matters more than a ruler.
Signs a pup is ready
- The pup has its own distinct rosette shape and several firm leaves
- You can see little roots starting at the base, or the pup feels well attached and substantial
- The mother plant has finished blooming and is slowly declining (outer leaves may fade over months)
When to wait longer
- Pup is tiny and floppy, with thin leaves
- Pup is still fully hidden inside the mother plant’s leaf base
- Mother plant is still actively flowering (you can wait until the show is done)
Timing note: Spring through early fall is easiest because warmth and light speed up rooting. You can do it in winter indoors too, just expect slower progress.
Should you separate at all?
You have two good options:
- Leave pups attached for a fuller “clump” look. The mother plant will gradually fade, and the pups take over. This looks especially nice in wider bowls.
- Separate pups if you want more plants, need to refresh the pot, or want each pup to mature faster with less crowding.
Neither choice is “more correct.” It is style plus space plus patience.
Tools and prep
Think clean and sharp. Bromeliads are tough, but jagged tears invite rot.
What you will need
- A clean, sharp knife (a small serrated knife works well) or pruning shears
- Rubbing alcohol or soap and hot water to sanitize tools
- Small pots with drainage holes
- Fresh bromeliad-friendly potting media (recipes below)
- Optional: cinnamon (as a gentle drying powder), gloves if your variety has spines
Sanitation tip: Wipe blades with rubbing alcohol before you start and between cuts if you are separating multiple pups. It is a tiny habit that prevents a lot of heartbreak.
How to locate offsets at the base
Most pups hide where the leaves meet the “stem” at soil level.
- Inspect the base: Gently spread the mother plant’s lower leaves and look for smaller rosettes.
- Check around the pot rim: Pups sometimes lean outward and show up along the edge.
- Unpot if needed: If you cannot see where the pup attaches, slide the whole plant out of its pot so you can see the junction clearly.
Step-by-step: Separating bromeliad pups
This is the calm, controlled version of the process. Go slowly, and your plant will forgive you if it is not perfect.
1) Water lightly the day before (optional)
If the potting mix is bone dry, water a little the day before so roots are less brittle. Do not soak it. You want “slightly moist,” not soggy.
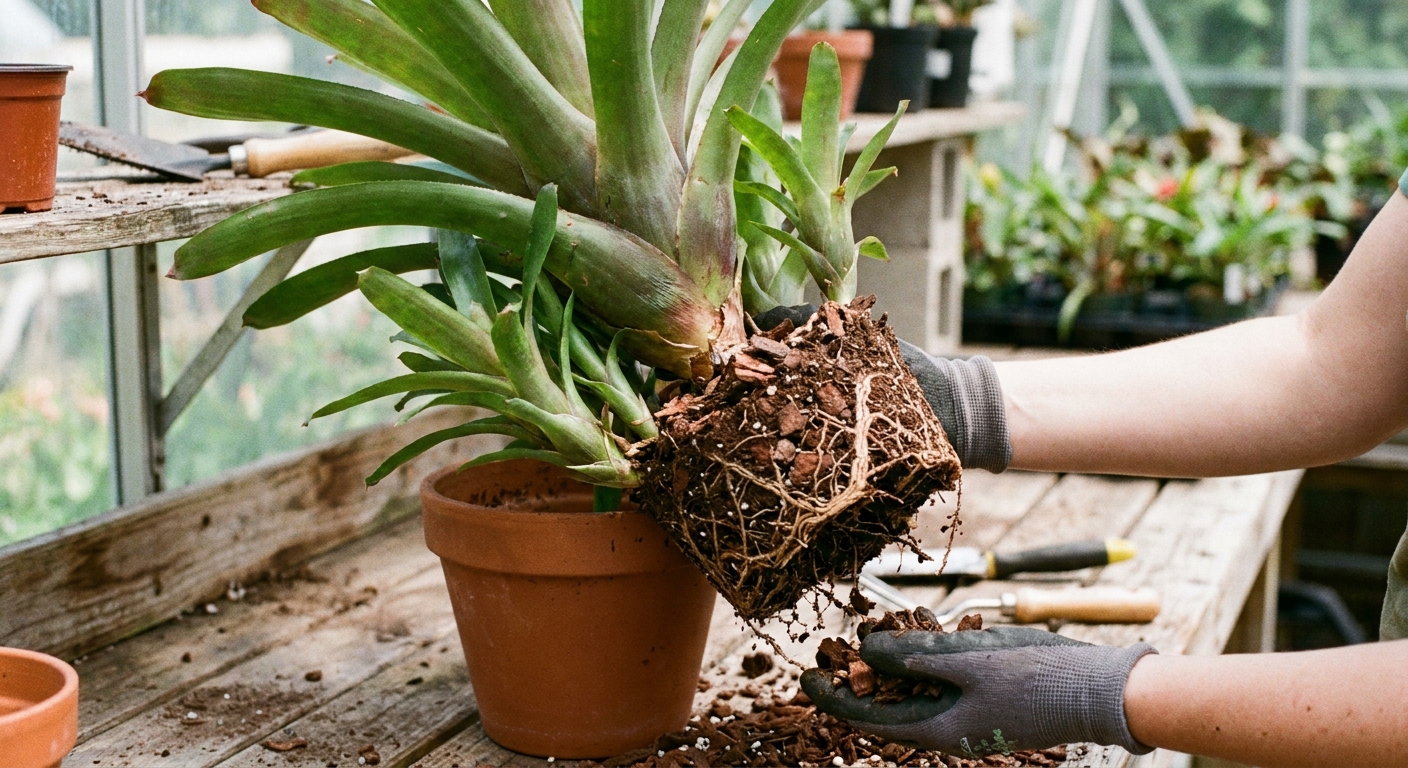
2) Remove the plant from the pot
Support the mother plant at the base and slide the root ball out. Brush away mix so you can clearly see where each pup connects.
3) Choose which pups to take
Pick pups that are at least 1/3 the mother’s size. If there are several, you can separate more than one in a session, but do not feel obligated. Leaving one or two attached is perfectly fine.
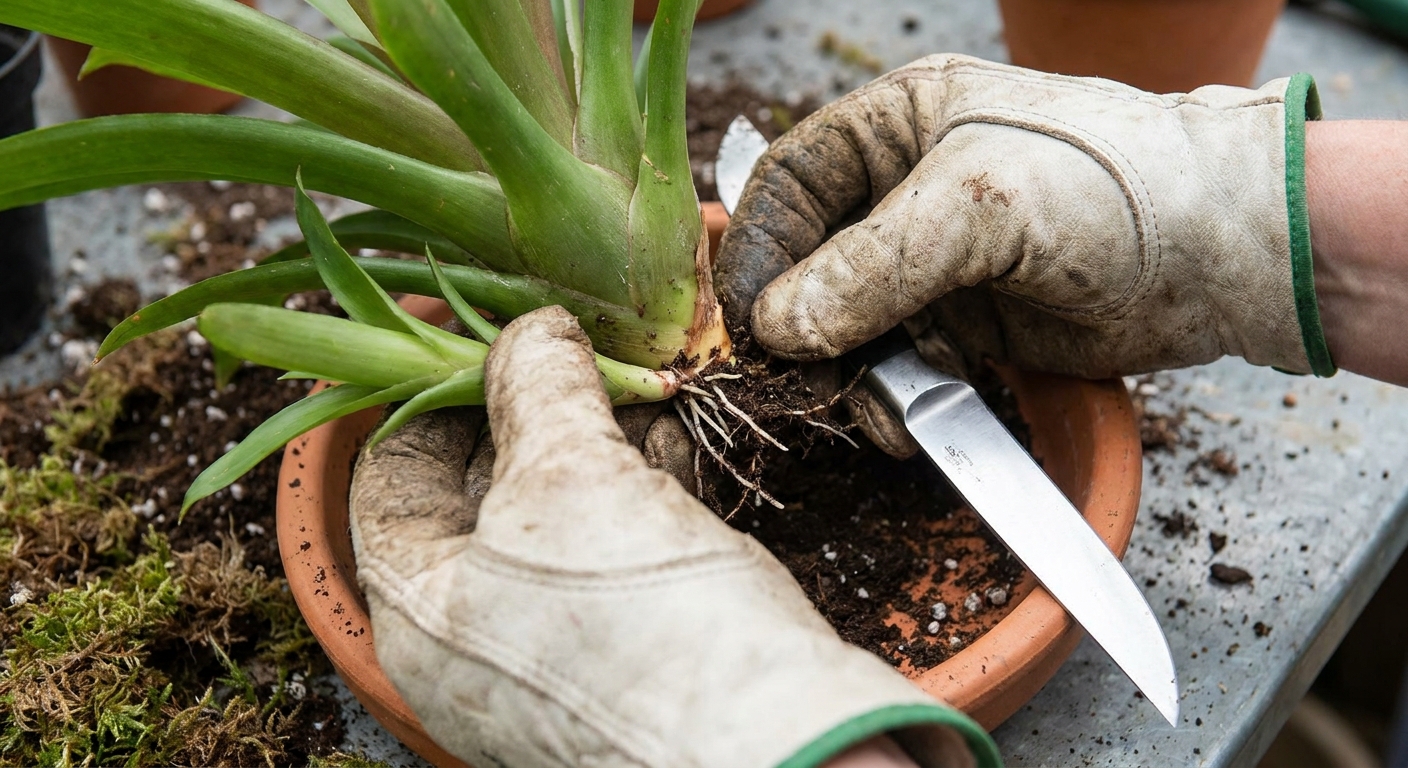
4) Make a clean cut
Look for the narrow “bridge” of tissue where the pup connects to the mother plant. Use your knife to cut downward and inward so the pup keeps as much of its base as possible. If roots come with it, wonderful. If not, still okay.
If it will not cut cleanly: Do not twist hard. Reposition the blade and take a second careful slice.
5) Let the cut surfaces dry
Set the pup in a bright, airy spot out of direct sun for 2 to 12 hours so the cut end can callus . This reduces rot risk. If your home is humid, lean toward the longer end.
Optional: Dust the cut end lightly with cinnamon. It is not mandatory, but it helps keep the cut area dry.
Best potting media for bromeliad pups
Bromeliads hate heavy, water-holding soil. Most are epiphytes in nature, meaning they grow on trees or in airy leaf litter, not in dense mud.
Simple, reliable mixes
- Easy store-bought option: Orchid mix, used as-is or with a small handful of perlite added
- DIY airy mix: 2 parts orchid bark + 1 part perlite + 1 part coco coir or peat
- Chunky houseplant mix shortcut: 2 parts potting mix + 1 part orchid bark + 1 part perlite (use only if you tend to underwater)
Goal texture: When you squeeze it, it should feel springy and full of air pockets, not like a wet sponge.
Choosing the right pot (this matters more than people think)
Bromeliad pups do best slightly snug.
- Pot size: Choose a pot only 1 to 2 inches wider than the pup’s base.
- Drainage: Non-negotiable. Use a pot with drainage holes.
- Weight: Top-heavy bromeliads may need a heavier pot (ceramic) or a few stones in the bottom for stability. Keep stones minimal so you do not create a soggy layer.
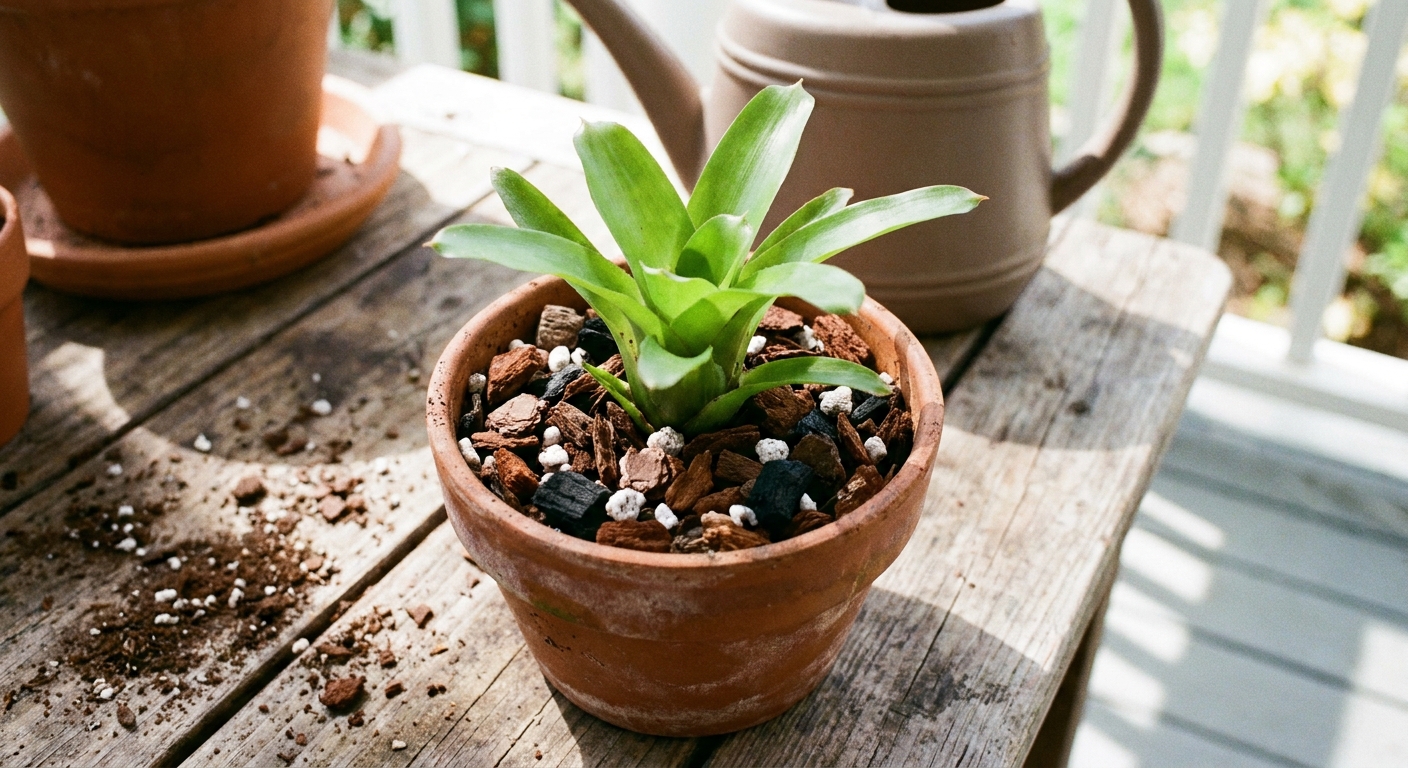
How to pot the pup
- Add mix to the pot until the pup can sit with its base just above the surface.
- Position the pup so the lowest leaves are not buried. Burying the crown invites rot.
- Backfill gently around the base and firm lightly with fingertips. You want it stable, not packed tight.
- Stake if needed using a bamboo skewer or chopstick. A wobbly pup roots slower.
Important: Bromeliads are not like pothos. Do not pot them deep. The “cup” and leaf base need airflow.
Watering after separation
This is where most pup losses happen, and it is almost always from too much water in the mix .
Right after potting
- Moisten the mix lightly, then let excess drain completely.
- Do not keep it constantly wet. Slightly damp, then drying partway is the rhythm you want.
Should you fill the central cup?
It depends on the type of bromeliad and your indoor conditions, but this guideline works well:
- For many tank bromeliads (Guzmania, Vriesea, Aechmea), you can keep a small amount of clean water in the central cup once the pup is established and stable.
- If the pup is very fresh-cut or wobbly, wait 1 to 2 weeks before keeping water in the cup to reduce rot risk.
Water quality tip: If your tap water is very hard, use rainwater, distilled, or filtered water. Mineral buildup can stress bromeliads over time.
Ongoing watering schedule
- Water the potting mix when the top feels dry and the pot is noticeably lighter.
- Empty and refresh any water in the cup weekly so it does not turn stagnant.
Light, humidity, and temperature for fast rooting
New pups root fastest when they feel like they are in a warm, bright greenhouse, minus the harsh sun.
- Light: Bright, indirect light. A little gentle morning sun is often fine, but avoid hot afternoon rays through glass.
- Humidity: Average home humidity works, but pups love 40 to 60%. A pebble tray or grouping plants together helps.
- Temperature: 65 to 80°F (18 to 27°C) is the sweet spot.
Hands-off trick: If your home is dry, you can loosely tent the pup with a clear plastic bag for 5 to 10 days, with a few openings for airflow. If you see condensation dripping, open it more. Stagnant moisture invites rot.
How long until a pup roots and grows up?
Most pups settle in within 3 to 8 weeks, depending on warmth and light. You will know rooting is happening when:
- The pup stops wobbling and feels anchored
- New leaves emerge from the center
- Color improves and leaves feel firmer
Bloom timing varies widely, but many bromeliads take 1 to 3 years to bloom from pup size, sometimes longer indoors. The best “fertilizer” for blooms is bright, steady light and patience.
Keeping the mother plant healthy while pups grow
The mother plant will not bloom again, but she can stay attractive for months, sometimes more than a year, while pups mature.
Mother plant care checklist
- Keep light bright so pups develop strong and colorful
- Water smart: avoid soggy mix, refresh cup water weekly if you use it
- Do not overfertilize: a weak orchid fertilizer at 1/4 strength once a month in spring and summer is plenty, and you can skip it entirely if your plant is doing fine
- Remove only dead leaves: let yellowing outer leaves be until they pull away easily
When to remove the mother plant
Once the mother is mostly brown and papery and the pups are sturdy, you can cut the mother plant away at the base with sanitized shears. If pups are still attached, work slowly and avoid slicing into their bases.
Troubleshooting common pup problems
Pup is turning brown at the base
- Likely cause: rot from too much moisture or buried crown
- Fix: unpot, trim away mushy tissue with a clean blade, let dry longer, repot in a chunkier mix, keep the crown above the surface
Pup will not root and keeps tipping
- Likely cause: pot too big, mix too loose, or low light
- Fix: downsize the pot, stake the pup, move to brighter indirect light
Leaves are pale or stretched
- Likely cause: not enough light
- Fix: move closer to a bright window or add a grow light 10 to 12 hours a day
Leaf tips are crispy
- Likely cause: dry air, hard water salts, or inconsistent watering
- Fix: use filtered water, increase humidity slightly, keep a steadier watering rhythm
Little bugs in the leaf axils
- Likely cause: mealybugs or scale hiding where leaves overlap
- Fix: dab pests with isopropyl alcohol on a cotton swab and rinse the cup; isolate the plant while you treat
Quick recap
- Separate pups when they are 1/3 to 1/2 the mother’s size.
- Use clean tools and make a clean cut at the base connection.
- Let cut surfaces dry and callus before potting.
- Pot in a chunky, airy mix and keep the crown above the surface.
- Water lightly, give bright indirect light, and be patient while roots form.
If you want the most Leafy Zen advice I can offer, it is this: bromeliads teach slow confidence. Let the pup get big, keep the mix airy, and trust that the plant knows what it is doing. You are just helping it move into its own little pot.