
Bromeliad Cup Rot: Black, Mushy Center

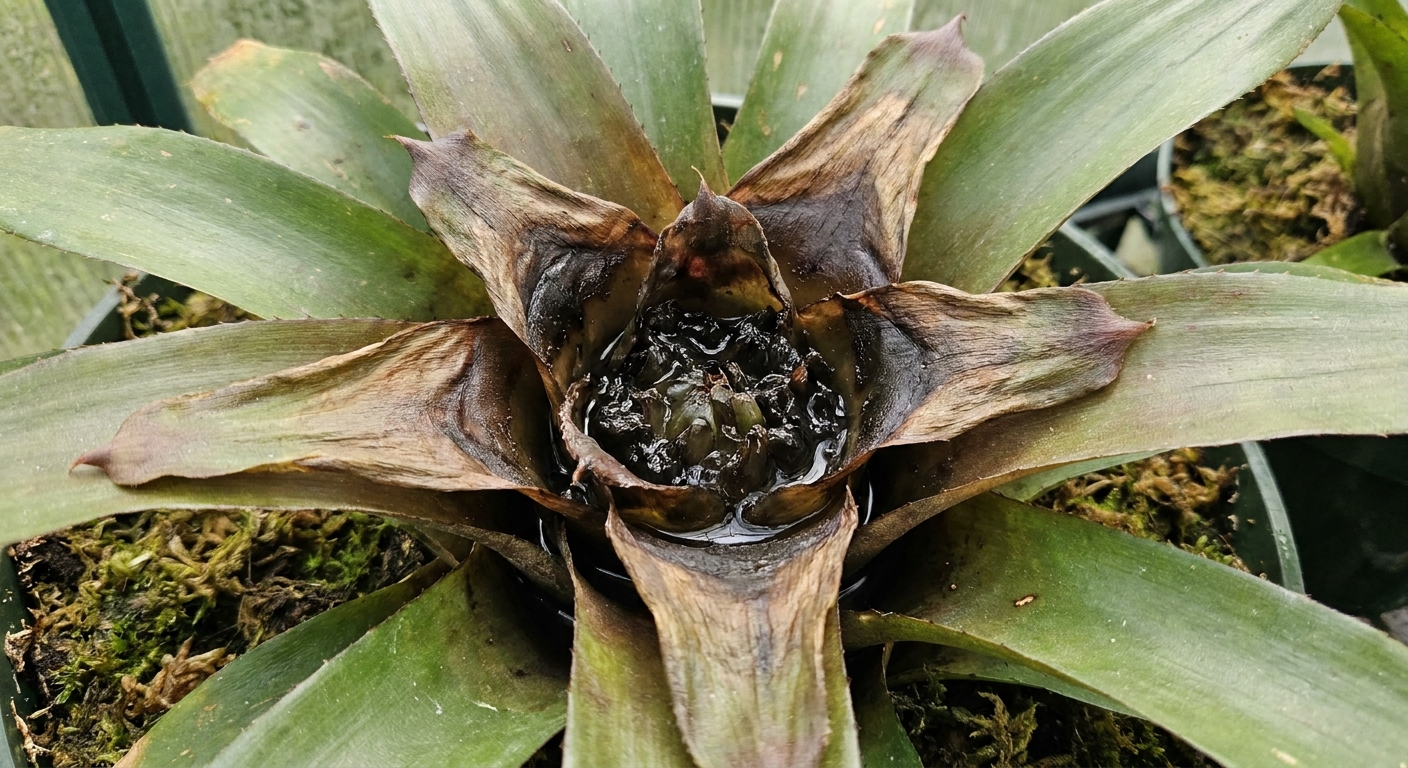

If you peeked into your bromeliad’s “cup” and found a black, soft, mushy center, I want you to hear this clearly: this is very likely cup or crown rot, and it moves fast because the damage starts right where new leaves should emerge.
Less often, a blackened center can also follow cold damage, physical injury to the crown, or pests hidden deep in the rosette that lead to secondary rot. Either way, the immediate response is the same: act quickly and gently.
The good news is that you can sometimes stop it, and even when the mother plant cannot be saved, the pups very often can. Let’s move quickly and gently.
First, confirm it is cup rot
Signs of true cup rot
- Black or dark brown tissue in the center cup, often wet and smelly.
- Inner leaves pull out easily when tugged, sometimes sliding out like a loose plug.
- Mushy texture at the growth point (the crown) rather than dry, papery browning.
- Sudden collapse of the central rosette even if outer leaves still look decent.
How it differs from normal post-bloom fading
Most bromeliads bloom once. After flowering, the mother plant slowly declines while pups grow at the base. That normal decline usually looks like gradual paling and older outer leaves yellowing over weeks or months. The center is not typically black and mushy early on.
How it differs from brown leaf tips
Brown tips are usually about salt buildup, low humidity, inconsistent watering, or too much sun. Tips turn crisp and dry. Cup rot is the opposite vibe: wet, soft, dark, and centered in the tank.
Emergency triage
If the center is soft and black: empty the cup, remove loose rot, then dry the crown with airflow. You can fine-tune the “ideal” watering style later. Right now, we stop the spread.
Step 1: Isolate and pause cup watering
- Move it away from other bromeliads and houseplants if possible.
- Stop refilling the central cup until the situation is stable. During triage, err on the dry side even if you are not sure which bromeliad you have. Once it stabilizes, you can return to species-appropriate watering.
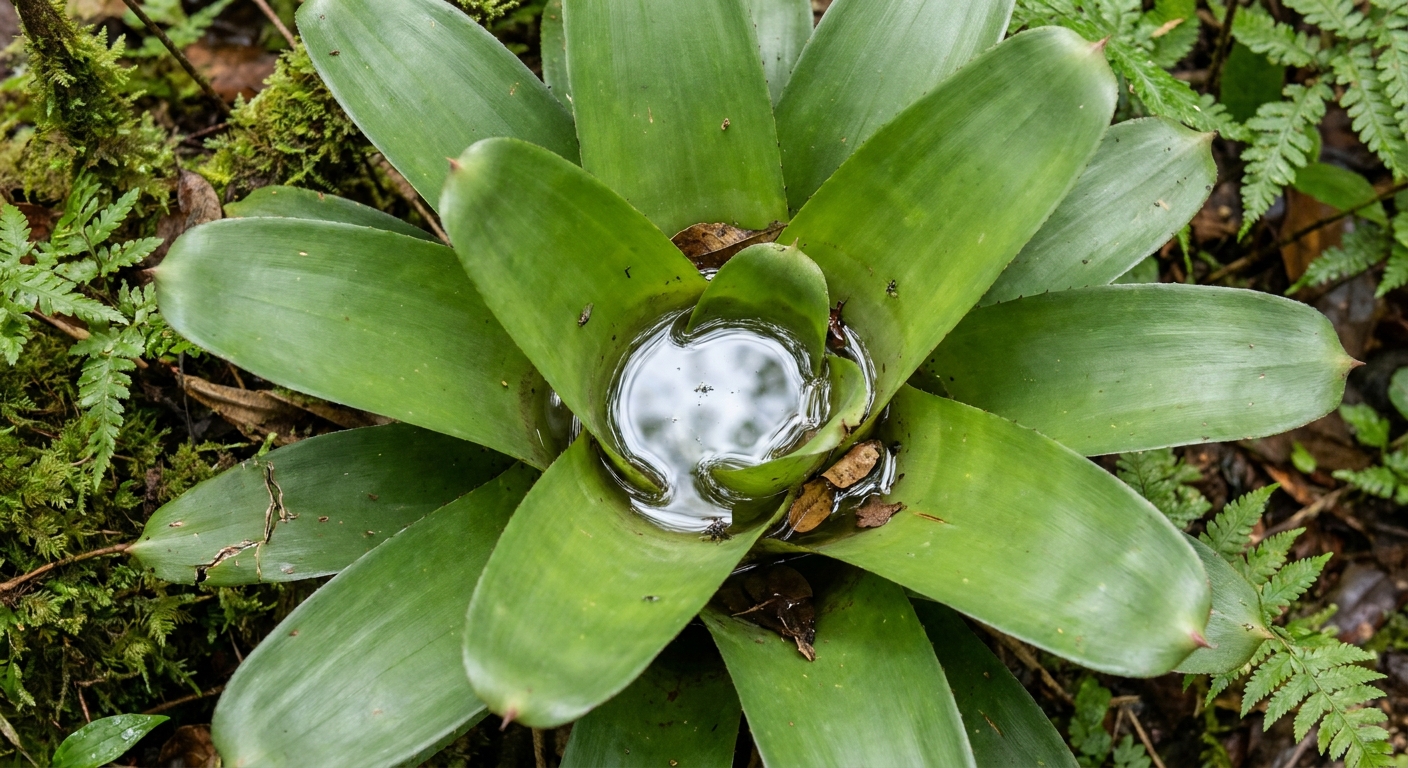
Step 2: Empty the tank completely
Tip the plant and pour out everything in the cup. If it is planted and hard to tip, use a turkey baster, large syringe, or paper towel twisted into a wick to pull water out.
Step 3: Sterilize tools
Before you cut anything, disinfect your scissors or blade. You can use 70% isopropyl alcohol (wipe and let air-dry), or a 10% bleach solution (brief soak), then rinse and dry thoroughly. Re-sterilize between cuts if you touch rotted tissue.
Step 4: Remove mushy tissue (only what is truly rotted)
Then:
- Gently tug out any inner leaves that slide out easily. If they resist, do not force them.
- With clean scissors or a sterile blade, trim away soft, black, collapsing tissue.
- Stop cutting when you reach tissue that is firm and looks more like normal pale green or light tan, not wet sludge.
Important: the center is the growth point. If it is fully rotted, the mother plant will not make new leaves again. Even then, pups can still be completely worth saving.
Step 5: Dry the crown fast, safely
- Blot the center with paper towels until you cannot pull up more moisture.
- Set the plant somewhere with bright, indirect light and excellent airflow.
- A small fan across the room is ideal. Do not aim a hair dryer at it.
- Keep it warm and away from cold drafts. Cool air plus wet tissue is a rough combination.
Step 6: Check the potting mix
Cup rot often starts in the crown or tank, independent of the roots. Still, soggy mix adds stress and can invite more problems, so it is worth checking.
- If the mix is wet, let it dry significantly before any more watering.
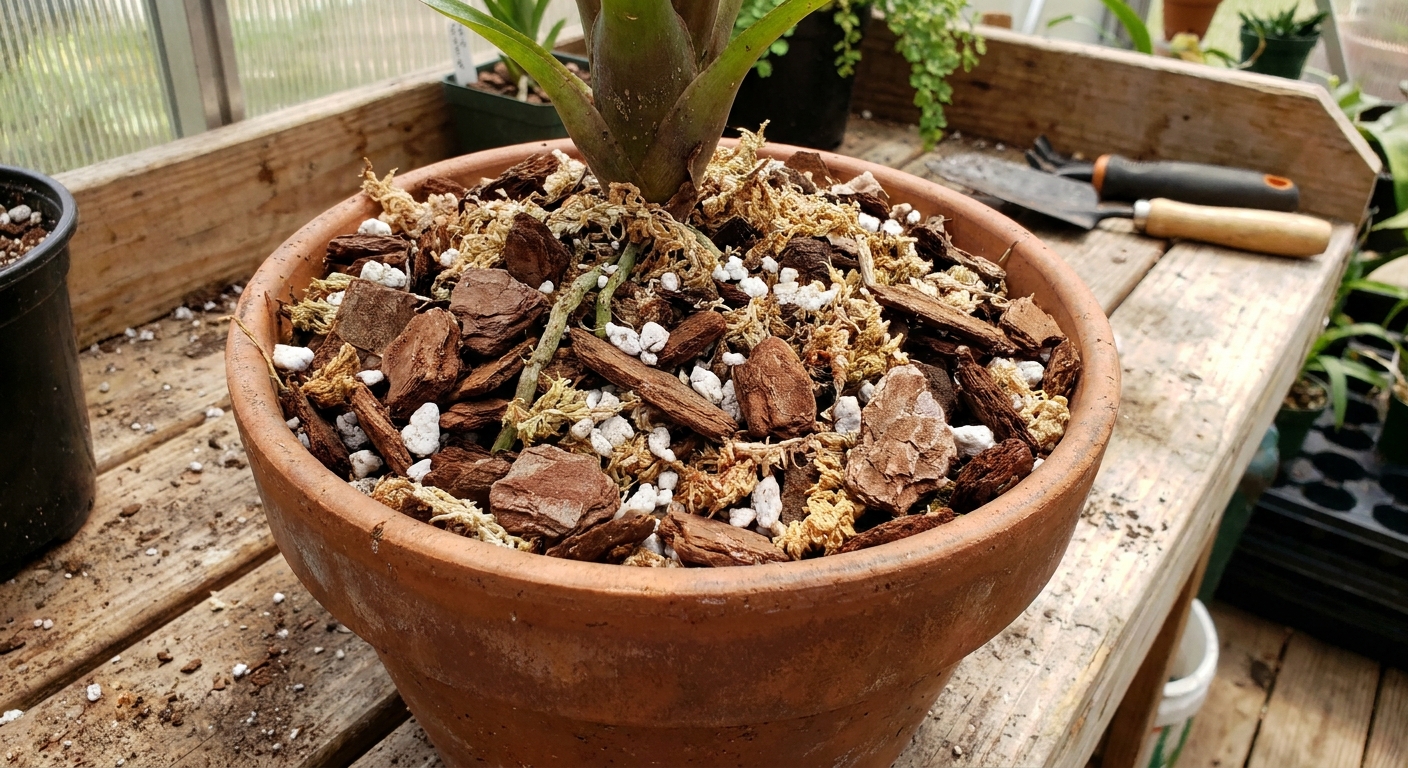
- If it smells sour, feels swampy, or stays wet for many days, consider repotting into a chunky, fast-draining bromeliad mix (orchid bark, perlite, a bit of coco coir or peat, and some charcoal if you have it).
- Make sure the pot has drainage holes.
Should you use anything on the rot?
Gardeners love a “magic sprinkle,” and I get it. In practice, drying and airflow do the heavy lifting. If you want a gentle assist:
- Cinnamon: Optional. Some growers dust a tiny bit on cut surfaces as a drying agent. Evidence for it as a true plant antifungal is mixed, and it can be overly drying or irritating on tender tissue. Use lightly and treat it as a helper, not a cure. Do not pack it into the crown.
- Fungicide or bactericide: Cup and crown rot can involve bacteria and fungi. If rot is advancing quickly despite drying, a product labeled for ornamental plants and crown rots can help. Follow the label exactly and improve airflow and watering habits at the same time, or it will return.
Avoid pouring oils or heavy home remedies into the cup. Anything that traps moisture can backfire.
Can the pups still be saved?
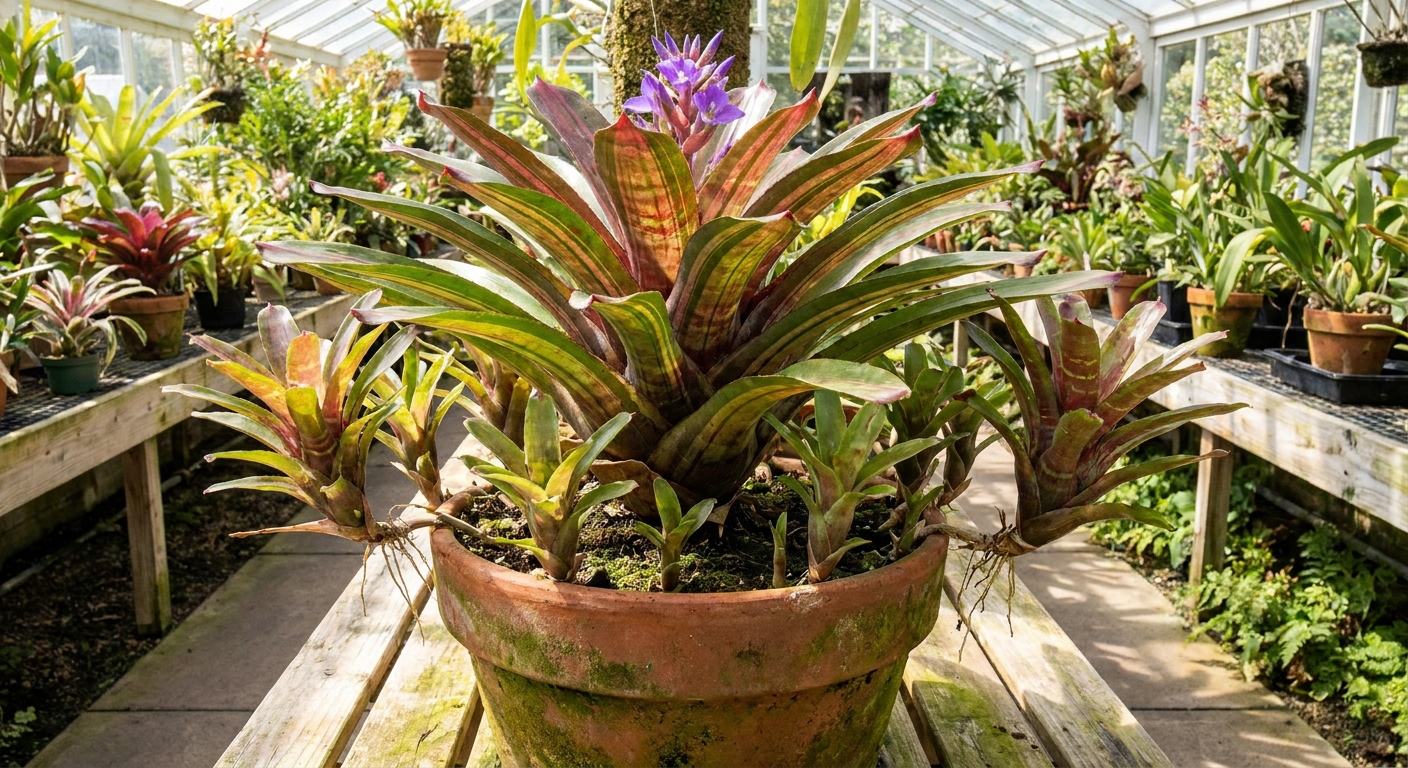
Often, yes. In fact, pups are the happy ending I see most with cup rot. The trick is catching them before the infection spreads into their base.
How to judge pup health
- Firm base: The pup should feel solid where it meets the mother plant.
- Clean center: Look down into the pup’s tiny rosette. It should not be black and mushy.
- Leaves hold on: A healthy pup’s inner leaves do not pull out easily.
When to separate pups
If the mother plant’s center is rotting, I am more willing to separate pups a bit earlier than usual, especially if the rot is creeping downward. As a general guideline, pups transplant best when they are about one-third to one-half the size of the mother plant, but emergency conditions change the plan.
How to remove pups without spreading rot
- Use a sterile knife and cut the pup away with a small portion of its “stem” attachment.
- Avoid cutting into black, mushy mother tissue. If you cannot avoid it, sterilize the blade again before the next cut.
- Let the cut end of the pup dry and callus for a few hours (or overnight) in a clean, shaded spot before potting.
- Pot in a small container with airy mix, and keep it in bright, indirect light.
Aftercare for 2 to 3 weeks
Watering (post-rot protocol)
- Do not keep water sitting in the cup while the crown is healing.
- Water the potting mix lightly only when it is mostly dry, and never let the pot sit in water.
- Once the plant is stable again, resume species-appropriate care. If you return to cup watering for a tank bromeliad, refresh the water frequently so it does not stagnate.
Light, airflow, temperature
- Give bright, indirect light. Too dim slows recovery, too much sun stresses a weakened plant.
- Keep airflow steady. Still air plus a wet cup is cup rot’s favorite combination.
- Keep the plant warm and away from cold windows and AC vents.
What recovery looks like
A mother plant with a damaged center may not “bounce back” with new leaves. Success may mean the rot stops spreading and the plant holds together long enough to mature pups. If the center stays firm and no new mush appears, you are moving in the right direction.
Water quality and prevention
- Refresh the cup water: In normal care (when the plant is healthy), dump and refill the tank regularly so water does not go stagnant.
- Use better water if you can: Rainwater, distilled, or RO water is ideal for many bromeliads. If you use tap water, letting it sit out can help some additives dissipate. Mineral-heavy water can contribute to buildup over time.
- Flush debris: Dead flower bits and fallen leaves in the cup decay fast. Rinse them out during regular checks.
Why cup rot happens
- Stagnant water in the tank: Water left too long becomes low-oxygen and microbe-friendly.
- Cool temperatures: In cool rooms, water evaporates slowly and the crown stays wet.
- Low light: Plants in dim light use less water and dry more slowly.
- Poor airflow: Crowded corners and still air keep moisture trapped.
- Debris in the cup: Dead bracts, fallen leaves, and dust can decay in the tank and kick off rot.
- Overly dense potting mix: A wet, airless root zone adds stress, even though the rot often begins in the crown.
Quick troubleshooting
The center is black, but not wet
If it is dry and firm, you may be looking at old tissue after blooming, sun damage on inner leaves, or cold damage. Cup rot is typically soft. Keep the cup empty for a few days while you assess, and watch for any new softness or odor.
Only one inner leaf is mushy
Remove that leaf, empty the cup, and improve airflow. Sometimes you catch it at the very beginning.
The whole plant is leaning and wobbly
That can mean the crown has rotted enough that the rosette is no longer anchored. Focus on saving pups, and consider separating any that are healthy.
When to discard
If the rot is widespread, the smell stays foul after you have cleaned and dried the crown, and there are no healthy pups to save, it is usually best to discard the plant to reduce the chance of spreading pathogens to nearby plants.
FAQ
Should I cut the entire center out?
Only remove tissue that is clearly soft and rotting. If you carve aggressively, you can create a larger wound that stays wet. Gentle, targeted removal plus drying is safer.
Can I still mist my bromeliad?
Skip misting while you are fighting cup rot. It raises humidity right where you need the crown to dry. If humidity is very low, run a humidifier nearby, not directly onto the plant.
Do I need to repot immediately?
Repot if the mix is staying wet, smells off, or the pot has no drainage. If the mix is already airy and drying normally, focus first on emptying and drying the cup.
Is the mother plant supposed to die after it flowers?
Yes, most bromeliads are monocarpic, meaning the mother plant declines after blooming. That decline is typically slow and starts with older leaves, not a sudden black, mushy center.
A calm next step
If you want to double-check what you are seeing, take a clear top-down photo of the cup and a second photo of the base where pups attach. In the meantime, empty the tank, remove anything mushy, and give that plant bright shade and airflow. Bromeliads are tougher than they look, especially the pups. I have watched plenty of “lost causes” turn into a whole new little bromeliad family with just a bit of fast, clean triage.