Asiatic and Oriental Lilies: Bulbs, Blooms, and Aftercare
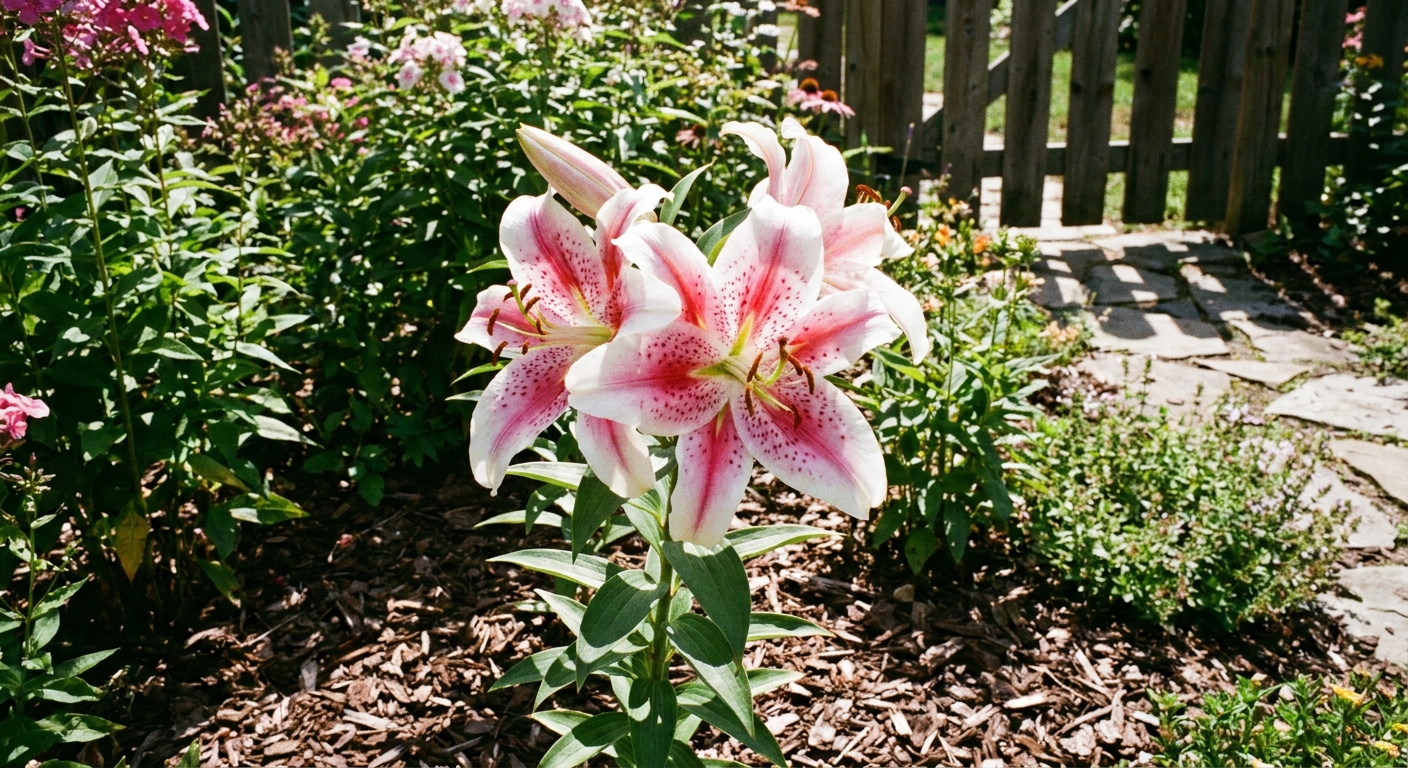
Lilies are the kind of plant that makes you pause mid-watering can and just stare. Big, elegant blooms. That unmistakable lily scent (especially from Orientals). And tall stems that look like they belong in a bouquet even when they are still rooted in your garden bed.
This guide focuses on true lilies in the genus Lilium, especially Asiatic and Oriental types. We will cover how to plant the bulbs, what they need while they grow, how to support tall stems, and the exact aftercare steps that help them return stronger next year.

Pet safety: lilies and cats
This needs to be said plainly: true lilies (Lilium) are highly toxic to cats. Even small exposure can cause fatal kidney failure, including a cat grooming lily pollen off their fur or chewing a leaf. If you share your home or yard with cats (including neighborhood roamers), choose safer flowers and keep lilies out of reach. If you suspect any contact, treat it as an emergency and call your vet or pet poison hotline immediately.
Asiatic vs Oriental lilies
Both are true lilies, but they have very different personalities in the garden.
- Asiatic lilies: Earlier bloomers (often early to mid-summer), usually little to no fragrance, bold colors, generally the easiest and most forgiving.
- Oriental lilies: Bloom later (mid to late summer), famous for strong fragrance and huge blooms, often a bit fussier about soil moisture and drainage.
If you plant both, you can stretch lily season for weeks, sometimes months.
Lilies vs daylilies vs Easter lilies
Daylilies are not lilies
Daylilies are Hemerocallis. They grow from fleshy roots, form grassy clumps, and each bloom lasts about a day. They are great plants, just a totally different creature with different care.
Easter lilies are true lilies
The classic potted Easter lily is usually Lilium longiflorum, a true lily forced to bloom indoors around spring holidays. You can plant it outside after blooming in many climates, but it may not rebloom on the same schedule and it needs time to rebuild energy.
When to plant lily bulbs
Lily bulbs are usually planted in fall or early spring, depending on what is available in your area.
- Fall planting: Great for establishing roots before winter. Aim for about 2 to 4 weeks before the ground freezes.
- Spring planting: Plant as soon as the soil is workable. Bulbs may bloom later the first year, especially if planted late.
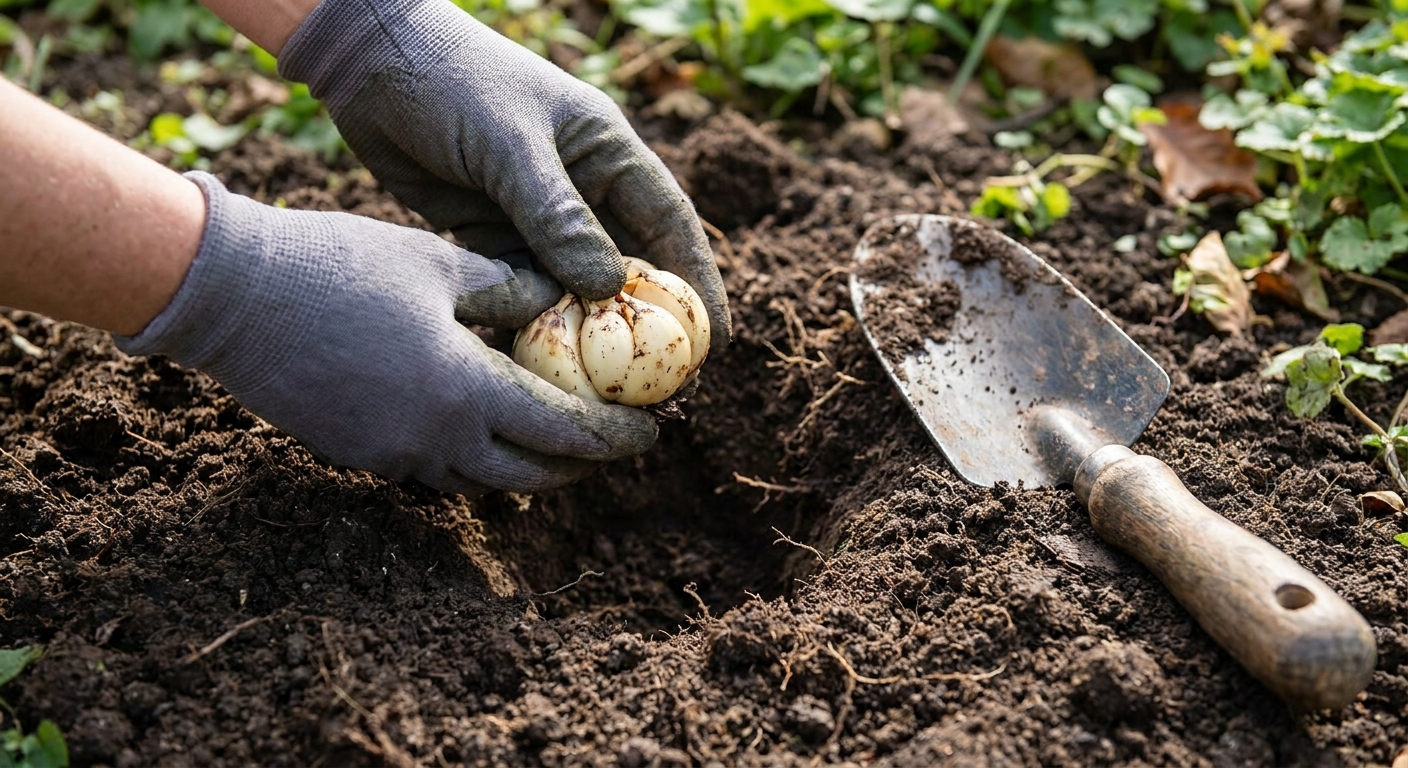
Do not let lily bulbs dry out on the counter for days. They are “scaly” bulbs and can desiccate faster than tulips or daffodils. If you cannot plant immediately, keep them cool and slightly moist (like in a paper bag in the fridge, away from fruit).
Site: sun, drainage, air flow
Sun
Most Asiatic and Oriental lilies do best with full sun to part sun.
- In cooler climates, 6 to 8 hours of sun is ideal.
- In hotter climates, morning sun with afternoon shade can prevent heat stress and extend bloom life.
Drainage
Lilies hate “wet feet.” If your soil stays soggy, bulbs can rot before they ever get going. Choose a spot that drains well, or create it by building up a berm or raised bed and mixing in compost.
Air flow
Good airflow helps prevent fungal issues like botrytis. Give lilies room and avoid tucking them into a tight, stagnant corner.
Planting depth and spacing
Lilies are happiest when planted deep enough to anchor tall stems and encourage strong rooting along the buried stem.
Planting depth
- General rule: plant lily bulbs about 3 times as deep as the bulb is tall.
- In most gardens, this works out to roughly 6 to 8 inches deep to the base of the bulb for common varieties.
- In sandy, fast-draining soil, you can go slightly deeper. In heavy clay, plant a little shallower and improve drainage.
Spacing
- Space most lilies about 8 to 12 inches apart.
- For a fuller look without crowding, plant in groups of 3 to 5 bulbs with consistent spacing.
Planting tip: If you garden where voles or other bulb nibblers are common, consider planting bulbs inside a wire bulb basket or lining the hole with hardware cloth.
Soil prep and planting
If you want lilies that return for years, start by building the kind of soil that makes bulbs feel safe and fed.
- Loosen soil at least 10 to 12 inches deep so roots can run.
- Mix in compost to improve texture and moisture balance.
- Add drainage help if needed (pine bark fines, leaf mold, or coarse compost are better than sand in clay, which can create concrete-like soil).
- Plant bulb with the pointed tip up. If you cannot tell, plant it on its side. It will figure itself out.
- Backfill and water to settle soil around the bulb.
Watering and feeding
Watering
Keep soil evenly moist while lilies are actively growing, but never swampy. Deep, occasional watering is better than frequent shallow sprinkles.
- Water at the base to keep foliage dry and reduce fungal pressure.
- If you use overhead sprinklers, do it early in the day so leaves dry quickly.
Fertilizing
Bulbs are stored energy, but they still appreciate a steady diet.
- In spring as shoots emerge, top-dress with compost and a balanced organic fertilizer.
- Avoid heavy high-nitrogen feeding that creates floppy stems and fewer flowers.
- After bloom, a light feeding or compost top-dress can help the bulb recharge.
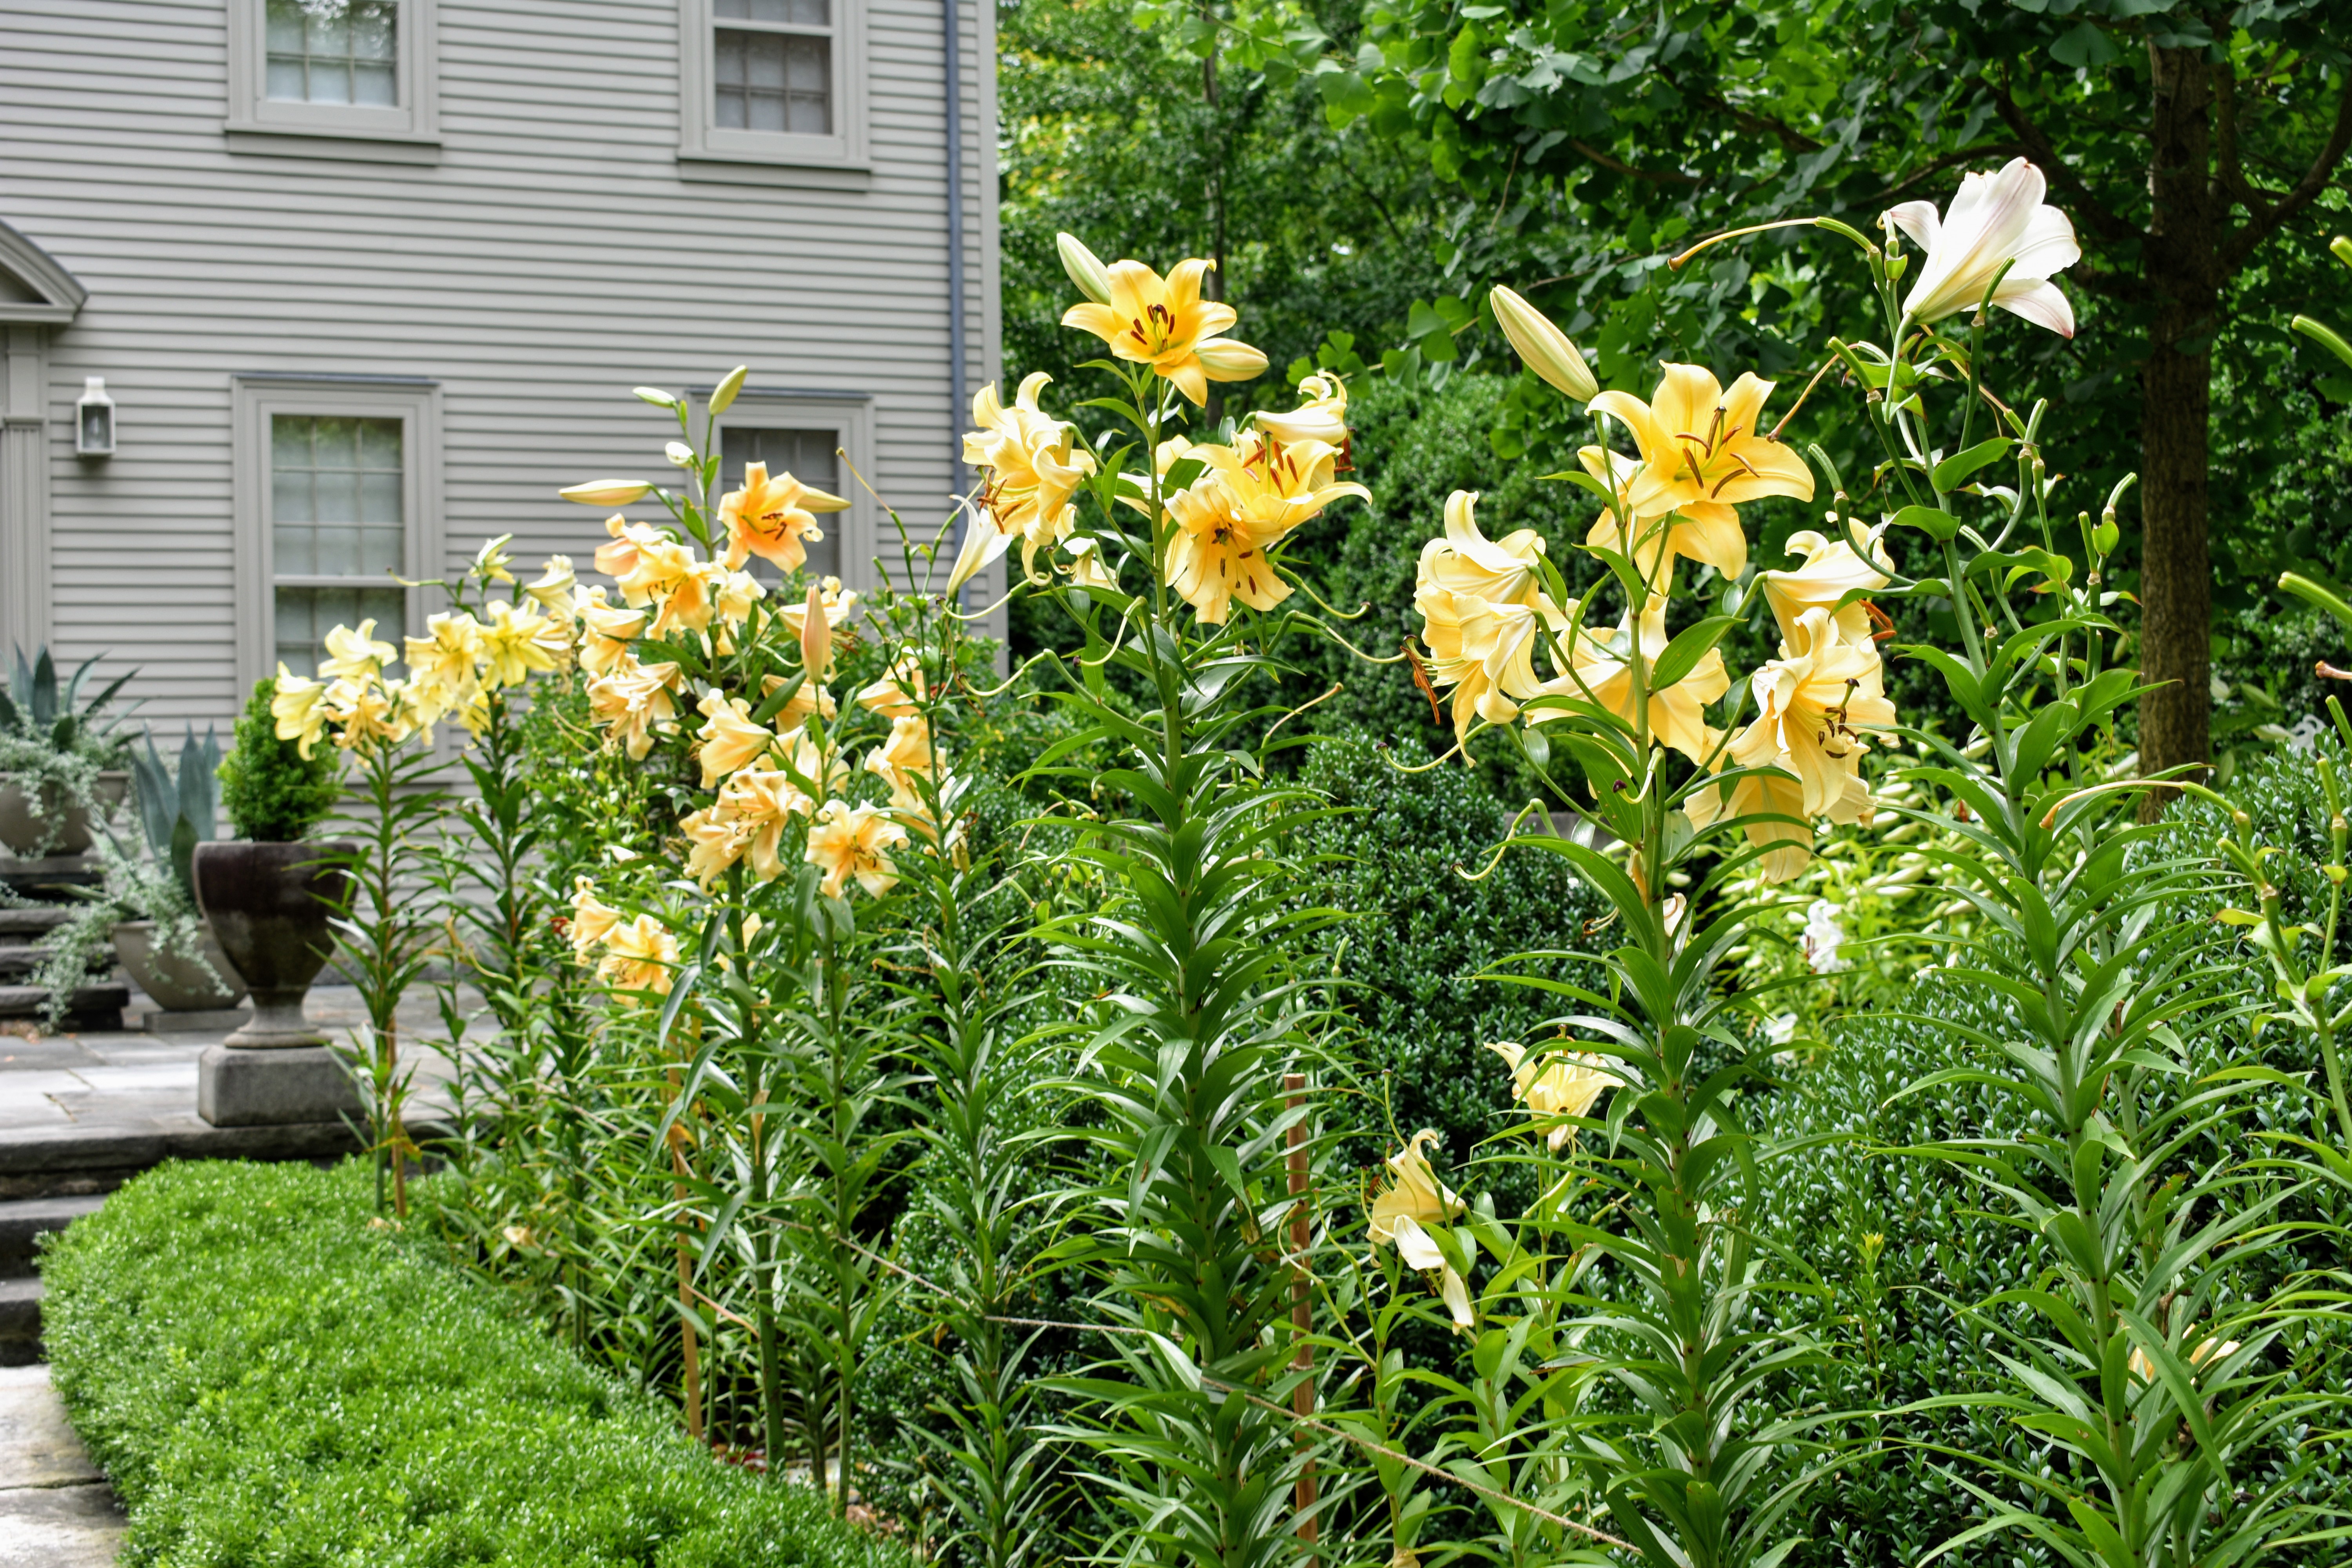
Staking tall lilies
Some lilies stand like little green soldiers. Others, especially tall Orientals with dinner-plate blooms, can lean or snap in wind and rain.
When to stake
Stake early, when stems are 8 to 12 inches tall. It is easier to place supports without spearing bulbs and roots later.
How to tie
- Use soft garden ties, jute, or stretchy plant tape.
- Tie in a loose figure-eight so the stem does not rub.
- Add additional ties as the plant grows, especially before buds open.
Mulch and cool roots
Lilies like their heads in the sun and their feet in the shade. A 2 to 3 inch layer of mulch helps keep soil evenly moist, buffers temperature swings, and reduces splash-back that can spread disease spores.
- Use shredded leaves, pine needles, or bark mulch.
- Keep mulch pulled back slightly from the stem to prevent rot.
You can also “shade the feet” by planting low companions nearby, like hardy geraniums, alyssum, or small salvias, as long as airflow stays decent.
Preventing botrytis
Botrytis often shows up as brown spots on leaves and buds, especially in cool, damp weather. It can spread quickly in crowded plantings.
Prevention
- Space properly for airflow.
- Water at soil level, not over the foliage.
- Mulch to reduce soil splash.
- Clean up fallen leaves and spent debris around lilies.
- Avoid working plants when wet to reduce spread.
If you spot it
- Remove badly affected leaves and dispose of them in the trash, not the compost.
- If the problem is chronic, consider an organic-approved fungicide labeled for botrytis and lilies, and follow the label exactly.
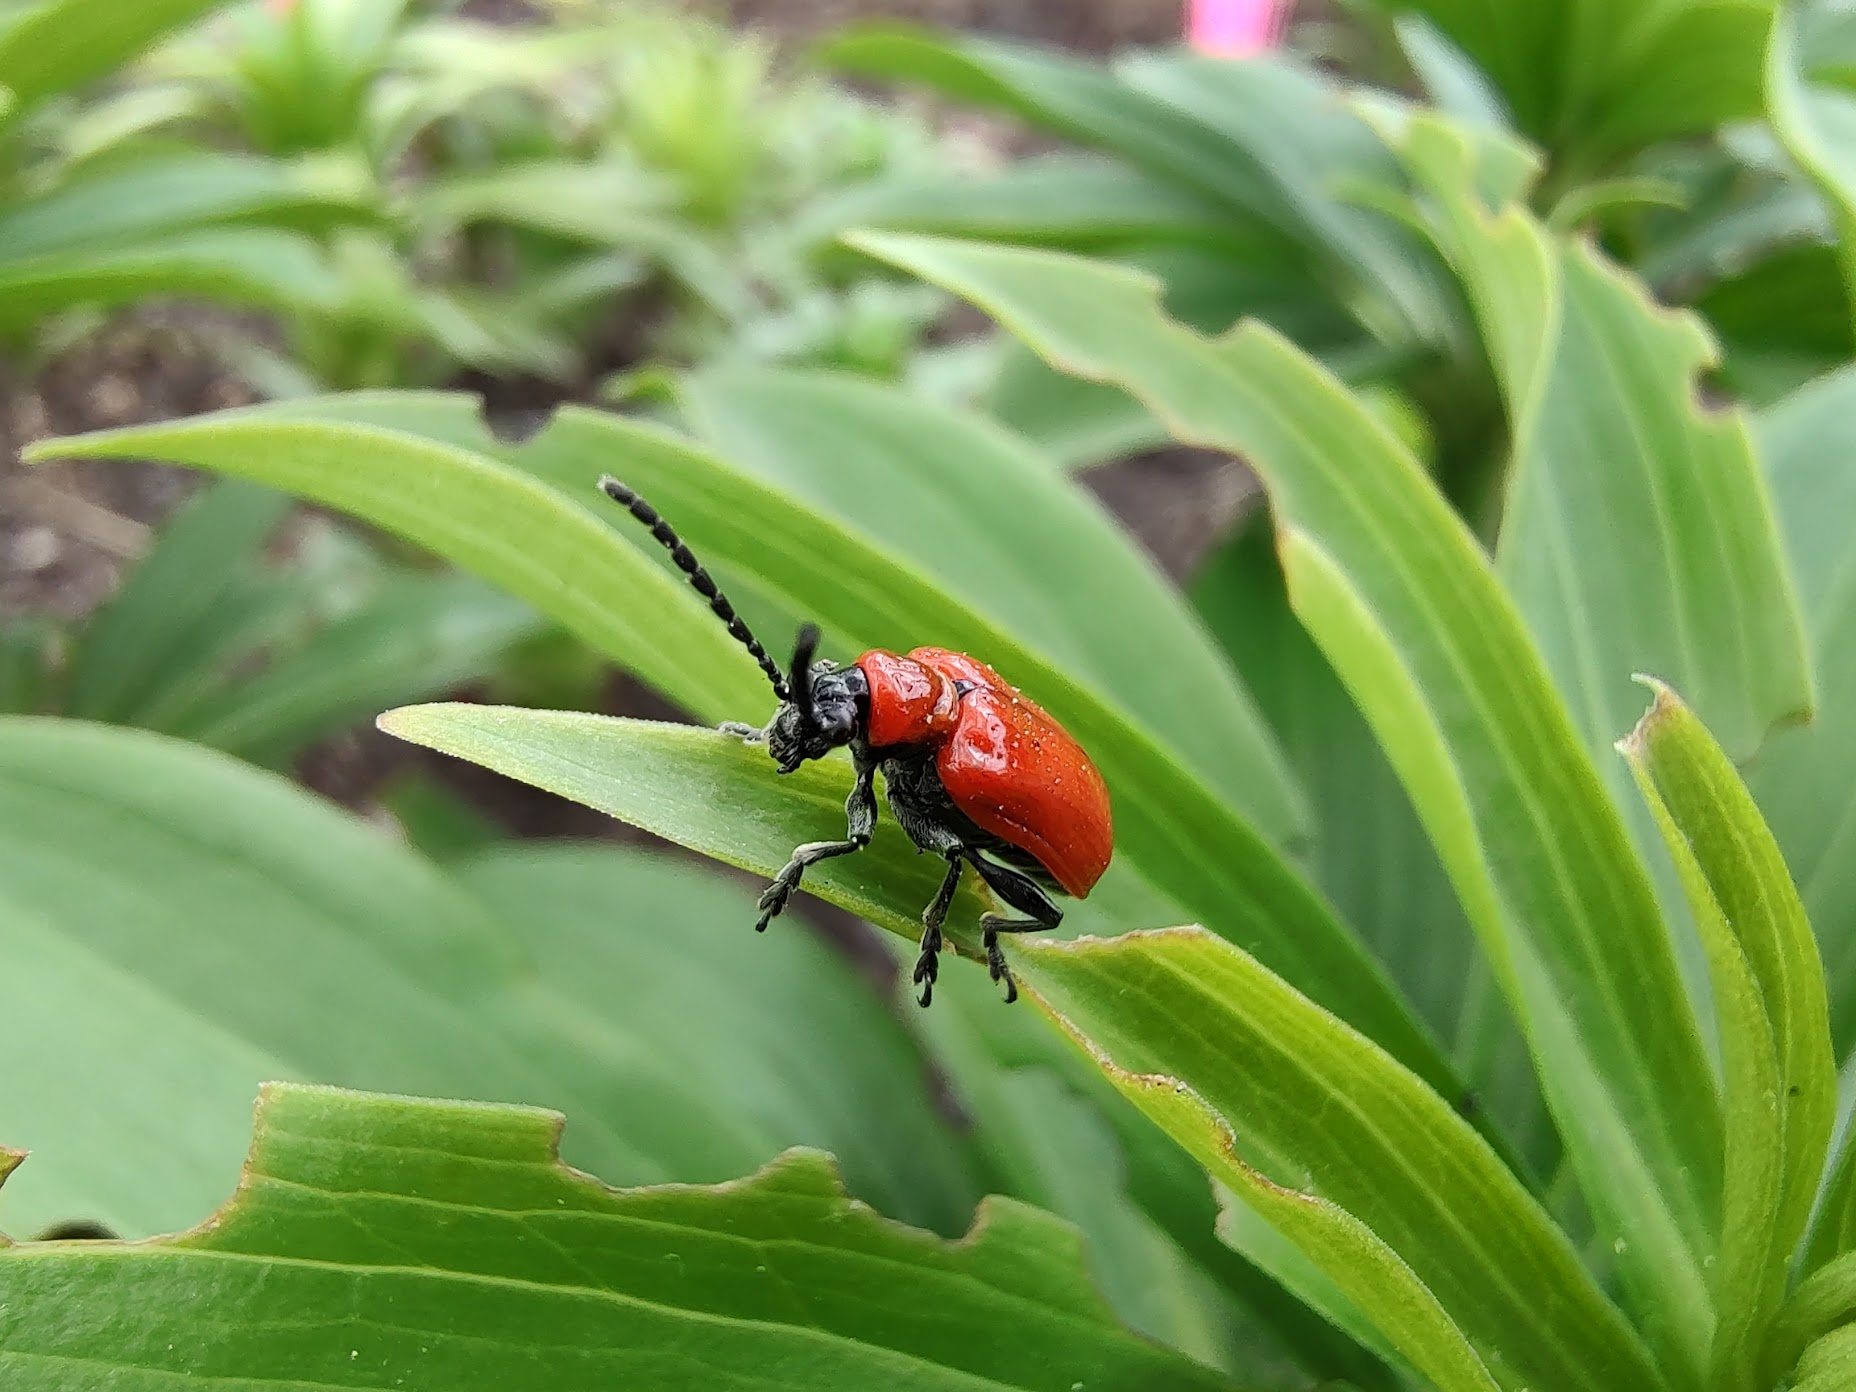
Lily leaf beetles
If you garden where lily leaf beetles are present, they can be the main event. Adults are small, bright red beetles. Larvae are softer-bodied and often cover themselves in a dark, messy-looking coating.
Signs
- Chewed leaves, starting early in the season
- Red adult beetles dropping off plants when disturbed
- Clusters of orange eggs on the undersides of leaves
Organic control
- Hand-pick adults and larvae into a cup of soapy water. Morning is easiest.
- Crush egg clusters on leaf undersides.
- Neem or spinosad may help with larvae in some situations, but timing matters and you must follow label directions. Avoid spraying when pollinators are active.
Bloom care
- Water consistently during bud set and bloom, especially in hot weather.
- Deadhead spent blooms by snipping just the faded flower, not the whole stem. This prevents seed formation and keeps energy going to the bulb.
- Cut for bouquets early in the morning, and leave at least half to two-thirds of the stem and foliage in the garden to feed the bulb for next year.
Aftercare after bloom
This is the part that decides next year’s flowers. Lilies are bulbs, and bulbs are basically little rechargeable batteries. The foliage is the solar panel.
Steps
- Deadhead spent flowers (remove the bloom only).
- Leave stems and leaves to yellow naturally. Do not cut green foliage down.
- Keep watering lightly if conditions are dry for a few weeks after bloom so the bulb can rebuild.
- Optional: light feeding with compost or a gentle organic fertilizer after flowering.
- Cut back only when the stem has turned yellow to brown and pulls away easily, usually in fall.
If you need to tidy for aesthetics, you can loosely gather and tie fading stems to keep the bed looking neat, but let the leaves keep doing their job as long as they are still green.
Winter care
Most Asiatics and many Orientals are hardy in cold climates, but winter success depends on drainage and stability.
- Mulch after the ground freezes in very cold regions to prevent freeze-thaw heaving. Straw, shredded leaves, or evergreen boughs work well.
- Avoid soggy winter soil. Winter rot is more common than true cold damage.
- Container lilies in cold climates may need extra protection, such as moving pots to an unheated garage once dormant, or burying the pot in the ground for insulation.
Quick troubleshooting
- No blooms: bulb planted too shallow, too much shade, cut stems too low for bouquets, or foliage removed too early last year.
- Flopping stems: variety is tall, too much nitrogen, not enough sun, or wind exposure. Stake earlier next season.
- Yellowing lower leaves: can be normal aging, drought stress, overwatering, or disease pressure. Check soil moisture first.
- Brown spots spreading: suspect botrytis. Improve airflow, stop overhead watering, remove affected leaves.
Final reminder
If you have ever felt nervous about bulbs, lilies are a beautiful way to rebuild confidence. Plant them deep, give them drainage and sun, and then let them do what lilies do best: rise up from the soil like they have someplace important to be.