Acclimating a New Houseplant
You know that feeling when you bring home a gorgeous new plant and immediately start hovering like an anxious plant-parent? I have been there. New houseplants go through a real adjustment period, and most of the “mystery issues” people panic about in week one are simply acclimation: a change in light, humidity, temperature, and routine.
This page is about environmental ramping, meaning you ease your plant into your home’s conditions instead of changing everything at once. It is not a full pest biosecurity guide. (Quarantine matters, but that is a separate lane.) If you can, isolate new plants from your collection for 1 to 2 weeks and keep an eye out for hitchhikers while they settle.

What acclimation means
Acclimation is your plant gradually adjusting from its old conditions to your home. Even if it looks perky at the store, it may have been grown under greenhouse shade cloth, high humidity, consistent watering, and steady temperatures. Your living room is a different planet.
- Light shift: intensity, direction, and hours of light change instantly.
- Humidity drop: most homes are drier than greenhouses and many stores.
- Water rhythm: store watering is often inconsistent, then we overcorrect at home.
- Transport shock: wind, cold or heat, jostling, and time in a car all stress tissues.
The goal for week one is simple: reduce additional stress while the plant stabilizes.
First 30 minutes
1) Unbag, inspect, let it breathe
Remove any sleeves or plastic immediately so leaves do not sit in trapped moisture. Give the plant a gentle once-over: look under leaves, along stems, and at the soil surface. You are not doing a full pest protocol here, just making sure there is nothing obvious going on.
2) Check drainage first
Before you do anything else, make sure the plant has a drainage hole. If it is sitting inside a decorative cachepot, confirm there is no water pooled at the bottom. After any watering, empty saucers and cachepots so roots are not soaking.
3) Do not repot today (usually)
Repotting is a big stressor because it disrupts roots and changes moisture behavior overnight. For most plants, let it rest first. A good rule is to wait about 1 to 2 weeks, then reassess.
That said, it can be worth intervening sooner if the situation is urgent, like:
- Soil is sour, staying soggy, or smells rotten
- There is visible rot at the base, or stems are turning mushy
- The plant is in a hydrophobic peat plug that will not re-wet evenly
- No drainage, cracked pot, or the plant is physically unstable and tipping
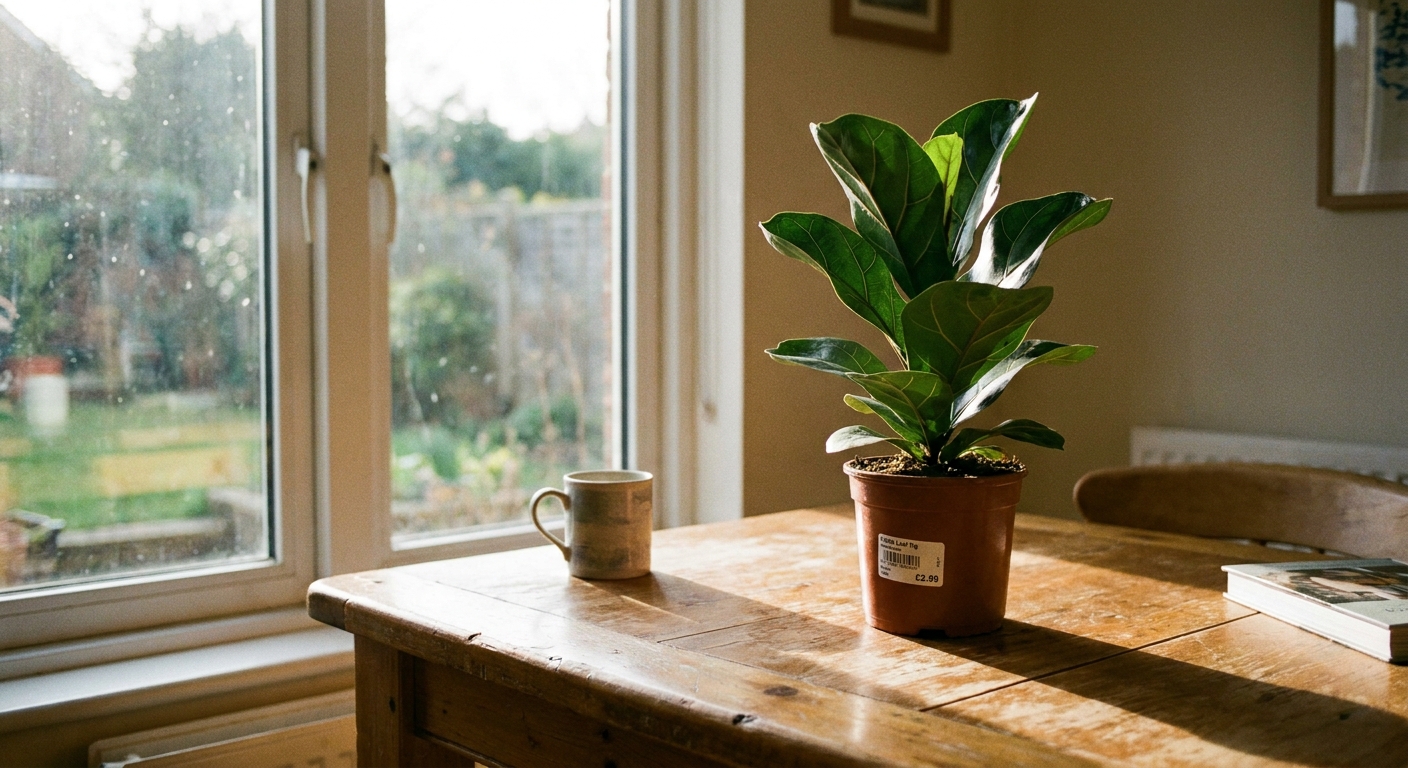
4) Choose a recovery spot
For the first week, choose a stable location away from vents, radiators, fireplaces, and drafty doors. Think bright but gentle light, not full blast sun through glass.
Light ramp for week one
Light is the fastest way to accidentally scorch a new plant. A plant that was grown under filtered greenhouse light can burn in a sunny window even if it is labeled “bright light.”
What bright indirect means
“Bright indirect” is strong light without sunbeams hitting the leaves. Think a plant a few feet back from a bright window, or right next to a window softened by a sheer curtain.
Window examples (general, not a law of physics): a south-facing window (north hemisphere) tends to be intense and may need more distance or a curtain, while a north-facing window tends to be gentler and may allow the plant to sit closer.
Days 1 to 3: bright shade
- Place near a window, but set it 2 to 6 feet back from intense direct sun through glass.
- If the window gets direct sun, use a sheer curtain or put the plant where it receives indirect light.
Days 4 to 7: inch closer, watch the leaves
Move it a little closer every couple of days. Watch for:
- Sun stress: bleached patches, crispy edges, sharp brown spots, leaves feeling papery.
- Too dim: stems stretching, new leaves smaller, plant leaning hard toward the window.
If you see sun stress, back it up and slow the ramp. If the plant perks up and holds color, you can keep easing it toward its ideal spot.
Note: high-light plants (some succulents, cacti, citrus, certain palms) can still need a ramp. They may ultimately want direct sun, but usually not on day one.
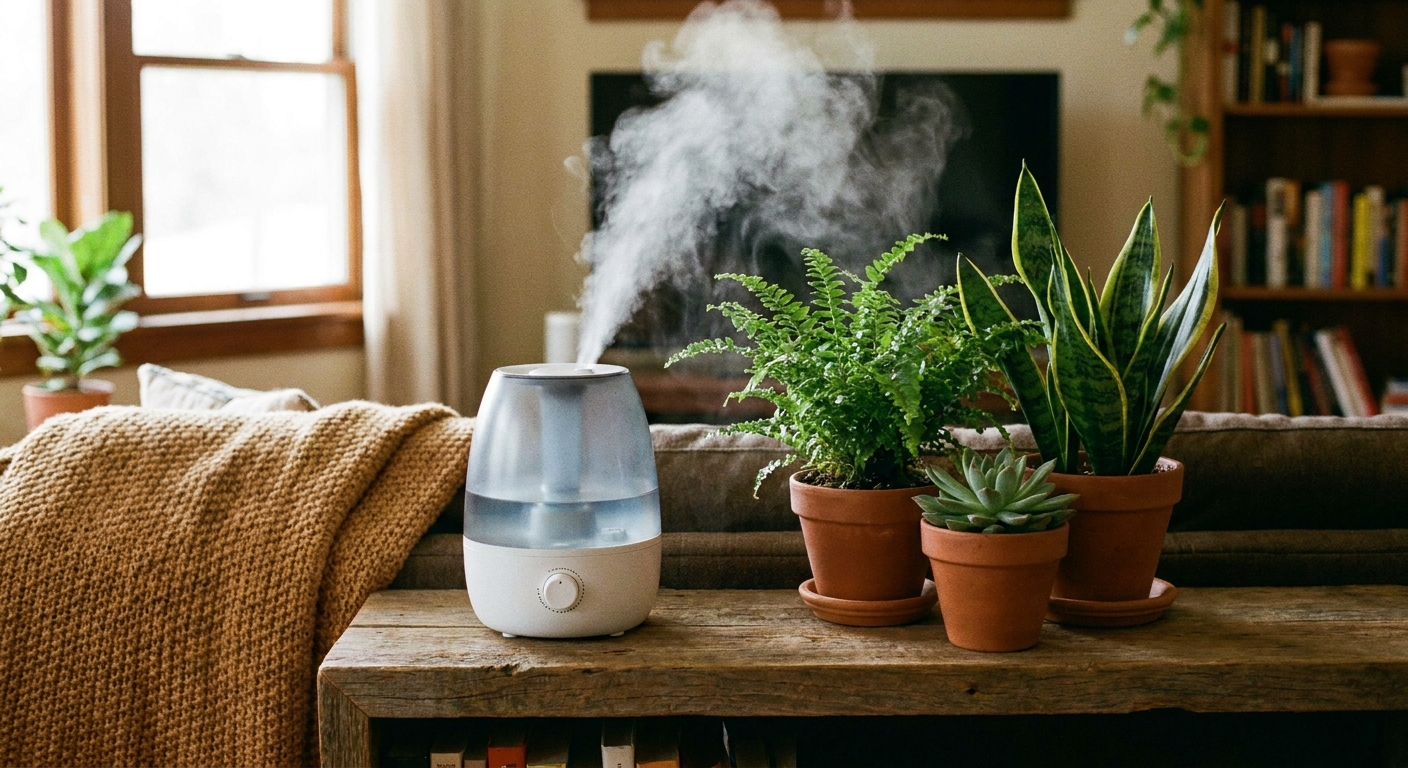
Humidity bridging
Many popular houseplants come from humid environments. When humidity drops suddenly, leaves lose water faster than roots can replace it. That mismatch is what creates curling, crispy tips, and general sulking.
Easy ways to bridge humidity for 7 to 14 days
- Group plants together: they create a slightly more humid micro-zone.
- Pebble tray: can offer modest localized help right around the plant, especially in still air. Keep the pot bottom above the waterline.
- Bathroom vacation: for humidity lovers (ferns, calatheas), a bright bathroom can be a gentle recovery room.
- Humidifier: the most reliable option, especially in winter.
Skip constant misting. Misting spikes humidity for minutes, not hours, and can contribute to leaf spot problems if leaves stay wet and airflow is low. If you enjoy misting, treat it like a brief rinse, not a humidity strategy.
Watering in week one
Right after a move, roots can be a little “stunned.” The plant is also adjusting to new evaporation rates in your home. That combination makes it easy to overwater, especially if you are watering to soothe your own nerves. I say this with love.
First, check how wet the pot already is
- Feel the soil 1 to 2 inches down, or deeper for bigger pots.
- Lift the pot. A heavy pot usually means plenty of moisture.
- Look for warning signs of saturated mix: fungus gnats, algae on the soil surface, or a sour smell.
Then choose the safest approach
- If the soil is moist: do not water. Let it breathe.
- If the soil is bone dry and the plant is wilting: water thoroughly until it drains, then let it drain completely. Empty the saucer or cachepot.
- If the soil is wet and the plant is droopy: resist watering again. Droop can happen from root stress even when soil is wet.
In week one, it is often safer to be slightly too dry than too wet for many common, thicker-leaved houseplants (pothos, snake plants, dracaena, zz plants, many philodendrons). But for thin-leaved, moisture-sensitive plants (ferns, fittonia, many calatheas, some begonias), do not let the pot go bone dry. Your goal there is even moisture, not constant wetness.
Transport shock
Transport shock is the plant equivalent of a long travel day. Leaves may droop, curl, or look a bit wrinkly. Stems can feel slightly soft for a day or two. A few blemishes can show up where tissues were bruised.
What helps
- Stabilize temperature: keep it away from hot windows and cold drafts for several days.
- Give steady light: follow the ramp plan rather than moving it around hourly.
- Avoid extra events: no repotting, no fertilizer, no heavy pruning.
Quick transport tips
- Do not leave plants in a hot or freezing car, even “for a minute.”
- In winter, wrap the plant in paper or a bag for the walk from store to car to house.
What not to do
- Do not dunk, ice-cube, or “flush” the plant unless you have a clear reason.
- Do not move it to full sun to “cheer it up.” Sun stress stacks fast when a plant is already tired.
Leaf drop basics
One of the most comforting truths in houseplant land is this: some leaf drop after a move is normal. Plants often shed older leaves as they rebalance water loss and light capture.
Normal acclimation leaf drop
- A few older, lower leaves yellowing and dropping
- Some buds aborting (especially on blooming plants)
- Temporary droop that improves within a week
Red flags
- Many leaves yellowing at once, especially with soggy soil
- Rapid mushy stems or a rotten smell (possible root rot)
- New growth blackening or collapsing
- Distinct stippling, webbing, or sticky residue (often pests)
If you see red flags, slow down and diagnose before you “treat.” Most plant problems get worse when we panic-correct.
Store vs shipped plants
Where your plant came from matters because the stressors are different. Here is how I adjust my first-week expectations.
Big-box or grocery store
- Common issue: inconsistent watering, low airflow, and low light on shelves.
- What that means at home: the root zone may already be too wet, even if the top looks dry.
- Your best move: check moisture deeper in the pot, confirm drainage, and prioritize airflow. Hold off on watering until you are sure it needs it.
Local nursery or greenhouse
- Common issue: grown in higher humidity and brighter, more even light than a home.
- What that means at home: humidity drop and light change are the big hurdles.
- Your best move: humidity bridging and gradual light ramp.
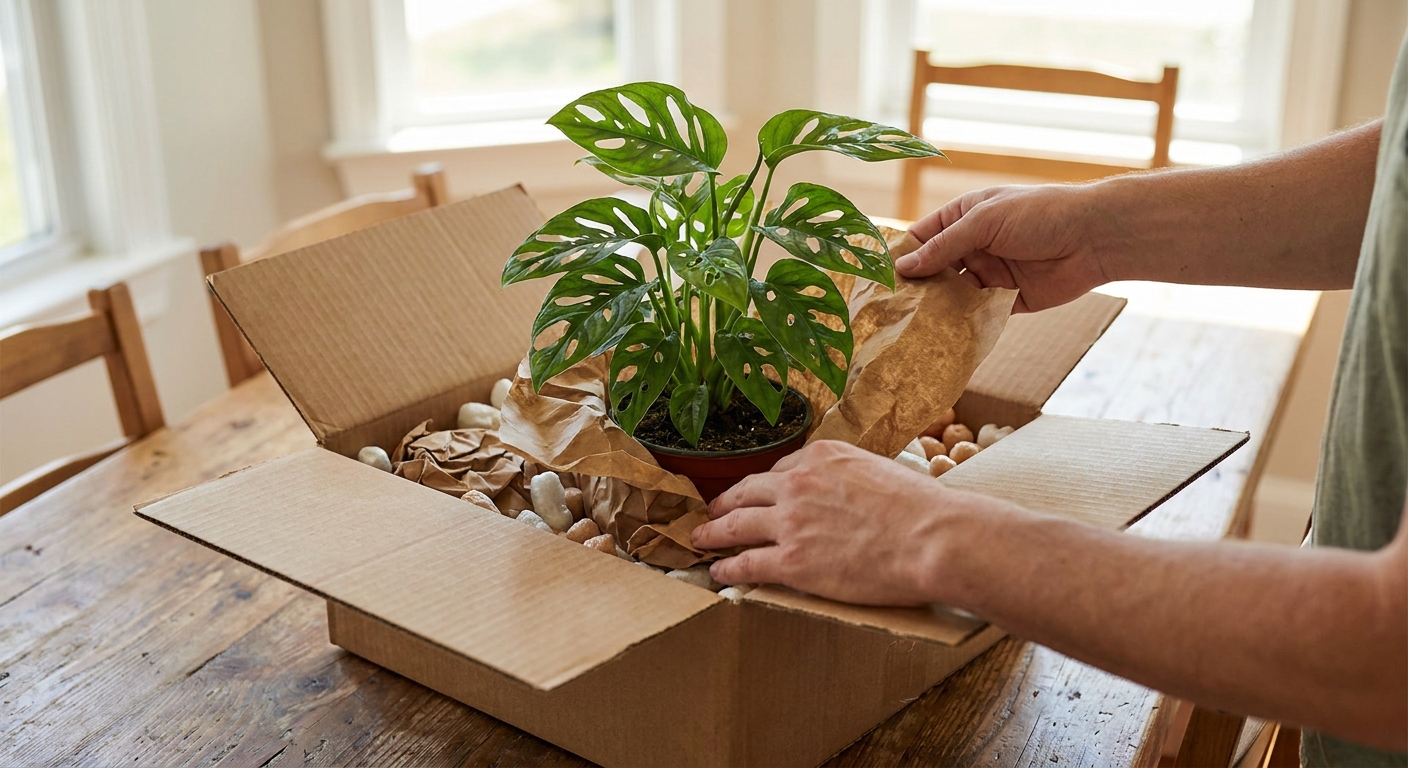
Shipped mail-order
- Common issue: darkness in a box, temperature swings, and dehydration or bruising.
- What that means at home: leaves can look limp or blotchy, and the plant may be disoriented.
- Your best move: unpack promptly, place in bright indirect light, and wait 24 hours before deciding anything drastic. Water only if the mix is truly dry.
When to fertilize
Fertilizer is not a recovery drink. It is more like a workout plan. Useful when the plant is actively growing, stressful when it is not.
Wait to fertilize if
- You just brought the plant home within the last 3 to 4 weeks.
- The plant is dropping leaves, wilted, or recovering from shipping.
- You plan to repot soon. Fresh potting mix often contains nutrients already.
Green light to fertilize when
- The plant has settled, perked up, and is making new growth.
- It is in active season (typically spring and summer for many houseplants).
Start with a half-strength balanced fertilizer and apply to already-moist soil. Also check the pot and soil surface for signs it is already fed, like slow-release fertilizer pellets mixed into the media or a grower tag that says it was recently fertilized.
7-day checklist
- Day 1: remove sleeves, inspect, confirm drainage, place in a stable bright-indirect recovery spot.
- Day 2: check soil moisture; water only if clearly needed. Empty saucers and cachepots.
- Day 3: keep conditions steady; bridge humidity if the plant is a humidity-lover.
- Day 4: move slightly closer to its eventual light level if it looks happy.
- Day 5: rotate the pot a quarter turn for even growth.
- Day 6: check for new stress signs; avoid repotting unless you have a clear reason.
- Day 7: evaluate. If it is perky, continue the light ramp and settle into a normal watering rhythm.
If your plant drops one or two leaves during this week, take a breath. That can be a normal goodbye to old leaves that no longer fit the new environment. Your job is to keep things calm and consistent so new growth can arrive.
Quick troubleshooting
Leaves are yellowing
- Most common cause in week one: too-wet soil or a sudden light drop.
- Action: confirm moisture deeper down, increase light gently, and let the mix dry appropriately. Confirm the pot is draining and not sitting in water.
Leaves are crispy or curling
- Common causes: low humidity, too much sun too fast, or underwatering.
- Action: pull back from direct sun, bridge humidity, and water only if the mix is actually dry (or approaching dry for moisture-sensitive plants).
Plant is droopy but soil is wet
- Common causes: oxygen-starved roots, cold exposure, or early root stress.
- Action: stop watering, ensure drainage, keep warm and bright-indirect.