10 Steps to Winterize Your Perennial Garden
When the light gets slanty and the garden starts whispering “slow down,” it is tempting to either (1) do nothing or (2) panic-cut everything to the ground. Winterizing perennials is the cozy middle path. You are not putting your garden to bed so much as tucking in the parts that need protection, while leaving the parts that quietly help wildlife and soil.
This checklist will walk you through what to cut back, what to leave standing, how to mulch without smothering crowns, and how to protect roots before real winter sets in. If you make a few imperfect choices along the way, welcome to gardening. The plants are used to it.
Before you start: timing matters
The best winterizing happens in two phases:
- After a few light frosts (tops look tired, growth slows): clean up, label plants, adjust watering, and prep mulch piles.
- When soil is consistently cold and just starting to firm up (often after several frosty nights, sometimes after the top inch starts to freeze): apply winter mulch and install protections. Mulch too early and you can invite rot, rodents, and premature warming.
If you garden by USDA zones, a good rule is: have your mulch and materials ready before your typical hard freeze, then mulch once nights are consistently cold and the soil has cooled down (or is beginning to freeze). The goal is steady conditions, not extra warmth.
Quick reality check: timing shifts with climate. Wet winters call for extra attention to drainage and airy mulch. Very cold, reliably snowy winters are often easier on plants than yo-yo freeze-thaw weather.
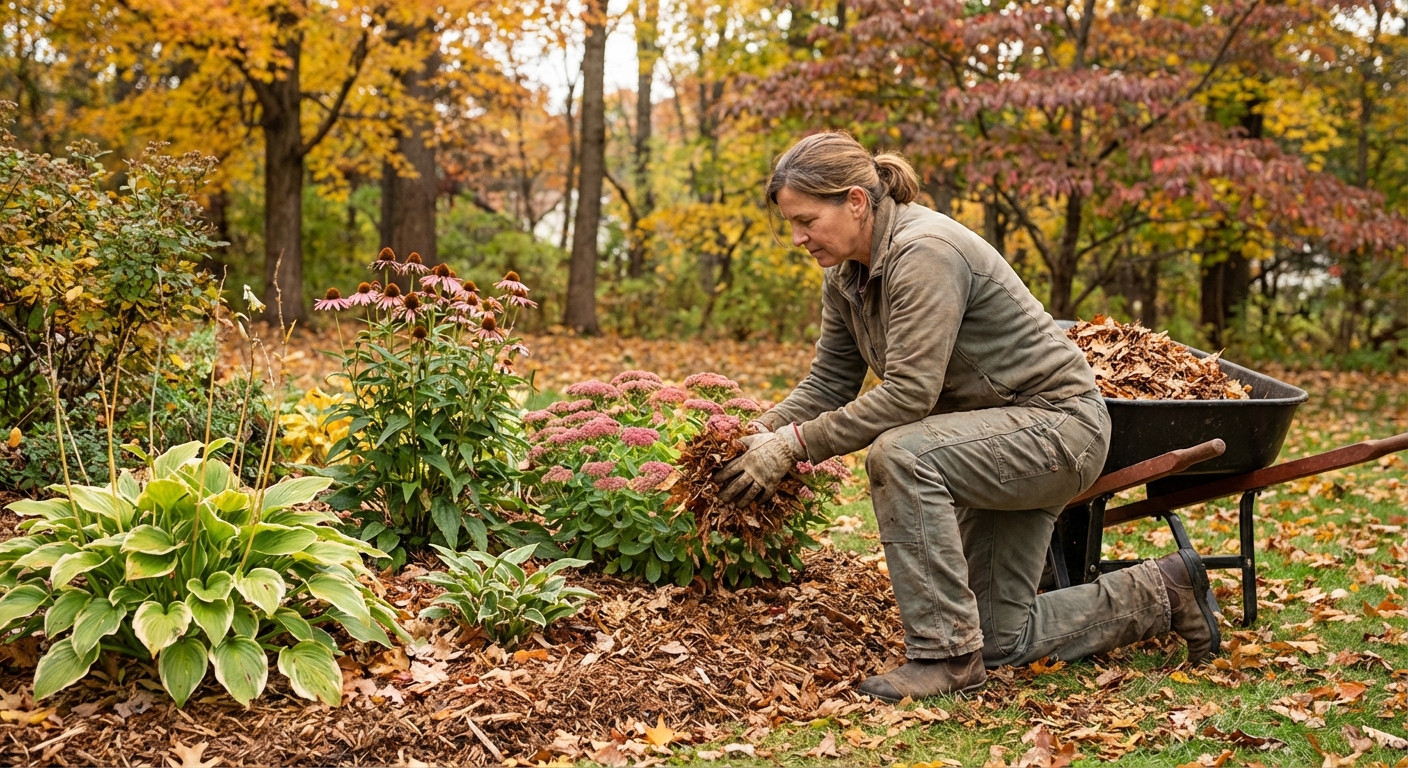
1) Walk the beds and make a quick map
This is the step everyone skips, then regrets in April when mystery sprouts appear in the “empty” space you just dug up.
- Snap a few photos of each bed from the same angle.
- Sketch a simple map: big clumps, new plantings, tender perennials, and bulbs.
- Mark anything you want to divide or move next spring.
Low-tech tip: I push a bamboo stake next to anything that disappears completely in winter, like hostas or bleeding heart.
2) Pull weeds while the soil is still workable
Weeds do not take winter off. Many happily overwinter as rosettes, then explode the moment spring warms up.
- Hand-pull what you can, especially anything with seed heads.
- Dig out deep roots on perennial weeds like dandelion and dock.
- Do not compost weeds that have gone to seed or have persistent roots. Bag them or solarize them.
One more gentle PSA: avoid stomping around beds when soil is saturated. Compaction now is a slow-motion problem you will still be fixing next summer.
The payoff is huge: less competition, fewer pest hideouts, and a cleaner start in spring.
3) Remove disease, compost wisely
Winter is when many garden diseases quietly overwinter in debris. This is where “clean up” is not about being tidy, it is about breaking cycles.
What to remove
- Powdery mildew, rust, leaf spot, blight: cut and remove affected foliage.
- Botrytis-prone material (mushy, gray mold): remove promptly.
- Any plant parts with blackened, oozing, or suspicious lesions: remove and discard.
What to do with it
- When in doubt, trash it. Many home compost piles do not heat evenly enough to reliably kill pathogens.
- If you hot-compost and know your pile consistently reaches hot-compost temps, you can compost some fungal issues, but virus- or bacteria-suspected plants are best bagged and discarded.
- Check local green waste rules for diseased plant material.
Wipe pruners with 70% isopropyl alcohol between problem plants. It feels fussy, but it is faster than dealing with the same disease next year.
4) Cut back vs leave standing
This is where gardeners get strong opinions. Here is my gentle, practical version: cut back what causes problems, leave what helps.
Usually cut back
- Floppy or disease-prone perennials that turn into soggy mats (beebalm with mildew, phlox with mildew, asters that collapse, anything that melted into mush).
- Peony foliage with leaf blotch or botrytis: cut it down and remove it rather than leaving it to overwinter.
- Plants you want to reduce self-seeding (cut seed heads before they drop).
Often worth leaving up
- Sturdy stems and seed heads for winter interest and birds (coneflower, rudbeckia, ornamental grasses).
- Hollow stems that provide habitat for beneficial insects.
If you leave stems for insects, hold off on the big spring tidy-up until conditions are truly waking up. A good rule of thumb is to wait until daytime temperatures are consistently above 50°F, then cut stems down. When you do, snip to about 6 to 8 inches so late sleepers still have a chance to emerge.
Also, not every perennial wants the same treatment. Some are happiest cut back after frost (hostas, daylilies). Others appreciate keeping their basal leaves (many heuchera and other evergreen or semi-evergreen perennials). Do not peel them bald. Just clean up what is rotting and keep crowns breathing.

5) Protect crowns: keep the neck clear
Many perennial winter losses are not from cold alone. A very common cause is freeze-thaw cycles and crown rot. The crown is the plant’s transition zone where stems meet roots, and it hates being buried under wet mulch too early.
- Keep mulch a couple inches back from the crown, like a little donut, not a volcano.
- For plants with sensitive crowns (lavender is famous for this), prioritize drainage and avoid heavy, soggy mulches.
- Do not pile compost thickly over crowns going into winter. Save richer top-dressing for spring.
6) Water before freeze-up
This one surprises people. Cold, dry wind can desiccate plants, especially evergreens and shallow-rooted perennials. If autumn has been dry, a good soak is real winter insurance.
- Water in the morning on a day above freezing.
- Aim for deep, infrequent watering rather than daily sprinkles.
- Pay extra attention to new plantings from late summer or fall. Their roots are still settling.
Stop once the ground is frozen solid and hoses become a wrestling match you do not need in your life.
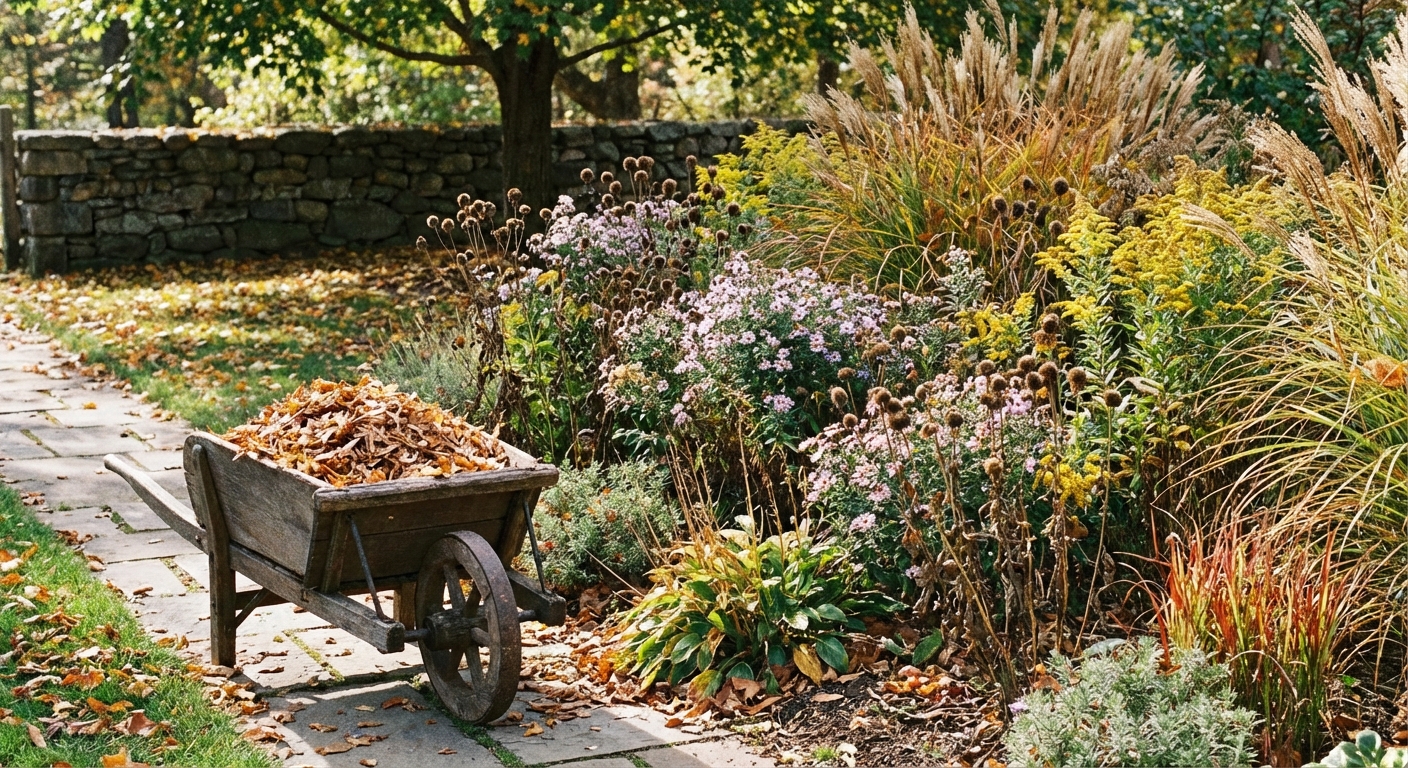
7) Mulch: timing and materials
Mulch is not a blanket that keeps plants “warm.” It is more like a thermostat. It helps soil stay consistently cold so roots are not tricked into waking up during warm spells. It also buffers extreme cold and helps prevent heaving during freeze-thaw cycles.
When to mulch
- After a few frosts and when the top couple inches of soil are cooling down.
- Often when the soil is consistently cold or just starting to freeze, usually late fall, not early fall.
How much mulch
- 2 to 4 inches for established beds.
- 4 to 6 inches over tender perennials or new plantings, while still keeping crowns clear.
Best mulches for perennial beds
- Shredded leaves: my favorite. They knit together, insulate well, and feed soil life.
- Straw (seed-free if possible): light, insulating, easy to remove in spring.
- Evergreen boughs: great wind protection over tender plants, and they let air through.
Avoid thick, wet layers of whole leaves unless you shred them. Whole leaves can mat and block airflow.
8) Extra protection for tender plants
Some perennials are hardy on paper but fussy in real life, especially in exposed or wet sites. If you have ever lost lavender, rosemary, agastache, or borderline mums, you have met this category.
Simple ways to protect tender plants
- Evergreen boughs laid loosely over the plant after the ground is cold.
- Hardware cloth cylinder around the plant, filled with shredded leaves for insulation (great for roses and tender crowns).
- Burlap windbreak for windy spots. Focus on wind, not warmth.
Skip plastic wrapped tightly around plants. It traps moisture and invites fungal trouble.
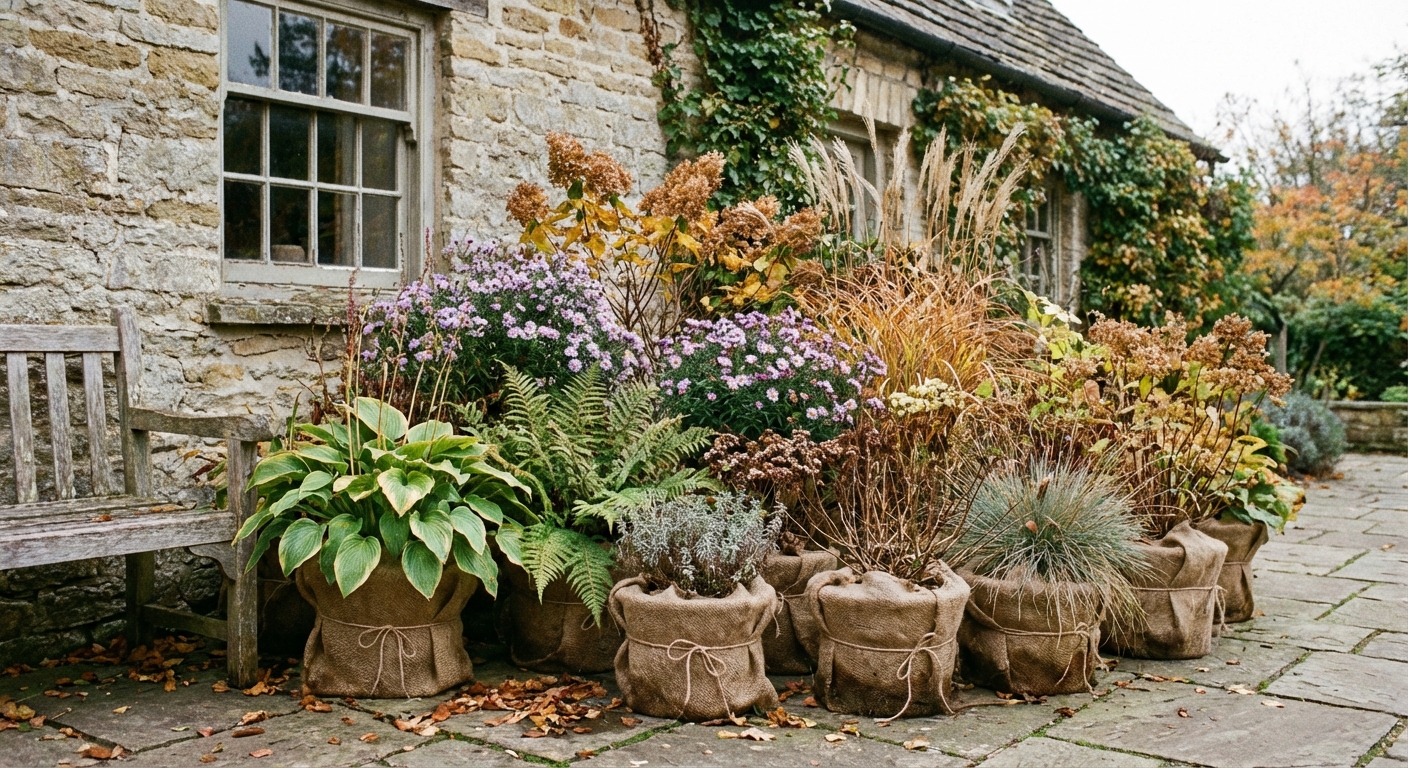
9) Perennials in containers
Container roots are far more exposed than in-ground roots. Even hardy perennials can be knocked back in pots.
Your options
- Sink the pot in the ground up to the rim, then mulch around it.
- Cluster pots together in a sheltered spot and wrap them with burlap, leaves, or bubble wrap around the outside of the pots (not over the soil surface).
- Move to an unheated garage or shed where temps stay cold but steadier. Check occasionally and water lightly only if the soil is bone dry.
Terra cotta can crack in freeze-thaw. If you love your clay pots, empty them or protect them somewhere dry.
10) Keep critters from moving in
Mulch is wonderful. It is also a five-star resort for voles and mice if it is piled right against stems.
- Keep mulch pulled back from crowns and woody bases.
- Reduce tall grass and dense weeds near beds where rodents travel.
- Consider a ring of hardware cloth around young woody perennials if vole pressure is high.
- Clean up fallen fruit and birdseed spills that attract visitors.
If you see tunneling in winter or early spring, gently pull mulch back from the most vulnerable plants and keep the area a little less cozy.
Quick fall checklist
- Photograph and label plants that disappear in winter
- Weed and remove seed heads you do not want
- Cut back and discard diseased foliage
- Leave sturdy stems and seed heads for birds and beneficials
- Water deeply if fall is dry
- Mulch after soil cools, keep crowns clear
- Protect tender plants from wind and freeze-thaw
- Winterize containers (sink, shelter, or insulate)
- Discourage rodents by avoiding mulch piles against stems
- Make a spring note list: divisions, gaps, and wish-list plants
Common mistakes to skip
Mulching too early
It can trap warmth and moisture, leading to rot and pest issues. Wait for cold nights and cooling soil.
Cutting everything to the ground
You lose habitat, winter interest, and sometimes protection for crowns. Be selective.
Smothering crowns with compost or mulch
Perennials need airflow at the base. Mulch around, not on top.
Ignoring new plantings
First-year perennials benefit most from steady moisture and careful mulching.
A final note from me and my ferns
Winterizing is not about perfection. It is about giving your perennials steady conditions and a healthier start next spring. Do the big things that matter, mulch at the right time, keep crowns breathing, and let the garden rest. You have earned it.