Yellow Leaves on Houseplants: 7 Causes and Fixes
Yellow leaves happen to the best of us. I have been gardening long enough to know that chlorophyll is not just a pigment; it is basically a mood ring. When a houseplant starts paling out, it is saying, “Something in my routine is off.”
The good news: yellowing is usually fixable. The trick is to look at which leaves are yellowing, how fast it is happening, and what the soil and light situation look like. Let’s play plant detective together.
First, a quick sanity check
Before we jump into the seven causes, ask these three questions. They narrow things down fast.
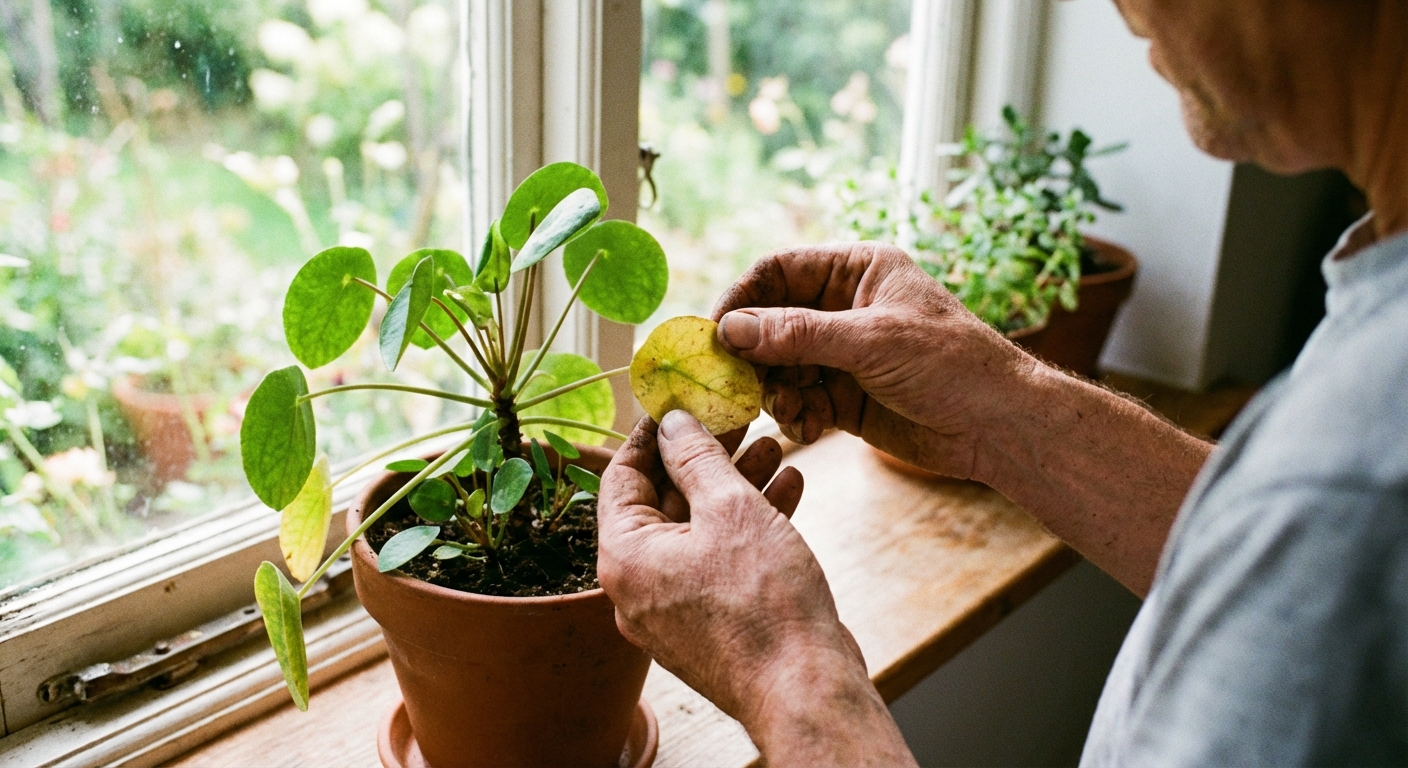
- Is it just one or two older, lower leaves? Some yellowing is normal as plants age and recycle nutrients.
- Is the soil wet, damp, or bone dry? Most yellow leaf problems begin at the roots.
- Has anything changed recently? New spot, new pot, new season, new watering schedule, a heat vent turning on, even a “helpful” roommate.
If the plant is otherwise pushing new growth and only the oldest leaves are fading, you may simply be seeing normal leaf turnover. If many leaves are yellowing at once, keep reading.
1) Overwatering (one of the most common)
If I could only fix one thing in most homes, it would be this. Overwatering is not about how much water you pour in. It is about how often the roots stay wet.
What it looks like
- Yellow leaves that may feel soft or a bit limp
- Soil that stays wet for days
- Drooping even though the pot is heavy
- Sometimes a musty smell
Why it happens
Roots need oxygen. When soil stays soggy, air pockets disappear and roots begin to suffocate and rot. A struggling root system cannot move water and nutrients properly, so leaves yellow.
How to fix it
- Pause watering until the top 1 to 2 inches of soil are dry (more for succulents, less for moisture lovers).
- Check drainage. Your pot needs a drainage hole. No hole, no mercy.
- Empty saucers after watering. Do not let the pot sit in runoff.
- If you suspect root rot, slide the plant out and inspect. Healthy roots are firm and light colored. Rotten roots are brown or black and mushy. Trim the bad roots, repot into fresh mix, and water lightly.
Clara tip: If your plant is in a decorative cachepot, lift the nursery pot out after watering and let it drain fully in the sink. Then put it back.
2) Underwatering (dry roots can yellow too)
Yellow leaves are not always a sign of “too much.” Chronic thirst can also turn leaves yellow, especially if the plant is cycling through wilting and recovery.
What it looks like
- Dry, crispy yellow edges or tips
- Soil pulling away from the pot sides
- Plant droops, then perks up after watering
- Leaves may drop after turning yellow
Why it happens
When the root zone gets too dry, fine feeder roots die back. Less root function means less nutrient uptake and less stability, so older leaves are sacrificed first.
How to fix it
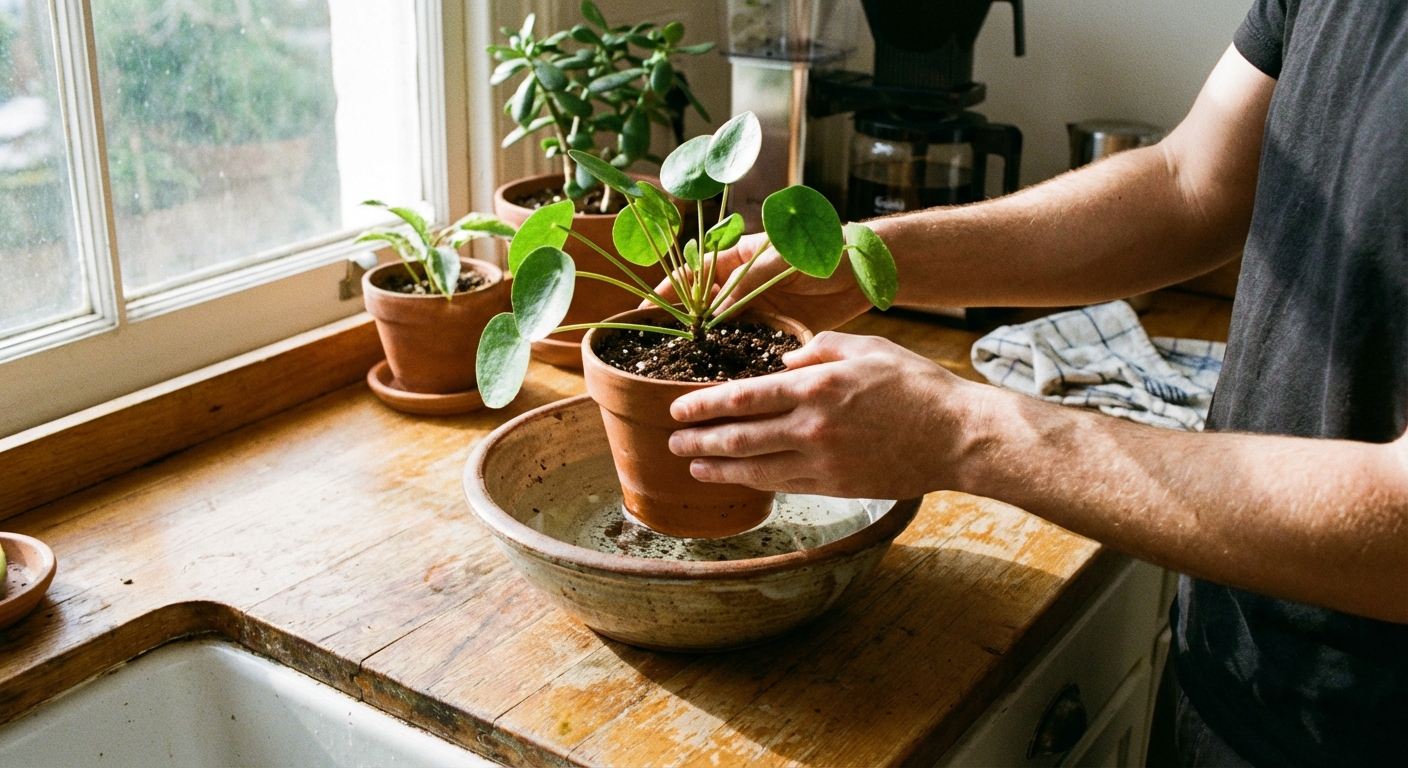
- Rehydrate thoroughly: water until it runs out the drainage holes, then let it drain.
- If soil is hydrophobic (water races through), bottom-water for 20 to 40 minutes so the mix can soak evenly.
- Set a simple rhythm: check moisture with a finger or wooden skewer weekly. Water when the plant actually needs it, not when the calendar says so.
3) Light problems (too little or too much)
Light is plant food. When it is off, leaves often yellow as the plant rebalances what it can support.
Too little light
Signs: pale yellowing, slow growth, leggy stems, smaller new leaves.
Fix: move the plant closer to a bright window, ideally bright indirect light for many common houseplants (pothos, philodendrons, peace lily). Rotate the pot weekly so growth stays even. If you have winter gloom, a modest grow light can be a game changer.
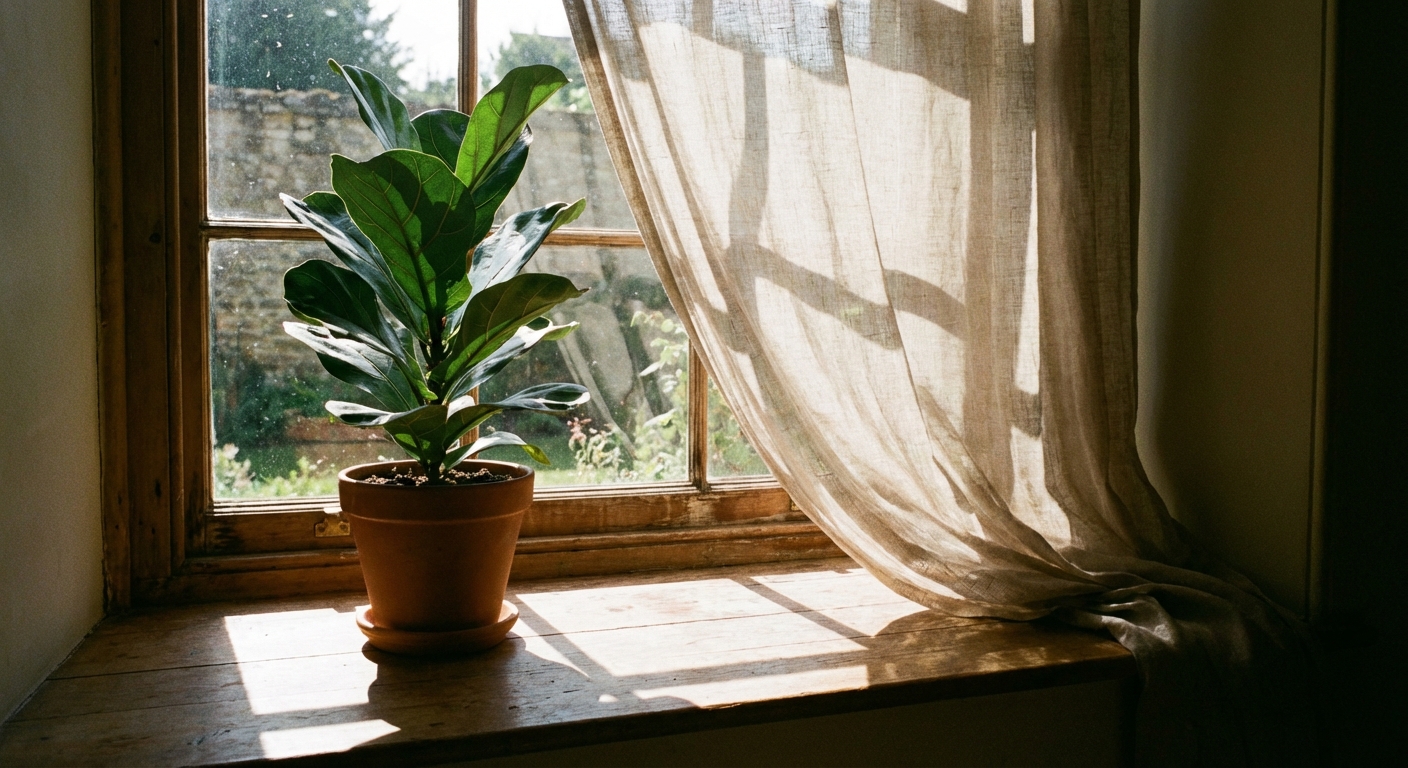
Too much light
Signs: yellowing paired with tan or brown crispy patches, especially on leaves facing the window. This often happens when a plant is moved suddenly into direct sun.
Fix: pull it back from harsh direct rays or use a sheer curtain. New growth should emerge healthier once conditions stabilize. Damaged patches will not turn green again, and that is okay.
4) Nutrient issues (too little or too much)
Yellow leaves can be a nutrition story, but it is rarely solved by panic-fertilizing. More is not always better. Plants like a balanced diet, not a buffet.
What it looks like
- Underfed: gradual yellowing, often starting with older leaves; weak growth
- Overfed: yellowing plus brown tips, white crust on soil, leaf drop after fertilizing
Why it happens
Nitrogen helps keep leaves green. Too little can cause overall yellowing. Too much fertilizer can burn roots or cause salt buildup, which blocks water uptake and stresses foliage.
How to fix it
- If you have not fertilized in months and the plant is actively growing (spring and summer), feed with a balanced houseplant fertilizer at half strength every 4 to 6 weeks.
- If you suspect overfertilizing, flush the pot: run room-temperature water through the soil for a few minutes and let it drain completely. Then pause fertilizing for 4 to 8 weeks.
- Repotting refreshes nutrition. If the plant has been in the same soil for 2+ years, a fresh mix often solves mysterious yellowing.
Clara tip: Fertilize only when the plant is growing and getting enough light to use those nutrients. Feeding a plant stuck in low light is like handing espresso to someone who needs a nap.
5) Soil and root stress
Even with a good watering schedule, the wrong soil (or a stressed root system) can keep roots too wet or too dry in all the wrong ways.
What it looks like
- Soil stays wet on top and heavy in the pot
- Water pools or runs down the sides without soaking in
- Yellowing plus general “blah” growth
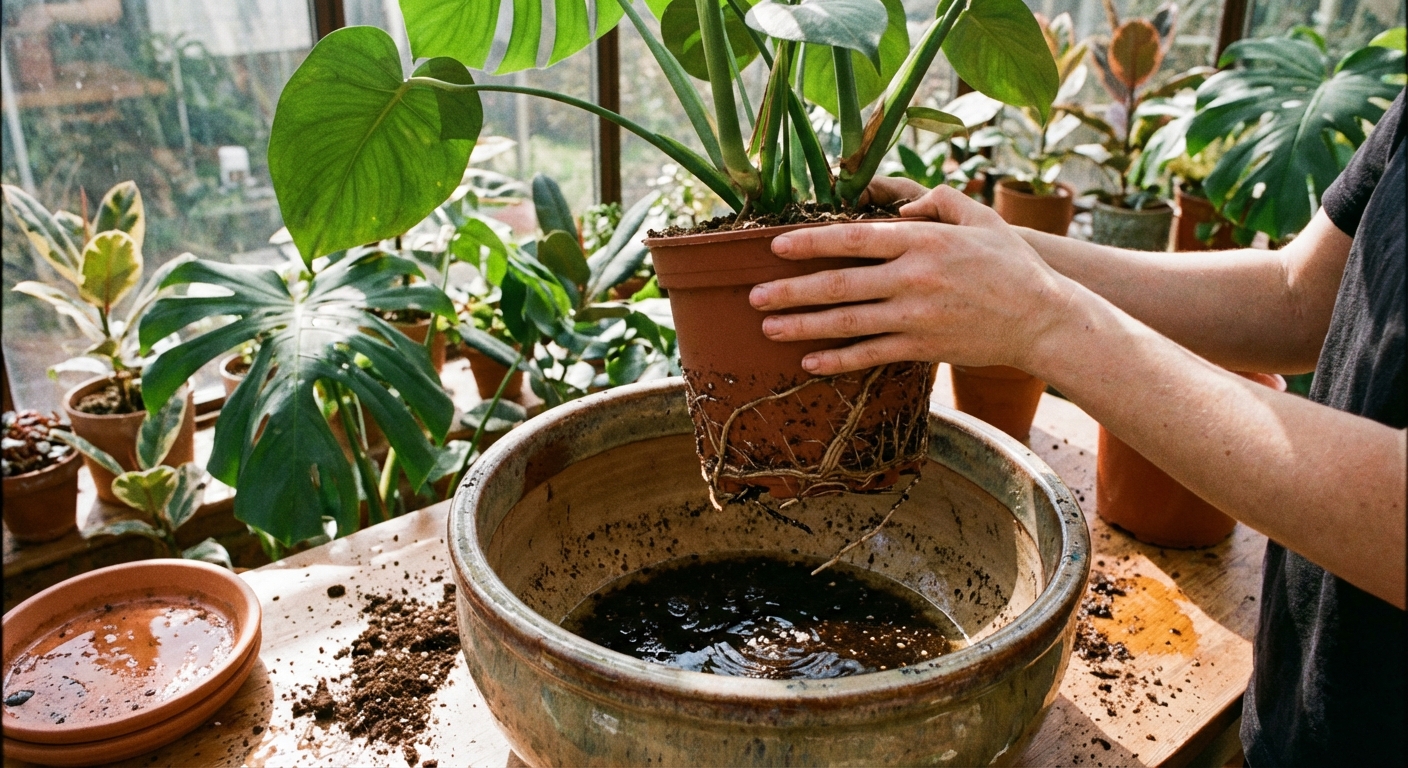
- Pot dries out very fast, and roots may circle the inside of the pot (root-bound)
Why it happens
Many bagged “potting soils” are too dense for long-term indoor pots, especially once they break down. Compacted soil has fewer air spaces, and roots struggle. On the other end, a very root-bound plant can dry out too quickly and have trouble taking up water and nutrients evenly.
How to fix it
- Repot into a chunkier mix. For many tropical houseplants, a blend with potting mix plus perlite and orchid bark improves airflow.
- Choose the right pot size. Oversized pots hold extra wet soil for longer, which invites yellowing. If the plant is root-bound, sizing up 1 to 2 inches wider is usually plenty.
- Do not add rocks to the bottom. In containers, this can create a perched water layer that keeps roots sitting in wet soil longer, not shorter.
Clara note: If yellowing started right after repotting, a little transplant shock is also possible. Keep care steady, avoid fertilizing for a few weeks, and let the roots settle in.
6) Temperature and humidity stress
Indoor air can be surprisingly dramatic. Heating vents, AC blasts, cold windows, and winter dryness can all trigger yellow leaves, especially on tropical plants.
What it looks like
- Yellowing after a cold night near a window
- Leaves yellowing and dropping after a draft
- Yellowing with crispy edges in very dry air
Why it happens
Temperature swings and low humidity increase water loss through leaves. The plant closes stomata, growth slows, and older leaves may yellow and drop to conserve resources.
How to fix it
- Keep plants away from vents and exterior door drafts.
- Aim for stable temps. Many common houseplants are happiest around 65 to 80°F.
- Boost humidity gently for sensitive plants (calatheas, ferns): a humidifier works better than misting. Grouping plants can help too.
Clara confession: I talk to my ferns, but I also run a little humidifier near them in winter. Encouragement plus humidity is the winning combo.
7) Pests and disease
Sometimes yellowing is not a care routine issue at all. It is an uninvited guest siphoning sap, or an infection stressing the plant.
Pests
What it looks like:
- Yellow stippling or mottling
- Sticky residue on leaves or nearby surfaces (honeydew)
- Fine webbing (spider mites)
- Small bumps on stems (scale)
- Tiny flying gnats around wet soil (fungus gnats)
How to fix it:
- Inspect closely: look under leaves and along stems in bright light.
- Quarantine the plant away from others while you treat.
- Rinse and wipe: a lukewarm shower and a gentle wipe-down removes many pests.
- Treat with insecticidal soap or horticultural oil, repeating every 7 to 10 days for a few rounds to catch new hatchlings.
- For fungus gnats, let the top couple inches dry, use sticky traps, and consider BTi dunks in your watering can.
Disease
What it looks like: leaf spots (brown or black) with yellow halos, mushy patches, or a quick decline that does not match your watering and light habits.
How to fix it: remove the worst leaves, keep foliage dry (water the soil, not the leaves), improve airflow, and avoid crowding plants. If spots keep spreading, isolate the plant and consider replacing the soil or, in severe cases, the plant. (It is okay to choose peace in your living room.)

Quick pattern match
Use this quick pattern match. It is not perfect, but it gets you close.
- Bottom leaves yellow first, soil wet: overwatering or poor drainage
- Bottom leaves yellow first, soil dry: underwatering or inconsistent watering
- New growth yellowing first: nutrient issue, high pH or alkalinity (sometimes from hard water), or root stress (also check pests)
- Yellow plus brown crispy patches on the window side: too much direct sun
- Yellow plus webbing or sticky leaves: pests
If you are stuck between two causes, start with the easiest, lowest-risk change: check moisture and drainage, then adjust light gently. Give the plant 2 to 3 weeks to respond before changing five things at once.
New leaves yellow, green veins
If your newest leaves are yellow but the veins stay green (interveinal chlorosis), think micronutrients, especially iron. This is often connected to soil pH creeping too high or mineral-heavy water.
- Try this first: switch to filtered, rain, or distilled water for a few weeks and avoid overfertilizing.
- If it persists: use a fertilizer that includes micronutrients or an iron chelate labeled for houseplants, and follow the label carefully.
Clara reality check: Older fully yellow leaves usually do not bounce back, but catching chlorosis early can help new growth come in greener.
What to do with yellow leaves
A yellow leaf usually will not turn green again, especially older leaves that have fully faded. The goal is to stop the spread and support healthy new growth.
- If the leaf is mostly yellow, snip it off with clean scissors close to the stem.
- If it is only slightly yellow, you can leave it until the plant re-stabilizes. The plant may still pull nutrients from it.
- Always remove fallen leaves from the soil surface to discourage fungus and gnats.
When yellowing is normal
Sometimes yellowing is simply part of life indoors.
- Seasonal slowdown: Many plants drop a few leaves in fall and winter when light decreases.
- Acclimation: A newly purchased plant may yellow and drop a couple leaves while it adjusts to your home’s light and humidity.
- Natural aging: Older leaves on the bottom fade as new growth arrives.
If the plant is otherwise healthy, take a breath. You are not failing. You are learning the language your plant speaks.
Yellow-leaf rescue plan
- Check the soil (finger test or skewer) and adjust watering first.
- Confirm drainage (holes, no standing water, appropriate pot size).
- Assess light and move the plant gradually if needed.
- Inspect for pests, especially under leaves.
- Hold steady for 2 to 3 weeks and watch new growth.
If you want, tell me what plant you have, where it sits (window direction matters), and how often you water. I can help you narrow it down without the guesswork.