Why Are My Tomato Leaves Turning Yellow?
Yellow tomato leaves can feel like a personal insult, especially when you have been watering, fussing, and maybe even whispering encouragement. The good news is that yellowing is your plant talking to you. The trick is learning its language.
In tomatoes, yellow leaves usually trace back to a few big buckets: watering stress, nutrient imbalance, disease, and sometimes pests or environmental damage (like herbicide drift or cold snaps). Below, I will help you narrow it down with photo-style descriptions and very specific next steps, focusing on the most common culprits.
Quick check before you diagnose
Before we jump into the big causes, take 60 seconds to observe. It saves hours of guessing.
- Which leaves are yellow? Lower, older leaves first usually point to nutrients or normal aging. New growth yellowing first often points to iron issues (covered briefly below), sulfur deficiency, viral issues, or root problems like rot or compaction.
- Is the yellowing even or spotty? Even yellowing suggests watering or nutrient deficiency. Spots, rings, or lesions suggest disease.
- Are the leaves wilting too? Yellowing plus persistent wilt can indicate fusarium or verticillium wilt, bacterial wilt, or root stress from soggy soil or root rot.
- What has the weather been doing? A stretch of rain, heat, or a cold snap makes stress-related yellowing much more likely.
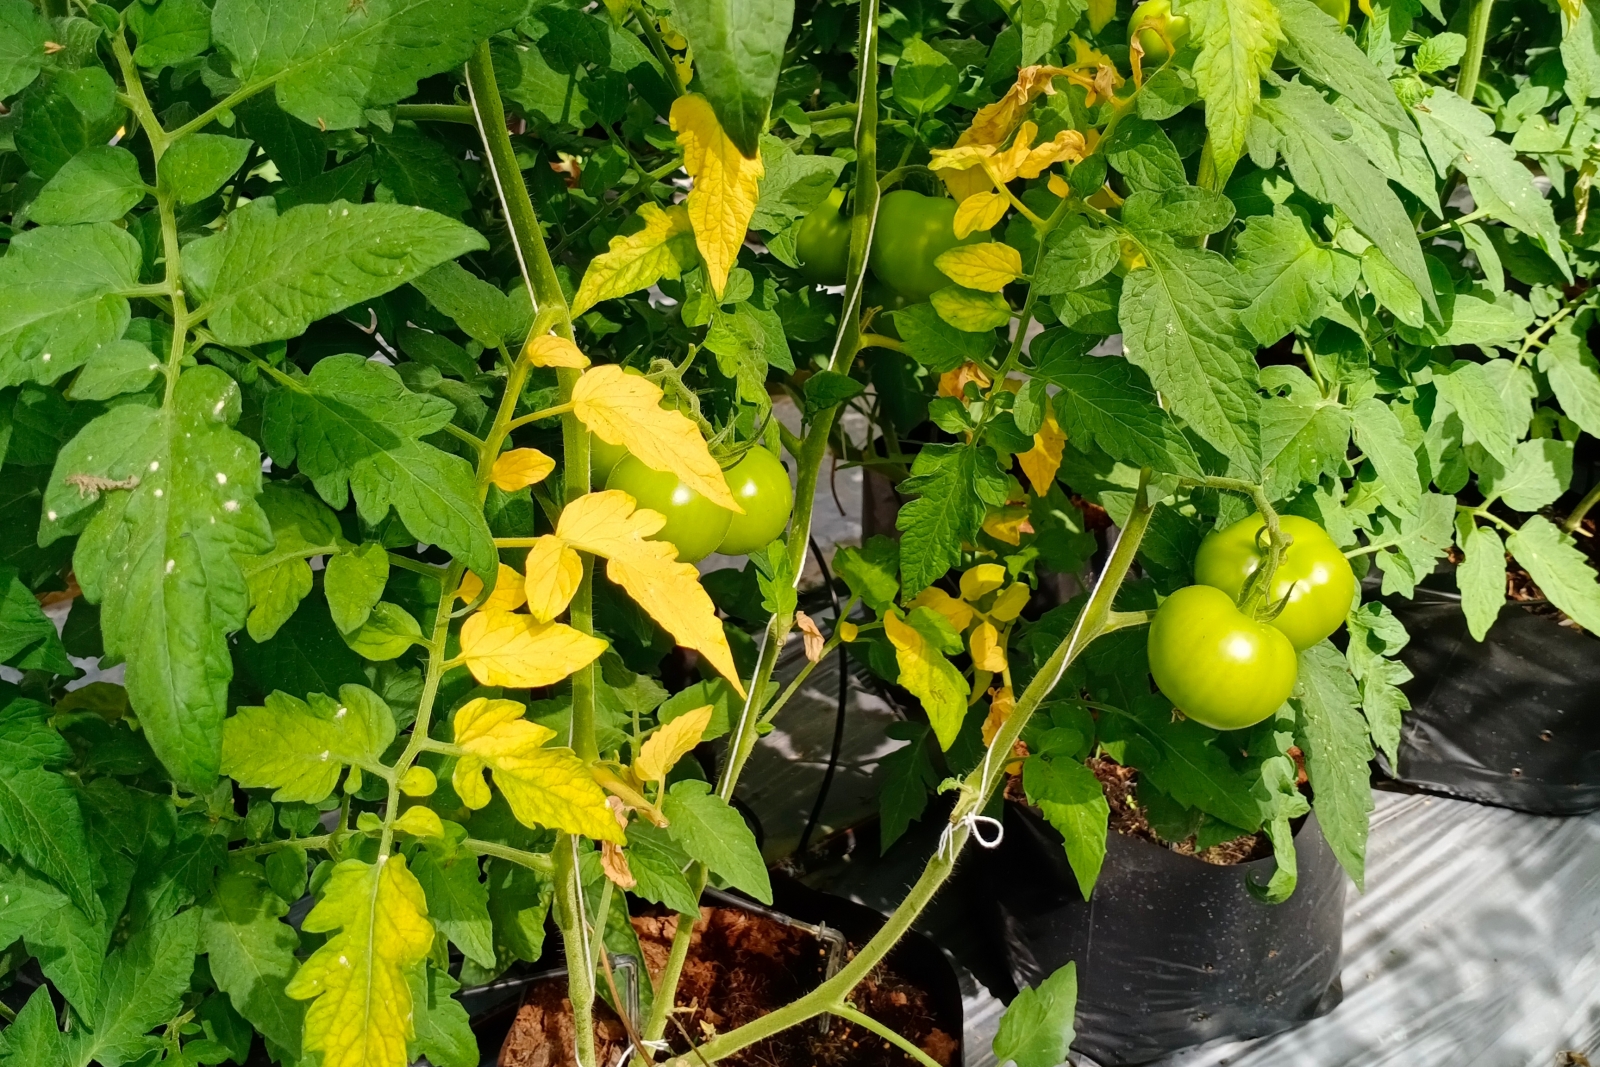
Cause 1: Nitrogen deficiency
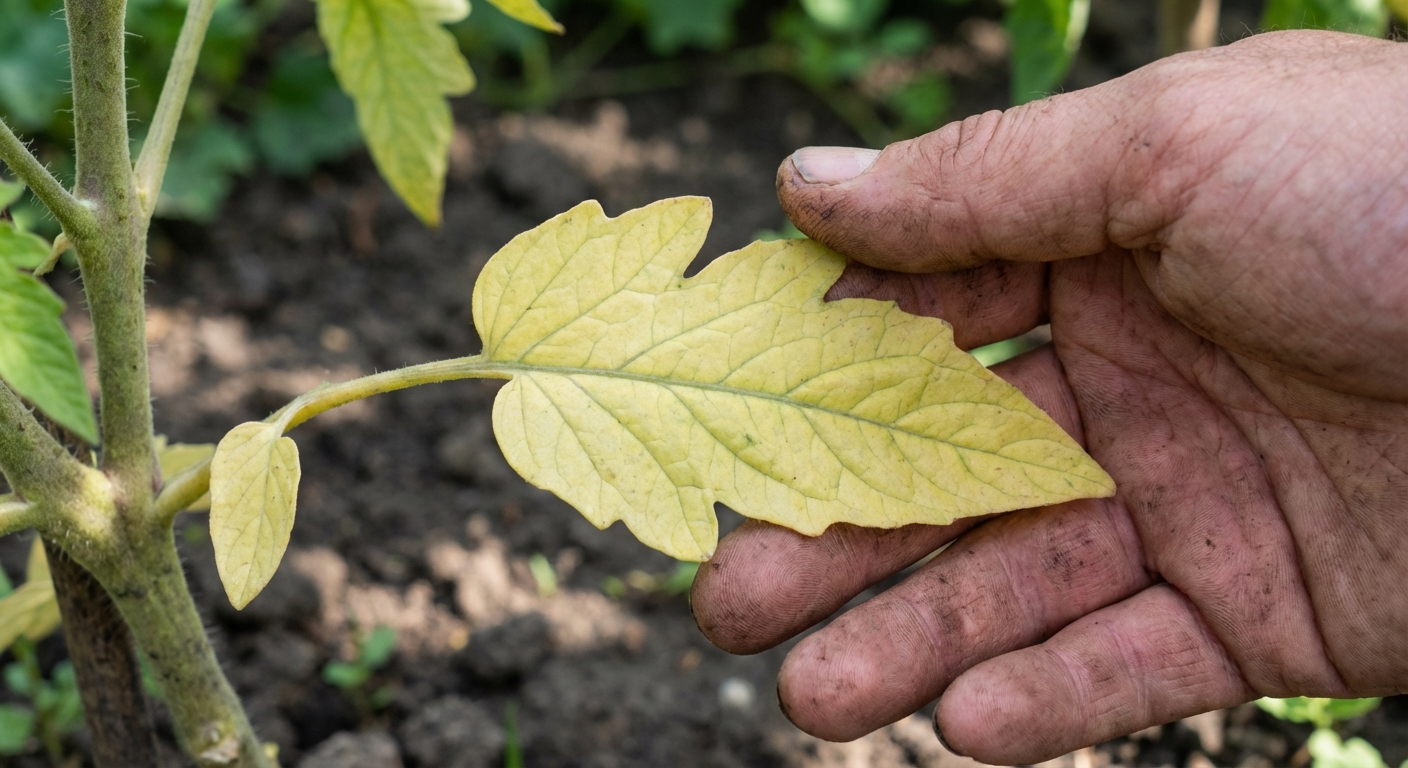
What it looks like (photo-style clues)
- Yellowing starts on older, lower leaves first.
- The whole leaf fades to a pale yellow-green, often fairly uniform.
- Plant growth may look slow, with thinner stems and smaller leaves.
Why it happens
Nitrogen is mobile in the plant, so tomatoes will “steal” nitrogen from older leaves to feed new growth. In containers and sandy soils, frequent watering and heavy rain can also wash nitrogen down out of reach. In raised beds, it can happen too, especially if the mix drains fast.
Fix (step-by-step)
- Confirm with location. If the yellowing is mostly on the bottom third and the top is still reasonably green, nitrogen is a prime suspect.
- Feed gently but promptly. Use a nitrogen-forward fertilizer, such as fish emulsion, blood meal, or an organic vegetable fertilizer with a higher first number (for example 4-1-2).
- Apply correctly. Water the soil first, then apply liquid feed around the root zone, not on leaves.
- Recheck in 5 to 10 days. Old yellow leaves may not turn fully green again, but you should see healthier new growth.
- Prevent it. Add compost and a slow-release organic fertilizer at planting time, and mulch to reduce nutrient leaching.
Clara note: If your plant is already setting lots of fruit, avoid overdoing nitrogen. Too much can make a gorgeous jungle with fewer tomatoes.
Cause 2: Overwatering (or poor drainage)
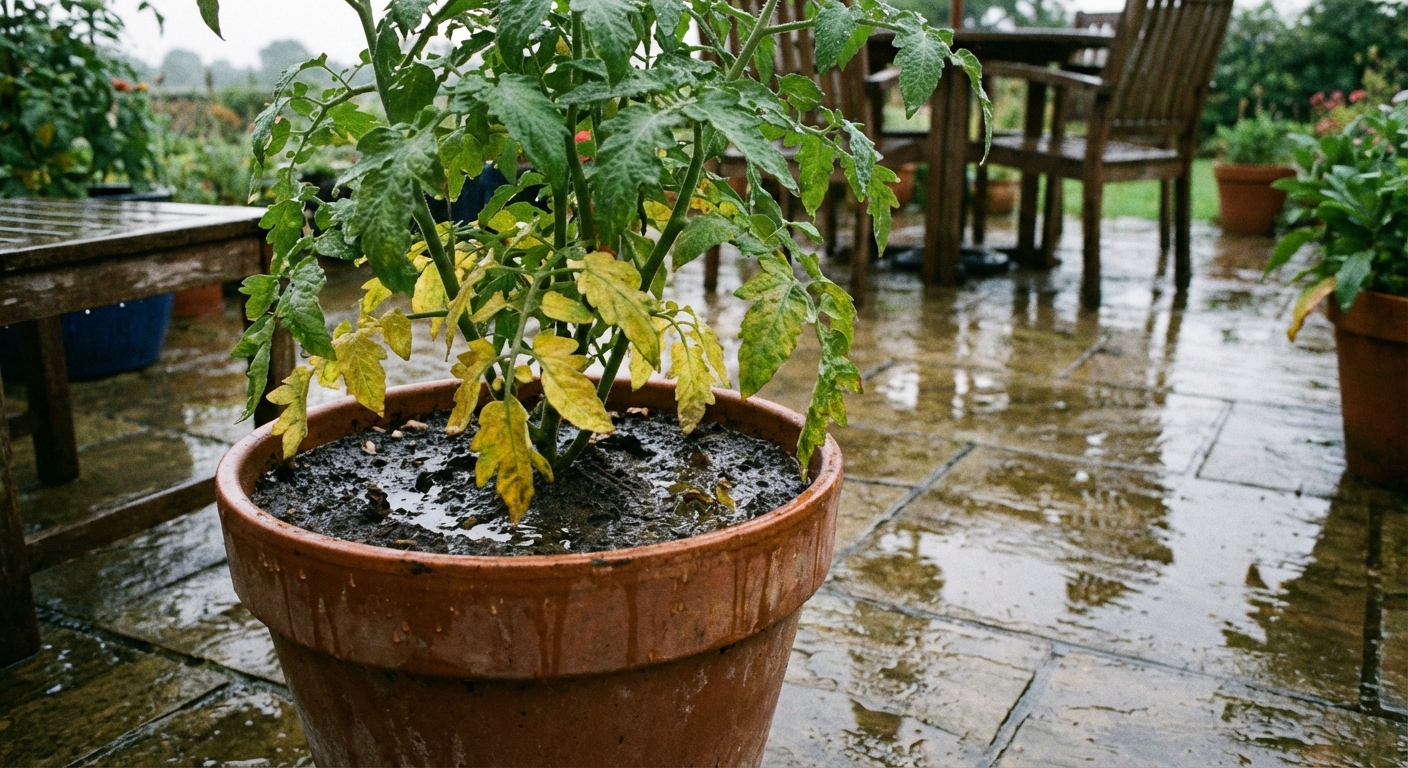
What it looks like (photo-style clues)
- Leaves turn yellow and soft, often starting low.
- Soil stays dark and wet for days.
- Plant may look a bit droopy even though the soil is wet.
- You might see edema: small blister-like bumps on leaf undersides that turn corky.
Why it happens
Tomato roots need oxygen. Constantly wet soil suffocates roots, reducing nutrient uptake and triggering yellowing. In containers, missing drainage holes or compacted mix makes it worse. Prolonged wetness can also open the door to root rot pathogens.
Fix (step-by-step)
- Do the finger test. Stick your finger 2 inches into the soil. If it is wet, do not water.
- Improve drainage. In-ground, loosen soil around the drip line and add compost. In containers, ensure drainage holes are open and the mix is fluffy, not heavy garden soil.
- Water deeper, less often. Aim for thorough watering, then allow the top 1 to 2 inches to dry before watering again.
- Mulch correctly. Use straw or shredded leaves, but keep mulch a couple inches away from the stem to reduce stem rot risk.
- Remove the worst leaves. Snip off yellow leaves that are not recovering to improve airflow.
Cause 3: Underwatering (drought stress)
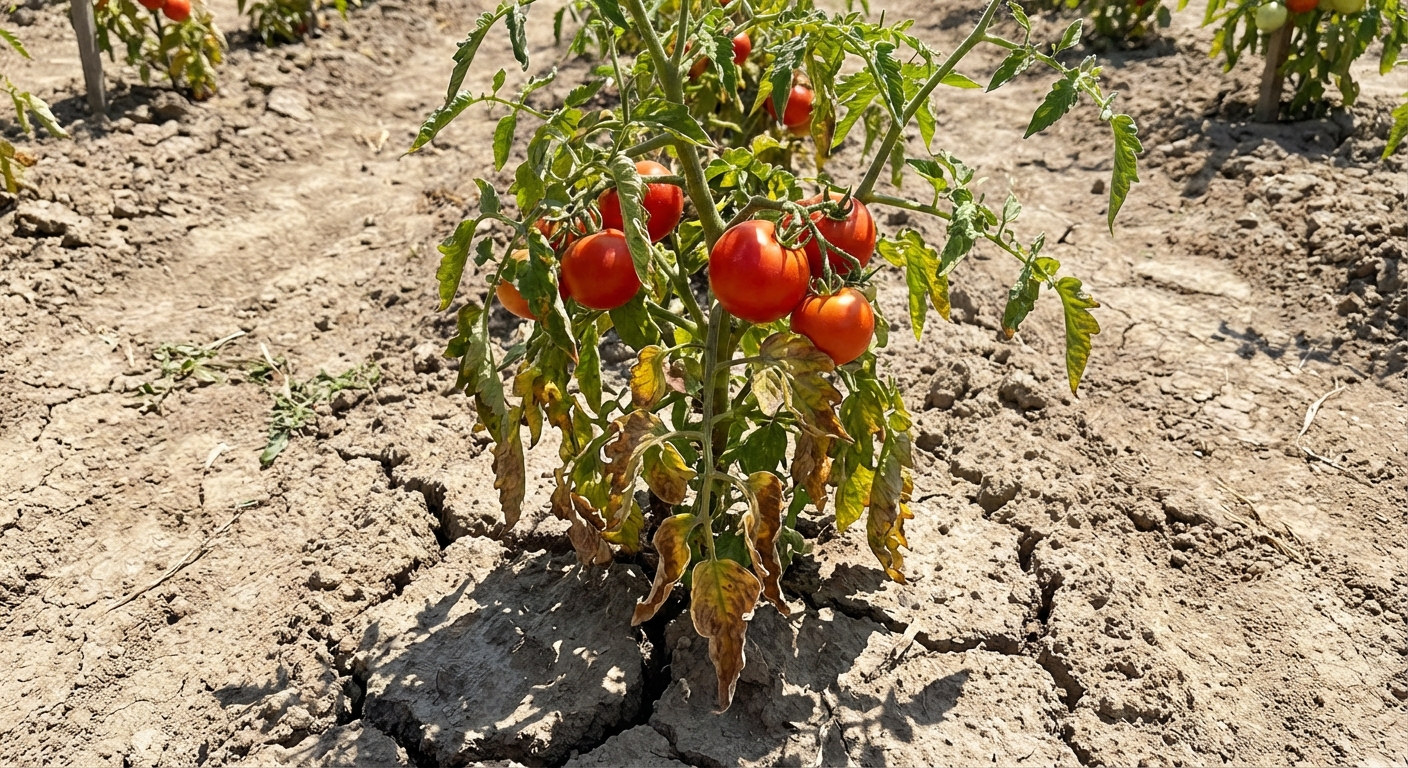
What it looks like (photo-style clues)
- Leaves may turn yellow, then papery and brown at the edges.
- Plants look wilted in the afternoon and may not fully bounce back by evening.
- Soil is dry several inches down, sometimes pulling away from the sides of a pot.
Why it happens
When water is inconsistent, tomato plants shed older leaves to conserve moisture and protect new growth and fruit. Drought stress can also lead to blossom end rot later because calcium transport depends on steady moisture.
Fix (step-by-step)
- Water slowly and deeply. Use a soaker hose or a gentle stream at soil level for several minutes so water penetrates.
- Check depth. After watering, soil should be moist 6 to 8 inches down for in-ground plants.
- Mulch. Add 2 to 3 inches of mulch to reduce evaporation.
- Container reset. If potting mix has become hydrophobic, bottom-water the pot in a tub for 20 to 30 minutes, then let it drain fully.
- Set a rhythm. In peak summer, containers may need daily watering. In beds, 1 to 2 deep waterings per week is common, depending on heat and soil type.
Cause 4: Magnesium deficiency
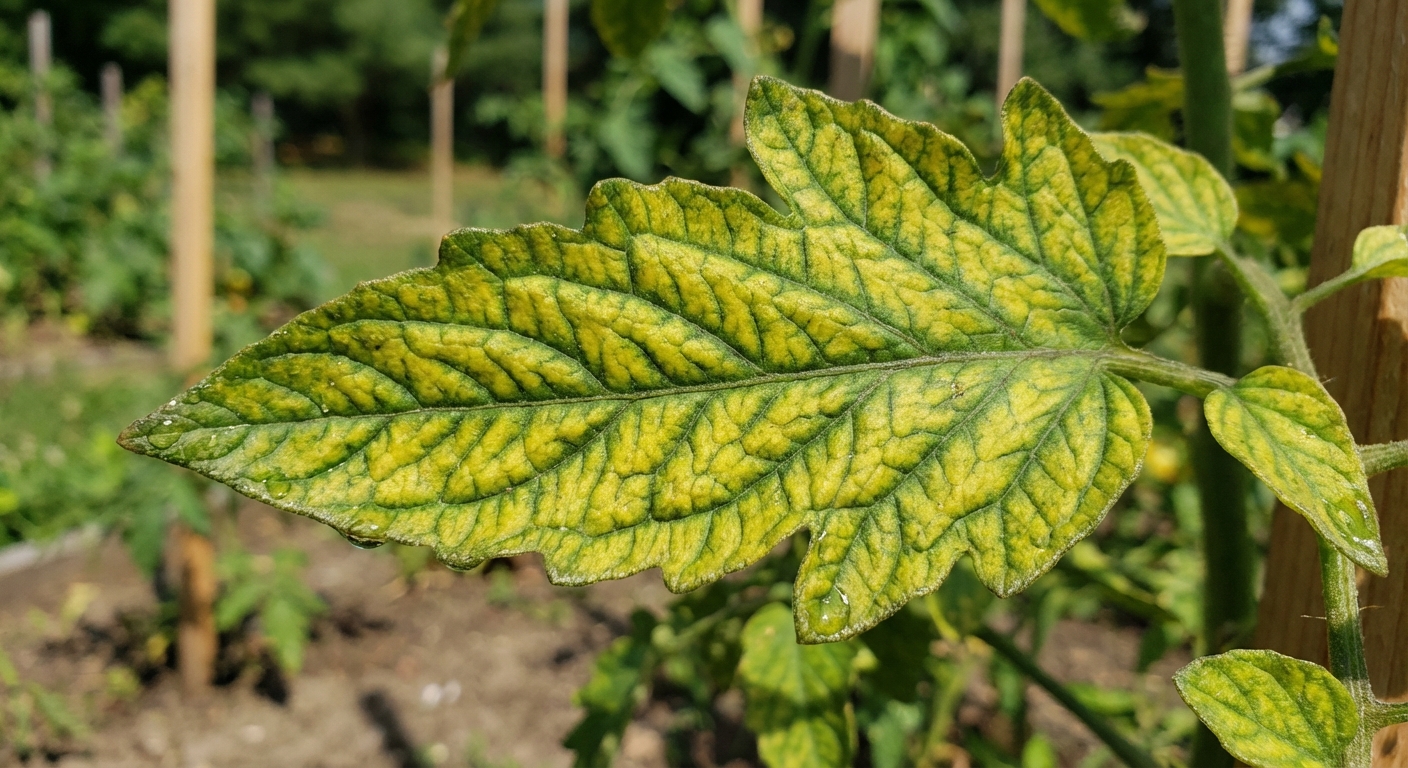
What it looks like (photo-style clues)
- Yellowing starts on older leaves.
- You see green veins with yellow tissue between them, a fishbone or marbled look.
- In advanced cases, leaf edges may brown and crisp.
Why it happens
Magnesium is central to chlorophyll. Deficiency is more common in containers, sandy soils, or when potassium and calcium are high and compete for uptake.
Fix (step-by-step)
- Confirm the pattern. Interveinal yellowing on older leaves is the classic clue.
- Use Epsom salt carefully. Dissolve 1 tablespoon per gallon of water and water the root zone. Repeat in 2 to 3 weeks if needed. If you can, confirm with a soil test first, especially if you have been fertilizing regularly.
- Go long-term. Add compost and consider a balanced organic fertilizer. If your soil is chronically low, a soil test helps you avoid chasing symptoms.
- Remove badly damaged leaves. They will not recover fully and can become disease-prone.
Caution: Epsom salt is not a cure-all. If you already have plenty of magnesium, adding more can throw other nutrients out of balance.
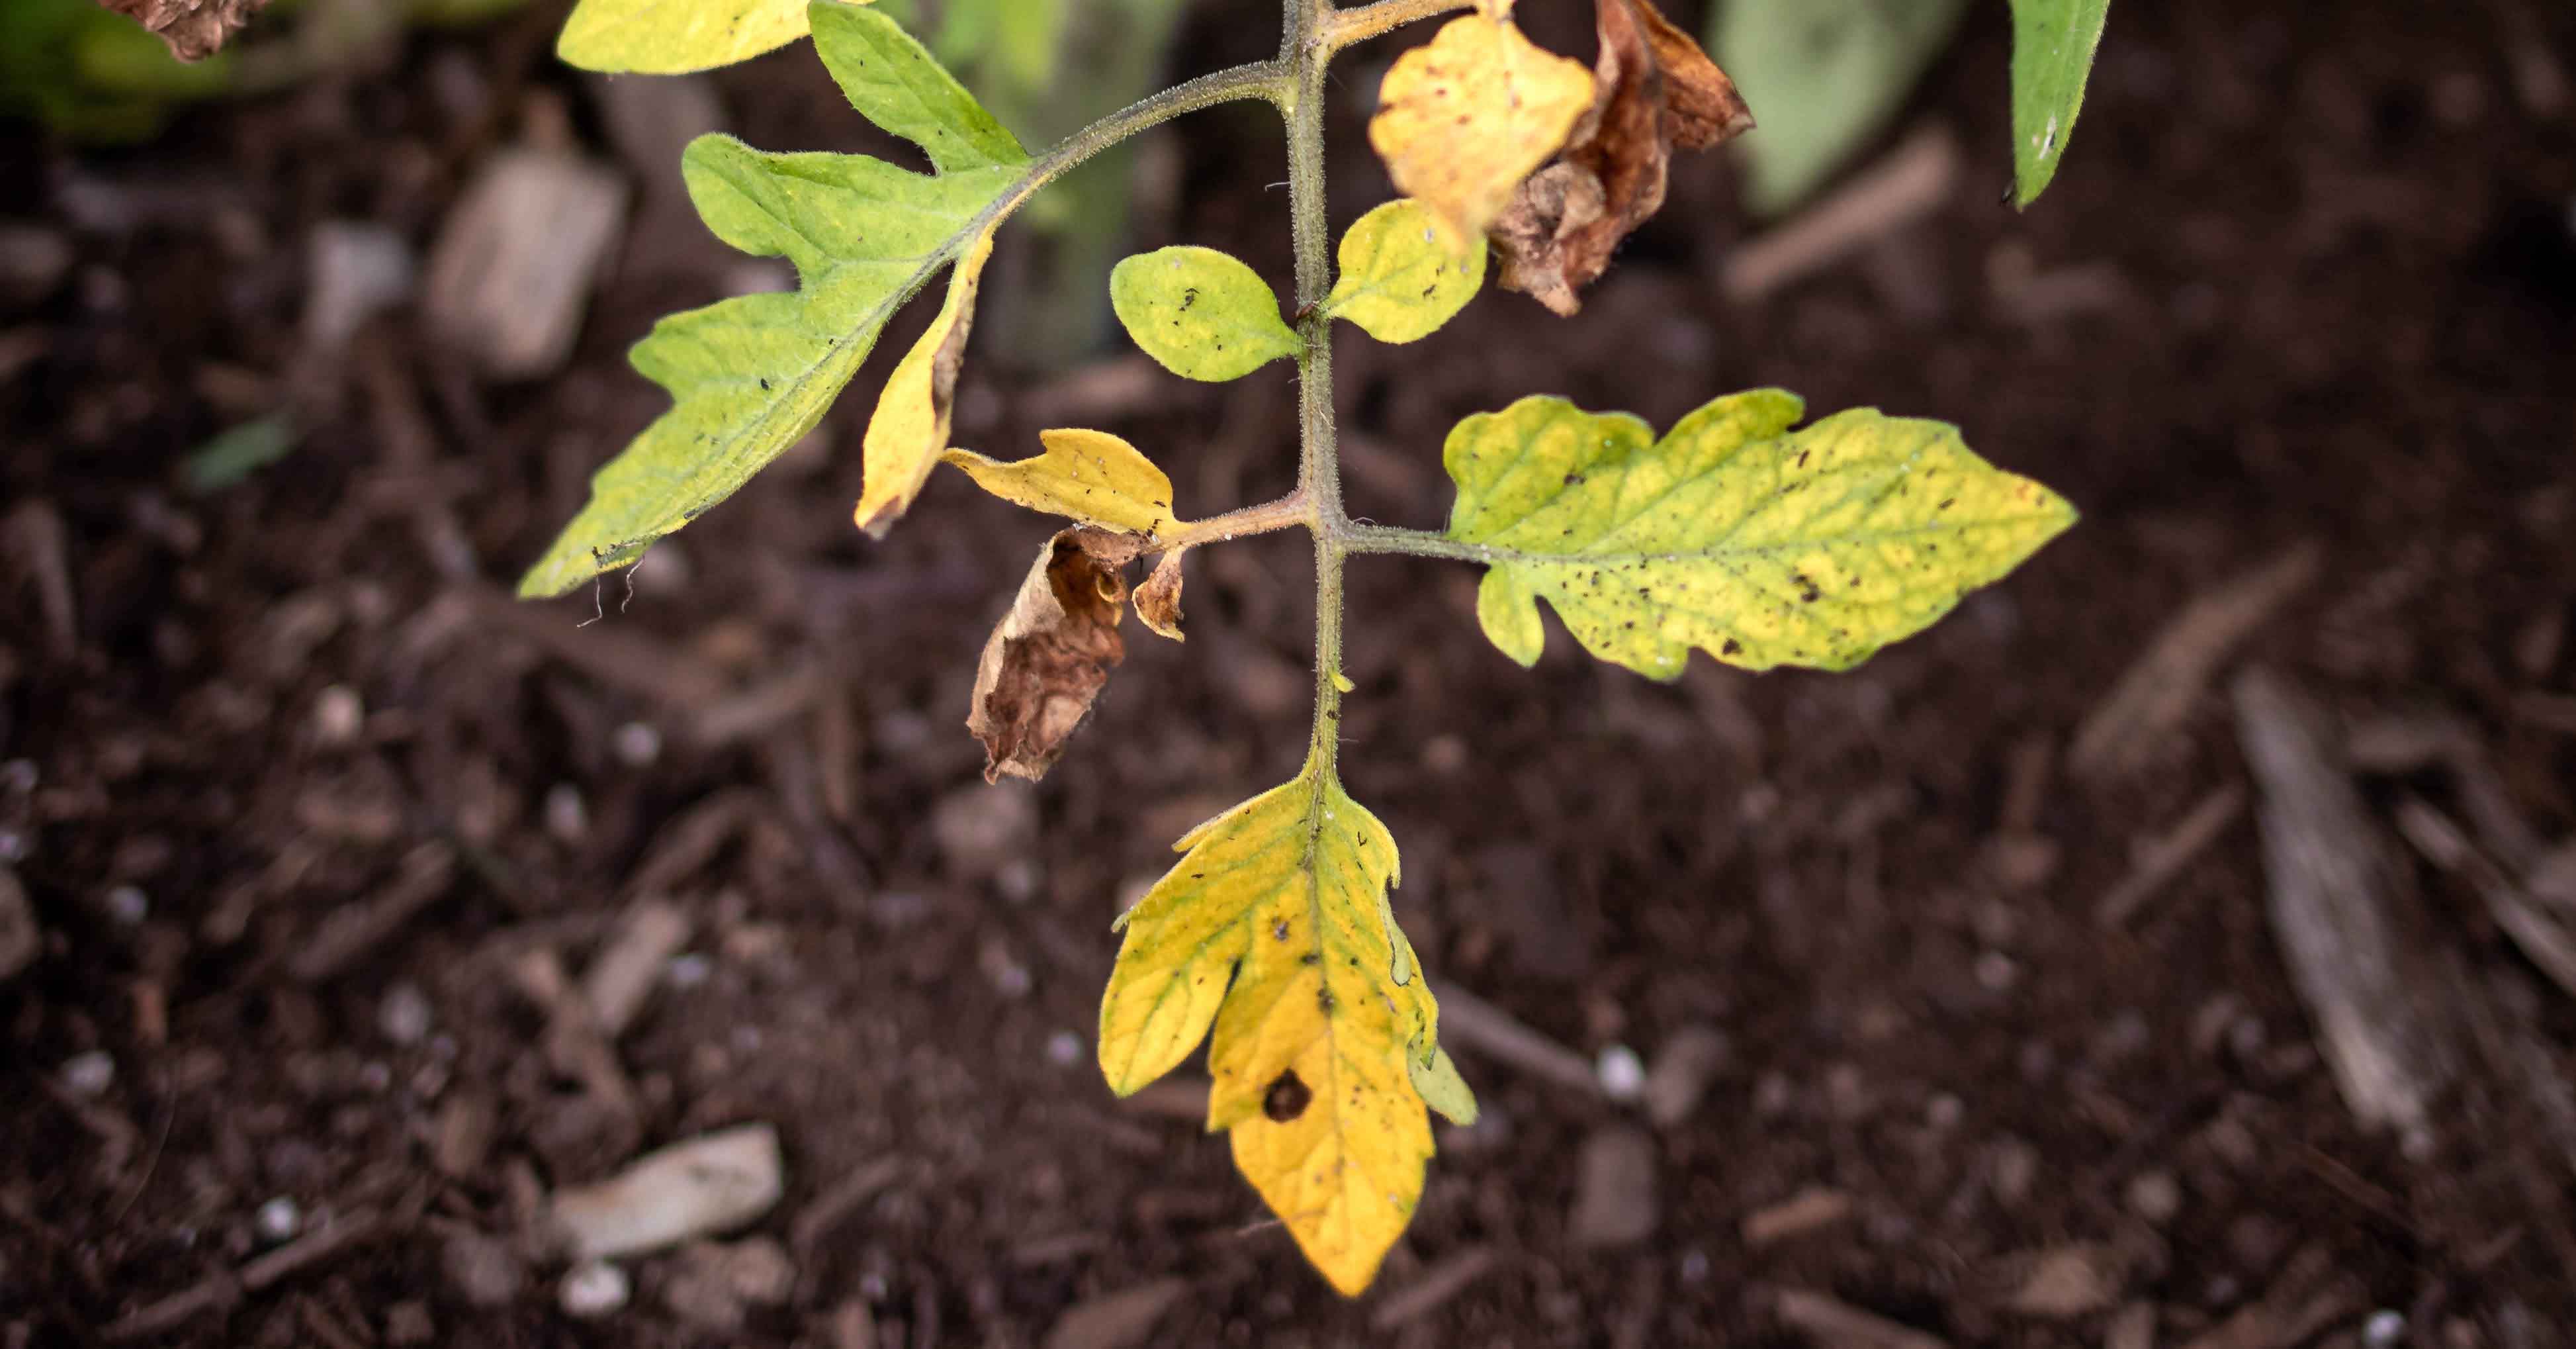
Cause 5: Early blight
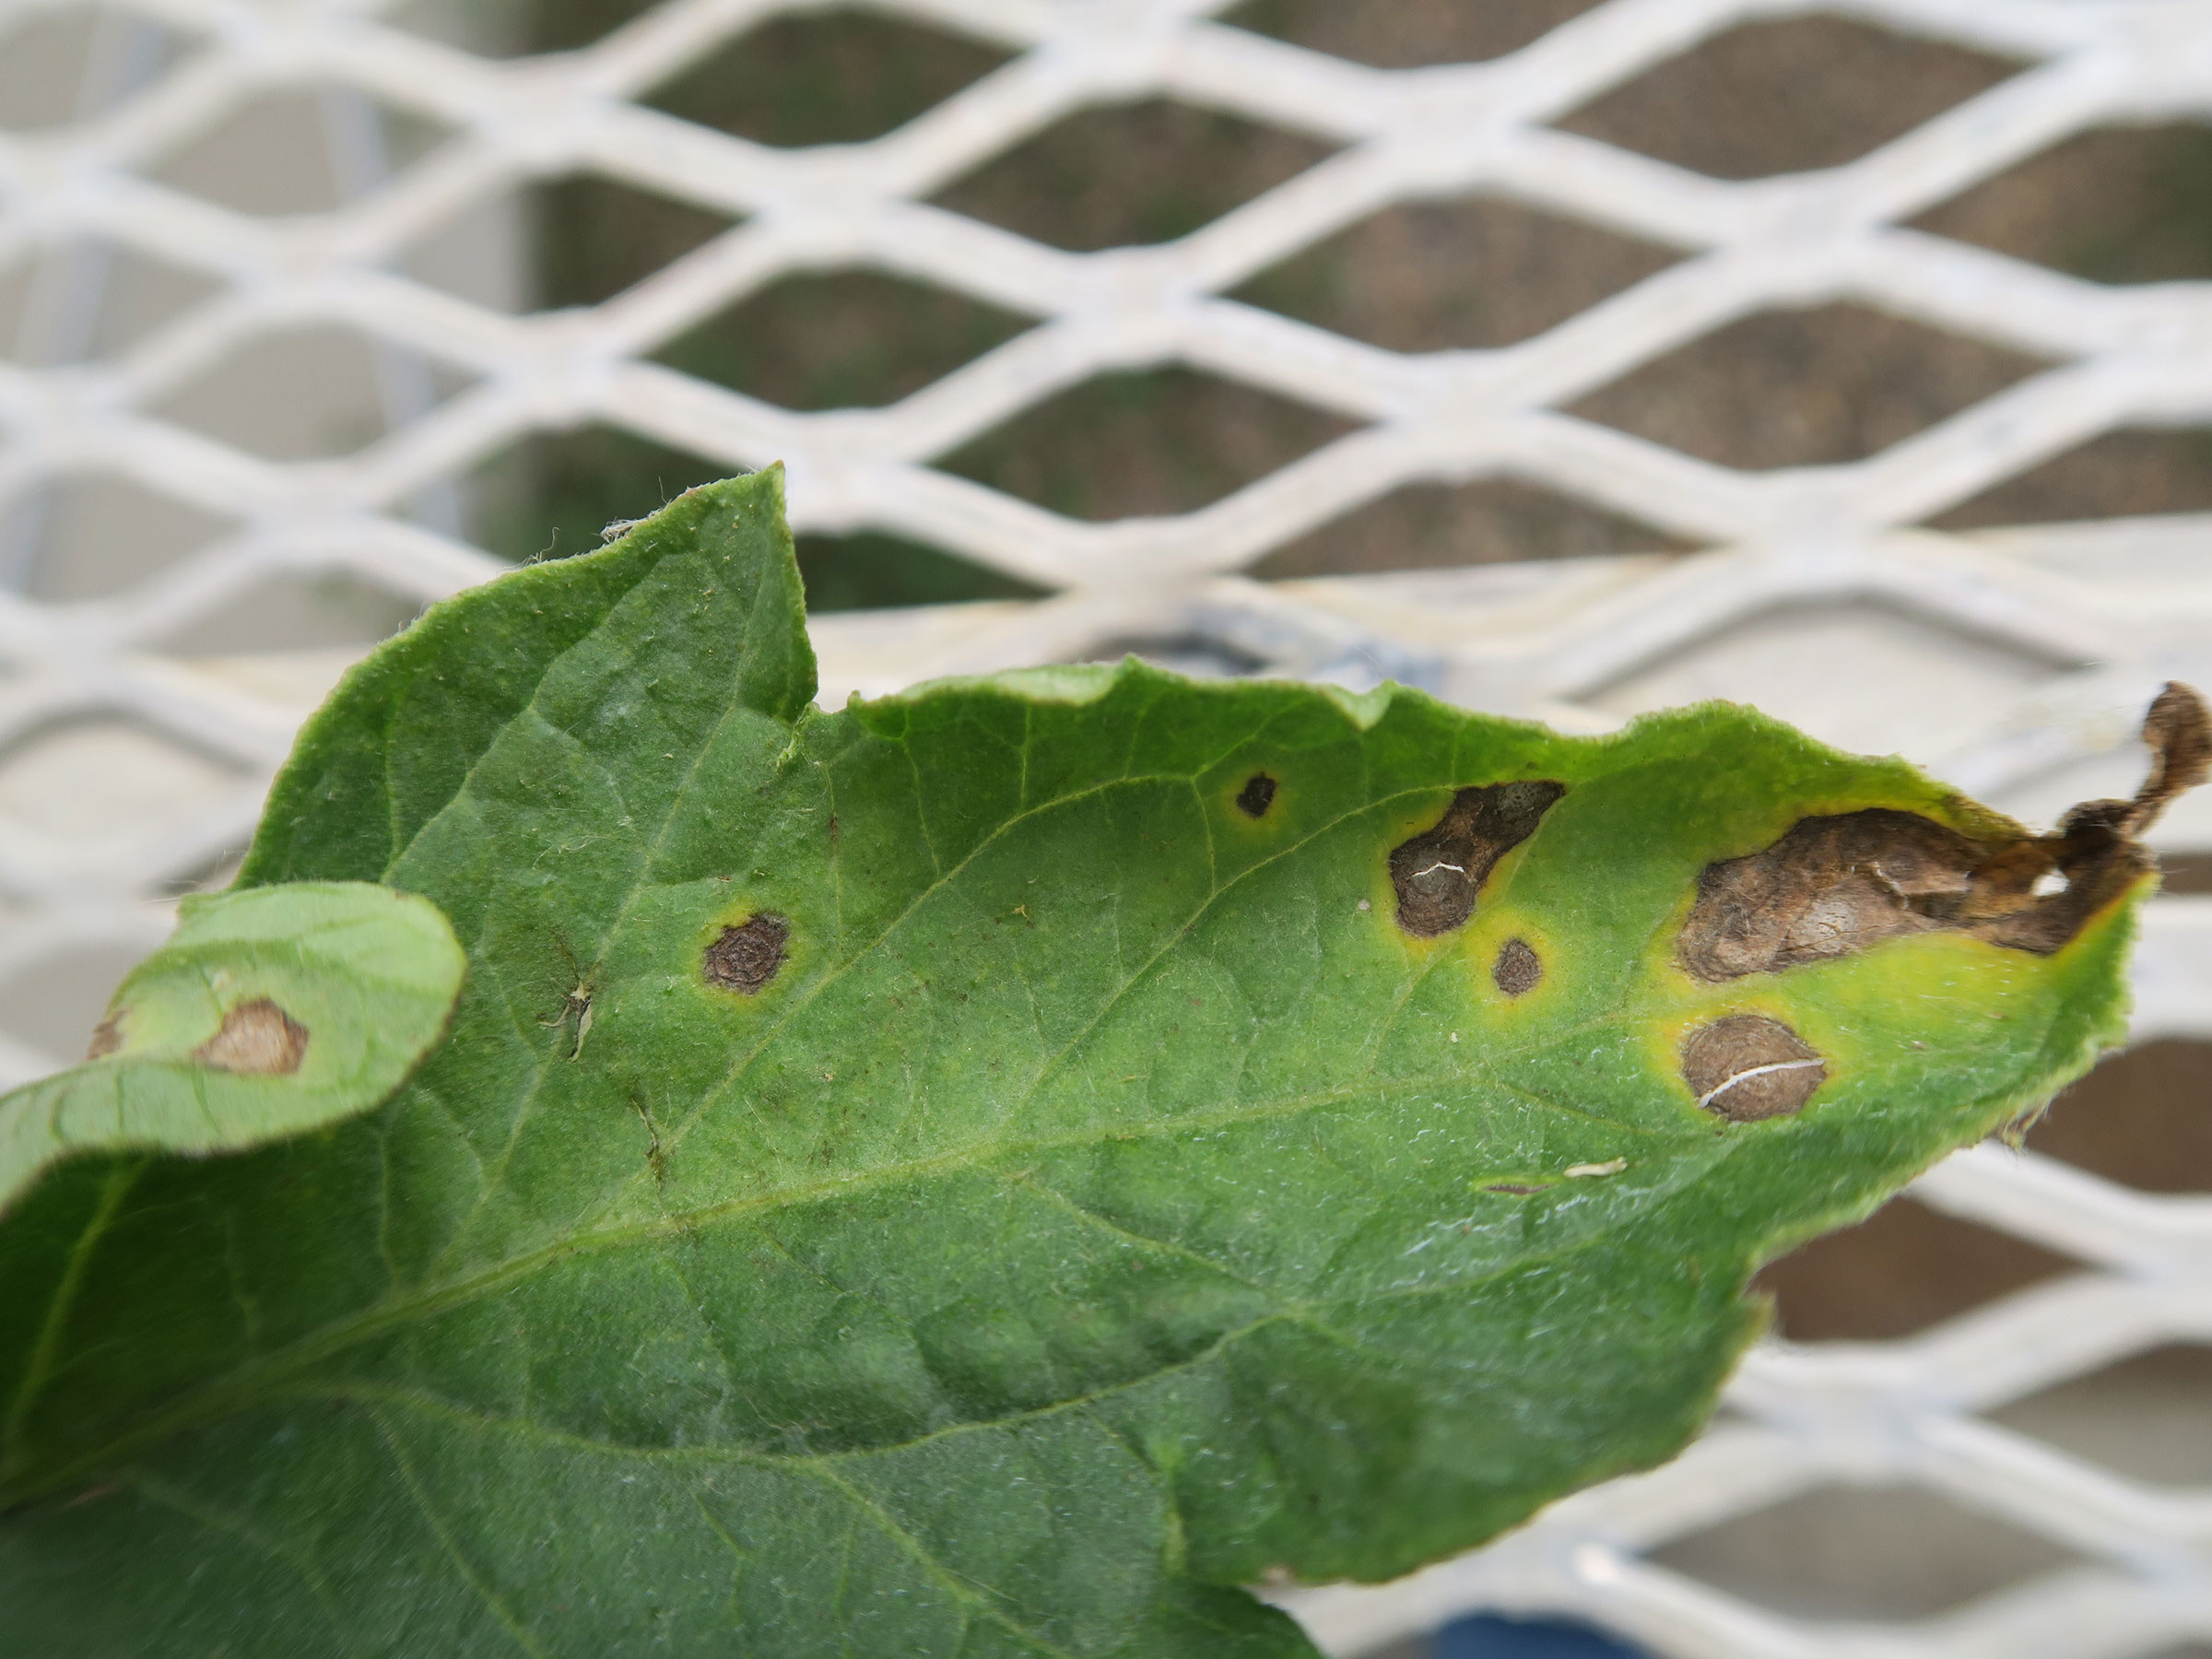
What it looks like (photo-style clues)
- Begins on lower leaves.
- Brown spots with subtle concentric rings like a target.
- Spots expand, leaf turns yellow around the lesions, then drops.
- Often shows up after warm, humid weather or overhead watering.
Why it happens
Early blight is a fungal disease (Alternaria) that survives in plant debris and splashes up from soil. Once it gets established, it climbs the plant.
Fix (step-by-step)
- Prune immediately. Remove affected lower leaves. Do not compost them. Bag them or trash them.
- Stop splashing. Water at soil level only. Add mulch to reduce soil splash.
- Increase airflow. Stake or cage plants, and avoid crowding.
- Use an organic fungicide if spreading. Copper spray or Bacillus subtilis products can slow it. They work best when started early. Follow the label, reapply as directed (often after rain), and avoid overusing copper long term.
- Clean up at season end. Remove all tomato debris and rotate crops for 2 to 3 years if possible.
Cause 6: Septoria leaf spot
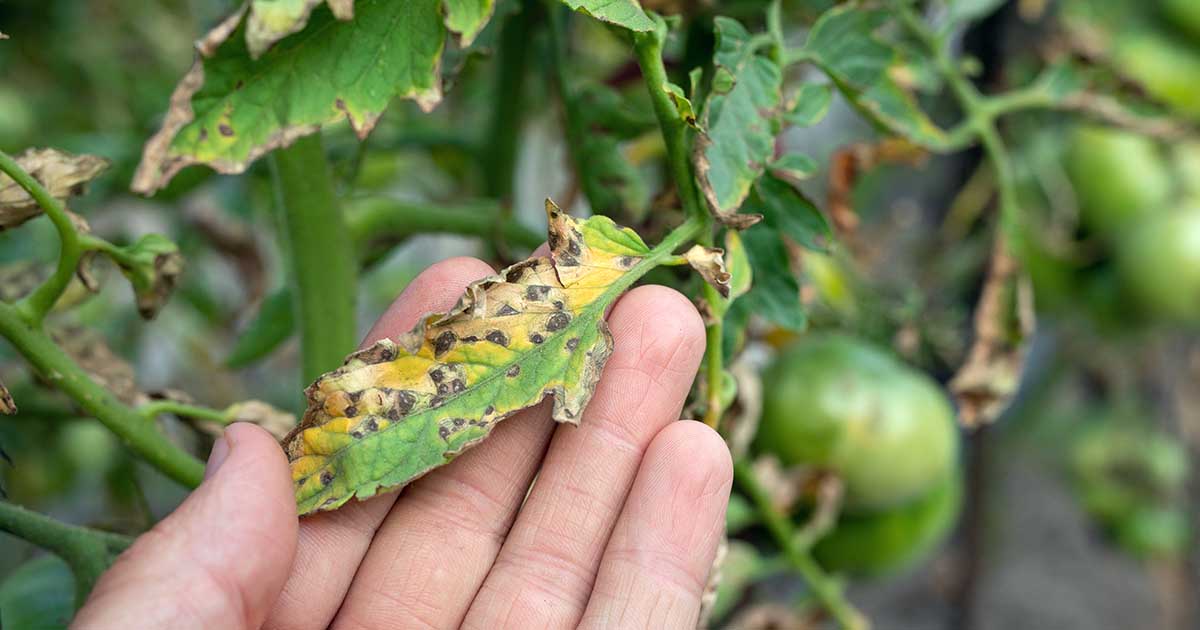
What it looks like (photo-style clues)
- Lots of tiny spots, often more numerous than early blight.
- Spots can have tan or gray centers with darker edges.
- Lower leaves yellow, then drop, leaving the plant looking bare from the bottom up.
Why it happens
Septoria thrives in warm, wet conditions and spreads mainly by water splash and wind-driven rain. It can also hitch a ride when you brush wet foliage or move from plant to plant with damp hands or tools, so it is worth being cautious.
Fix (step-by-step)
- Remove infected foliage. Start with the lowest leaves. Sanitize pruners between plants (and anytime you cut obviously infected tissue) with alcohol wipes or a disinfectant spray.
- Mulch and water correctly. Mulch reduces splash. Water at the base in the morning so surfaces dry quickly.
- Use copper or bio-fungicides. Apply as soon as you see it and keep up with label directions.
- Do not work plants when wet. This is a big one for septoria spread.
- Rotation and cleanup. Remove debris and rotate nightshades (tomatoes, peppers, potatoes, eggplant).
Cause 7: Fusarium wilt
What it looks like (photo-style clues)
- Wilting is the star symptom, with yellowing following close behind.
- Often starts as one-sided wilt or one branch drooping.
- Yellowing begins on lower leaves, then progresses upward.
- Plants do not perk up much after watering.
Why it happens
Fusarium is a soil-borne fungus that clogs the plant’s water-conducting tissue. Warm soil temperatures can speed it up. Once a plant is truly infected, you cannot cure it.
Fix (step-by-step)
- Be careful with diagnosis. Persistent wilt plus yellowing can also be bacterial wilt, verticillium wilt, root rot, nematodes, or even severe drought. A lab test is the only sure confirmation.
- Look for extra clues. One-sided decline is a classic hint. If you cut the lower stem lengthwise, you may see brown streaking in the vascular tissue.
- Remove the plant if decline is rapid. Pull it and dispose of it. Do not compost.
- Protect the rest. Avoid moving soil around, clean tools, and do not splash water from the infected area.
- Replant smarter next season. Choose fusarium-resistant varieties (look for “F” or “FF” on the tag) and rotate beds. In containers, replace potting mix and sanitize the pot.
Other causes to consider
If none of the sections above fit, do not panic. Tomatoes have a few other common yellow-leaf “plot twists.”
Pests
- Spider mites: Fine stippling (tiny pale dots), a dull or bronzed look, and sometimes webbing, usually worse in hot, dry weather.
- Aphids or whiteflies: Sticky honeydew, curling, and clusters of insects on new growth can cause yellowing and general decline.
Viruses
- Tomato yellow leaf curl virus (TYLCV): Yellowing with upward curling, stunting, and reduced fruit set, often tied to whitefly pressure.
Herbicide drift
- Clue: Twisted, cupped, or “strapped” new leaves, sometimes with yellowing, after nearby weed spraying or lawn treatments.
Cold and heat stress
- Clue: A sudden temperature swing can cause temporary yellowing, especially on younger transplants. New growth usually normalizes once conditions stabilize.
Root issues and nematodes
- Root-knot nematodes: Yellowing plus stunting in warm climates, often with wilting in heat. If you pull the plant, roots may have knots or galls.
- Compaction or root rot: Yellowing paired with poor vigor, especially after extended wet weather or in heavy soil.
Iron (or sulfur) deficiency
- Iron: New leaves turn pale or yellow while veins stay greener, often in high pH soil or container mixes that drift alkaline.
- Sulfur: More uniform yellowing that can show up on newer growth, less common but possible in low organic matter soils.
Clara note: When symptoms feel “weird” (twisting, stunting, odd curl patterns), it is often not a simple fertilizer problem. Step back and think pests, drift, weather, or roots.
When yellow leaves are normal
Tomatoes are not precious about old leaves. As the plant grows and shades its bottom foliage, a few lower leaves naturally yellow and drop, especially once fruiting ramps up. If the plant is otherwise vigorous, new growth is green, and there are no spots or wilting, you can simply prune the lowest yellow leaves and move on.
My yellow-leaf triage
If you are standing in the garden right now, here is the order I use:
- Look for spots. Spots with halos or rings mean disease management mode.
- Check soil moisture 2 inches down. Too wet or too dry causes a surprising amount of yellowing.
- Notice the pattern. Uniform pale lower leaves suggest nitrogen. Green veins with yellow between suggests magnesium. Yellowing plus curl, stippling, or sticky residue points to pests or viruses.
- Act, then watch new growth. Old leaves rarely become perfect again. Your success sign is healthy new leaves.
If you want, tell me: container or in-ground, your recent weather, and whether the yellowing is spotty or uniform. I can help you narrow it down like a plant detective with a trowel.