Spider Plant Care and Propagation
Spider plants (Chlorophytum comosum) are the houseplant equivalent of a dependable friend who shows up with snacks and never judges your messy kitchen. They are forgiving, fast-growing, and generous with baby plantlets called spiderettes that practically beg to be shared. If you have ever been told you have a “black thumb,” this plant is here to prove that is a myth.
Below is everything you need to keep your spider plant lush and bouncy, plus a few propagation methods that work even if you feel a little nervous with scissors.
Meet the spider plant
Spider plants are grass-like perennials best known for their arching leaves and their habit of sending out long stems with baby plants. Those babies are clones of the parent, and once you learn how to root them, you can turn one plant into many.
- Botanical name: Chlorophytum comosum
- Common names: Spider plant, airplane plant
- Growth habit: Clumping rosette with trailing stems and spiderettes
- Native range: Southern Africa
- Good to know: Generally considered non-toxic to cats and dogs (ASPCA), though chewing on the leaves can cause mild tummy upset. Cats are often drawn to spider plants and may nibble them more than other houseplants.
Light
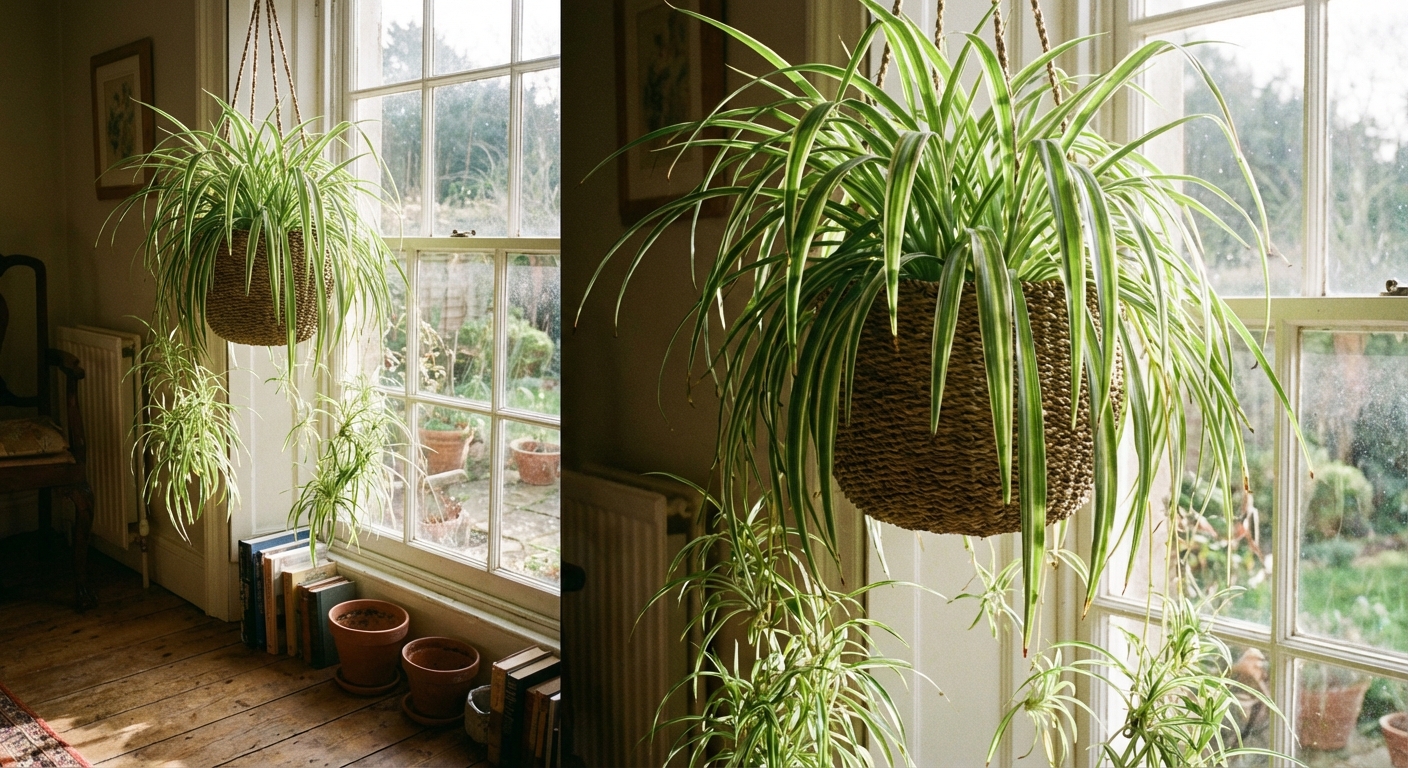
If spider plants had a favorite vibe, it would be bright, indirect light. Think: near a sunny window where the sun does not hit the leaves directly for long stretches.
Best placements
- East-facing window: Ideal for gentle morning sun.
- North-facing window: Can work for greener varieties or brighter rooms. Variegated types usually prefer a brighter spot.
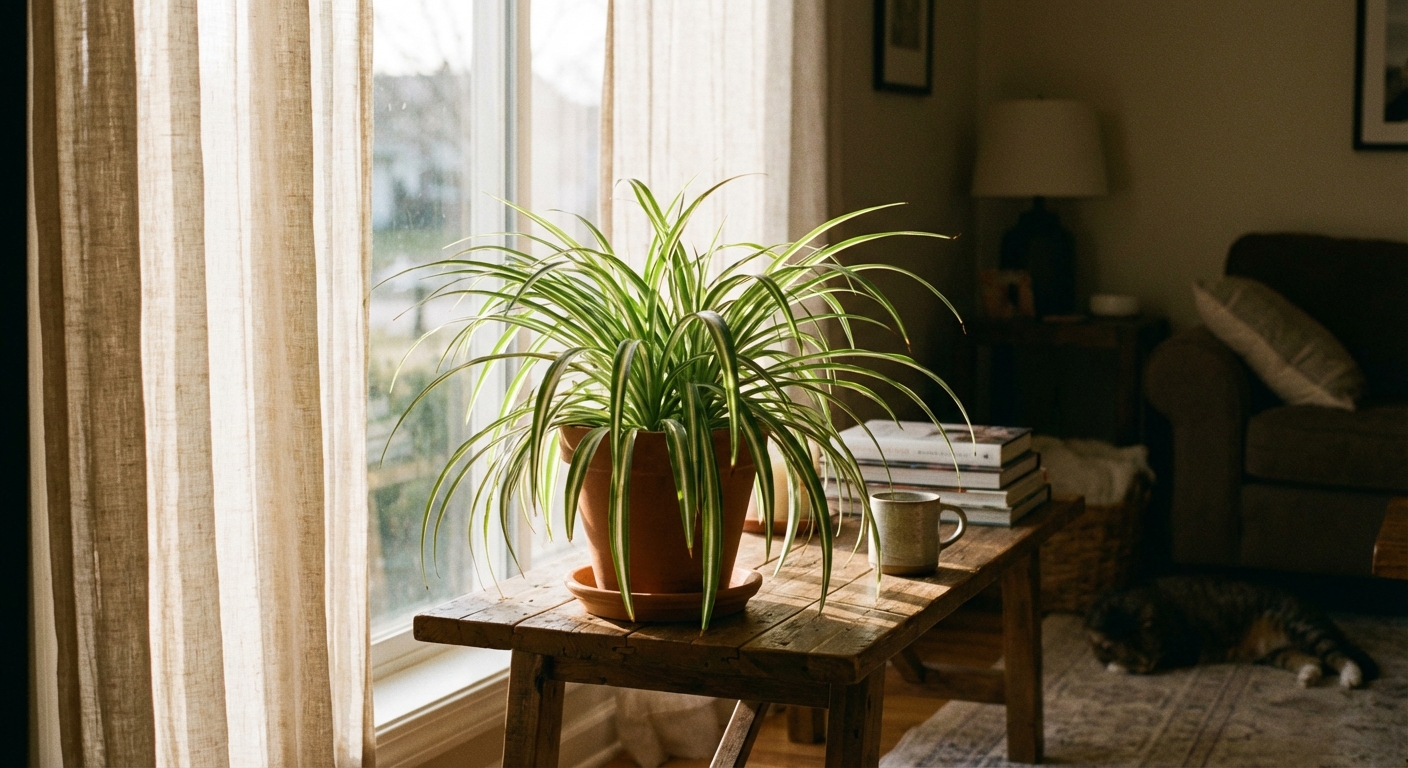
- South or west window: Great if filtered by a sheer curtain or set back a few feet from the glass.
What the plant will tell you
- Leggy growth and smaller leaves: Not enough light.
- Scorched, pale patches: Too much direct sun, especially midday.
- Slow growth and few spiderettes: Often a light issue (sometimes a feeding issue too), so start by brightening the spot.
Watering
Spider plants like a rhythm: a thorough drink, then a bit of drying out. The most common mistake I see is frequent small sips that keep the roots constantly damp. Aim for deep watering instead.
How often to water
Use this as a starting point, then adjust for your home:
- Spring and summer: Water when the top 1 to 2 inches of soil feel dry.
- Fall and winter: Water when the top 2 inches feel dry and the pot feels lighter.
How to water
- Check soil moisture with your finger or a wooden chopstick.
- Water slowly until it runs out of the drainage holes.
- Let it drain completely.
- Important: Empty saucers and cachepots after draining so the roots never sit in leftover water.
Note: Spider plants store some water in their fleshy roots, so they bounce back from the occasional missed watering better than they recover from being soggy for weeks.
Soil and potting
Spider plants are not fussy about soil, but they thrive in a mix that drains well and still holds a little moisture.
Best soil mix
- Simple option: High-quality indoor potting mix with a handful of perlite mixed in.
- My favorite blend: 2 parts potting mix, 1 part perlite, 1 part fine orchid bark or coco chips.
Pot choice
- Choose a pot with drainage holes.
- Spider plants enjoy being slightly root bound, which often encourages spiderettes.
- Terracotta dries faster. Plastic holds moisture longer. Either is fine if your watering habits match.
Temp and humidity
Spider plants are happiest in normal household conditions.
- Temperature: 60 to 80°F (16 to 27°C) is the sweet spot.
- Humidity: Average indoor humidity is usually fine. If your air is very dry, a little extra humidity can reduce brown tips.
Avoid placing your plant right next to heating vents, radiators, or drafty doors. Those hot and cold blasts can crisp the leaf tips fast.
Fertilizing
Spider plants are steady growers, so they appreciate light feeding during their active season.
- When: Spring through early fall
- How often: Every 4 to 6 weeks
- What: A balanced houseplant fertilizer at half strength
Skip fertilizer in winter when growth slows. Over-fertilizing can contribute to brown tips and weak, floppy growth.
Pruning and tidying
Spider plants do not need fancy pruning, but they do love a little grooming.
- Brown tips: Snip with clean scissors, following the natural point of the leaf. Keep the cut subtle and tapered.
- Old or yellow leaves: Remove at the base to make room for fresh growth.
- Too many spiderettes: You can leave them for the dramatic fountain look, or remove some so the parent plant keeps its energy.
Propagation
Propagation is where spider plants really shine. Those dangling babies already have tiny nubs that want to become roots. You have a few easy options depending on your comfort level and what you have on hand.
Method 1: Water rooting
- Choose a spiderette that has small root bumps and a few leaves.
- Snip the baby off the runner with clean scissors, leaving a short stem.
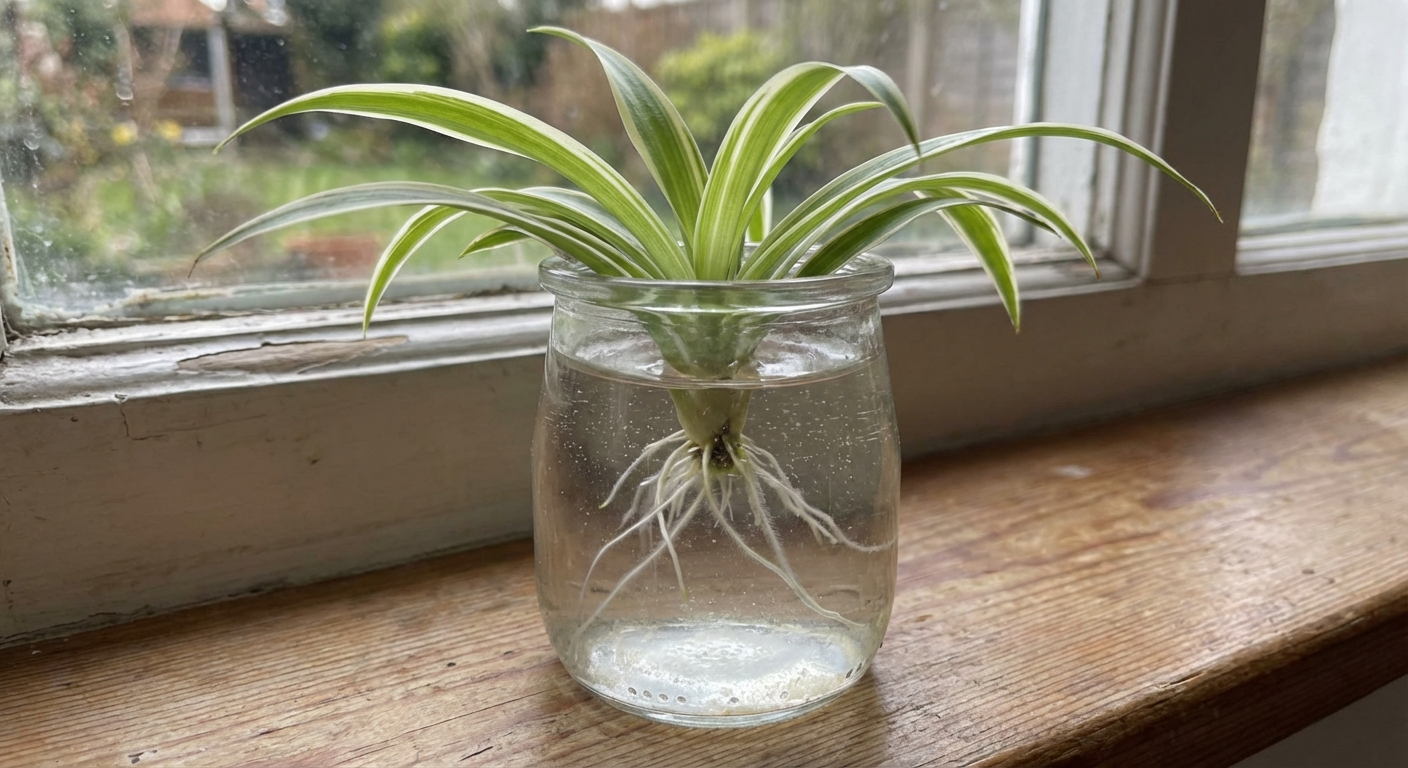
- Set the base in a small jar of water so the root area is submerged but the leaves stay dry.
- Place in bright, indirect light and refresh the water every few days.
- When roots are 1 to 2 inches long, pot it up in a small container with drainage.
Method 2: Soil rooting while attached
This method has a very high success rate because the baby stays supported by the parent while it roots.
- Place a small pot filled with slightly moist potting mix next to the parent plant.
- Set the spiderette on top of the soil and lightly pin it down with a bent paperclip or hairpin.
- Keep the soil lightly moist, not soggy.
- After 2 to 4 weeks, give a gentle tug. If it resists, it has rooted.
- Cut the runner connecting it to the parent and move the new plant to its own spot.
Method 3: Division
If your spider plant is bursting out of its pot, division gives you instant new plants.
- Water the plant the day before to reduce stress.
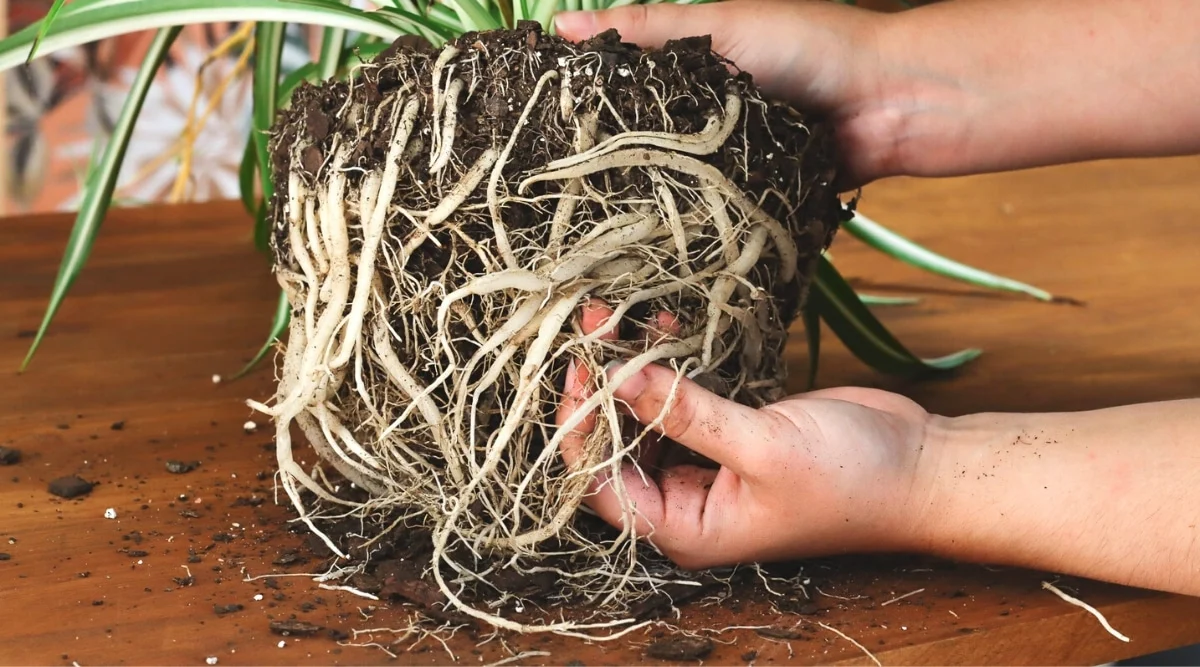
- Slide it out of the pot and gently loosen the root mass.
- Separate the clump into sections, each with healthy roots and leaves.
- Repot each division into fresh mix and water thoroughly.
Repotting
Spider plants can live happily in the same pot for a while, but eventually they get so root bound they start drying out too quickly or pushing themselves upward.
When to repot
- Roots circling heavily or growing out of drainage holes
- The plant dries out much faster than it used to
- Soil seems compacted and water runs straight through
How to repot
- Go up only one pot size, about 1 to 2 inches wider.
- Use fresh, airy soil.
- Water in well, then let it settle for a week before fertilizing.
Common problems
Brown tips
Brown tips are the most common spider plant complaint, and the good news is they are usually fixable. They can be related to water quality, dry air, and inconsistent watering. Sometimes fertilizer buildup plays a role too.
- Tap water minerals (like fluoride) or salts: Try filtered, rain, or distilled water for a month and see if new growth improves.
- Fertilizer buildup: Pause feeding and flush the soil by watering deeply several times and letting it drain completely.
- Inconsistent moisture: Increase consistency. Do not let it bone dry for long stretches.
- Very dry air: Move away from heat vents, group plants together, or use a small humidifier nearby.
Trim the brown parts for looks, but know this: the damaged tips will not turn green again. You are watching for healthier new leaves as your proof that the changes worked.
Leggy growth
- Cause: Low light is the usual culprit.
- Fix: Move to brighter indirect light, rotate the pot weekly, and consider a grow light in winter.
Pale leaves or faded variegation
- Cause: Often too little light.
- Fix: Brighter, filtered light, but still avoid harsh direct sun.
Yellow leaves
- Cause: Overwatering, poor drainage, or natural aging of older leaves.
- Fix: Let the top inches dry before watering, confirm the pot drains, and remove older yellow leaves at the base.
Root rot
If the plant smells sour, the base feels mushy, or leaves collapse quickly, check the roots.
- Trim away black, mushy roots.
- Repot into fresh, airy soil in a pot with drainage.
- Water lightly at first, then return to the normal dry-then-drench routine.
Pests
Spider plants are fairly tough, but pests happen, especially in dry indoor air.
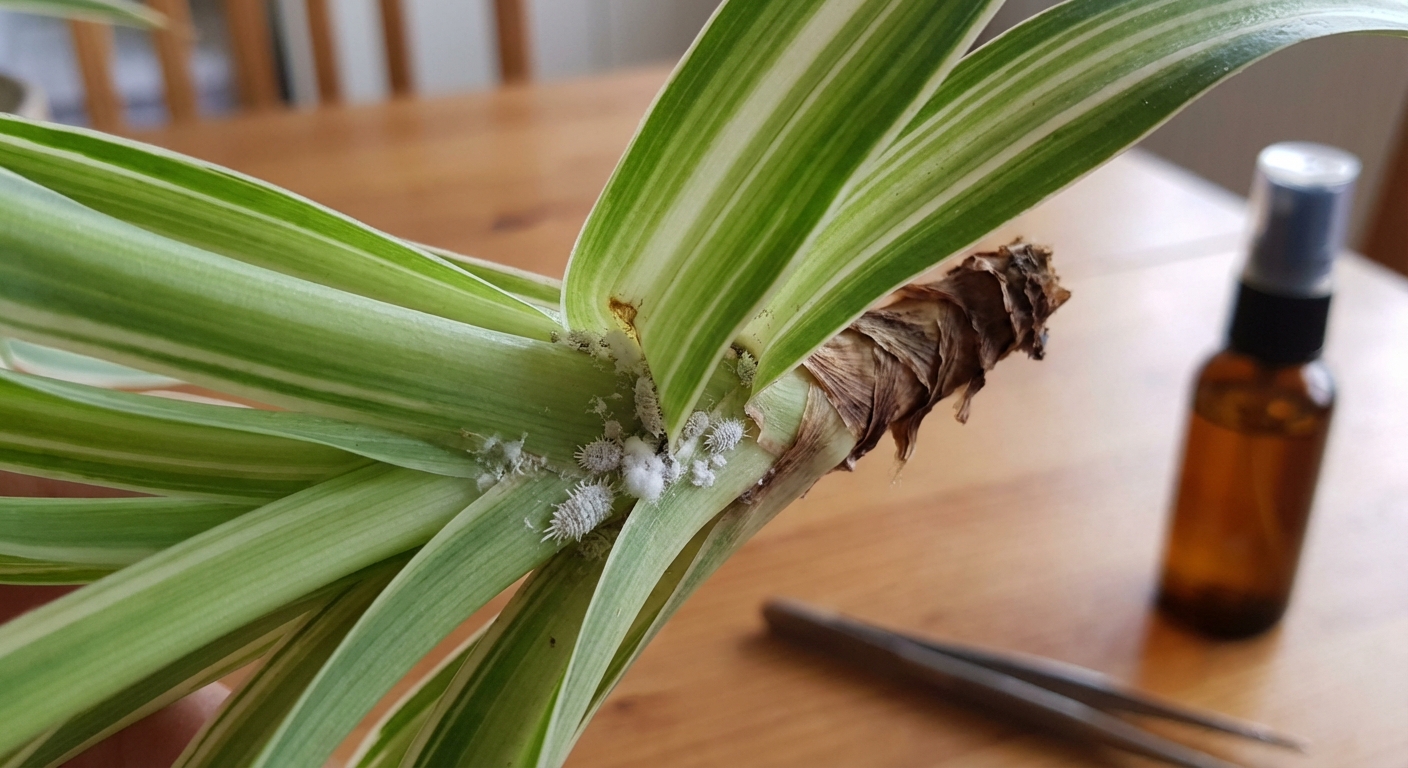
- What to look for: Fine webbing (spider mites), cottony clusters in leaf joints (mealybugs), or small bumps that scrape off (scale).
- First step: Rinse the plant in the sink or shower and isolate it from other plants.
- Then: Wipe leaves with diluted castile soap (a few drops in a cup of water) or use insecticidal soap, repeating weekly for a few rounds.
- Tip: Check the leaf bases and undersides, where pests love to hide.
More spiderettes
If you want that classic cascade of babies, here is what encourages it:
- Brighter indirect light than you think you need (especially for variegated plants)
- A slightly snug pot rather than a huge container
- Light feeding during spring and summer
- Patience, especially with younger plants
Quick care checklist
- Light: Bright, indirect
- Water: When top 1 to 2 inches are dry
- Soil: Airy, well-draining potting mix
- Fertilizer: Half strength every 4 to 6 weeks in spring and summer
- Propagation: Root spiderettes in water or soil, or divide mature clumps
Final encouragement
If your spider plant has a few brown tips or a lopsided moment, you have not failed. You are just learning its language. Give it bright, gentle light, water it deeply when it is ready, and let those roots breathe. Before long, you will have a little green fountain in your home and probably a few bonus babies to pass along to a friend.