How to Propagate Rosemary from Cuttings
Rosemary is one of those plants that makes you feel like a confident gardener even on a messy week. Snip a few stems, give them the right cozy conditions, and they often root into brand-new plants that smell like sunshine and Sunday dinner. If you have one healthy rosemary plant, you can turn it into several, and you can do it without fancy equipment or a greenhouse.
This guide walks you through exactly when to take cuttings, how to prepare them, whether to root in water or in a potting mix, and what to expect week by week until transplant day.
Best time to take rosemary cuttings
Rosemary roots most reliably when the plant is actively growing and not stressed by heat, cold, or heavy flowering. You can propagate at different times of year, but your success rate can shift depending on variety and conditions.
Spring (best for most gardeners)
- Why it works: The plant is waking up and pushing fresh growth, which tends to root more quickly.
- What to look for: Lots of flexible, green stems and minimal flowering.
- Typical rooting speed: Often 2 to 6 weeks, but timelines vary by cultivar, light, and temperature.
Fall (works, but slower)
- Why it can work: Many rosemary plants still have usable growth, especially in mild climates or indoors.
- Challenges: Shorter days mean slower root formation, and cool, damp conditions can invite rot.
- Tip: If you propagate in fall, give cuttings brighter indoor light and keep the rooting medium only lightly moist.
Skip the extremes: Mid-summer heat waves and mid-winter low light are the hardest times to root rosemary unless you can control temperature and lighting.
What you need
You likely have most of this already. Clean tools and the right medium matter more than anything “high tech.”
- Healthy rosemary plant (or fresh sprigs from a friend)
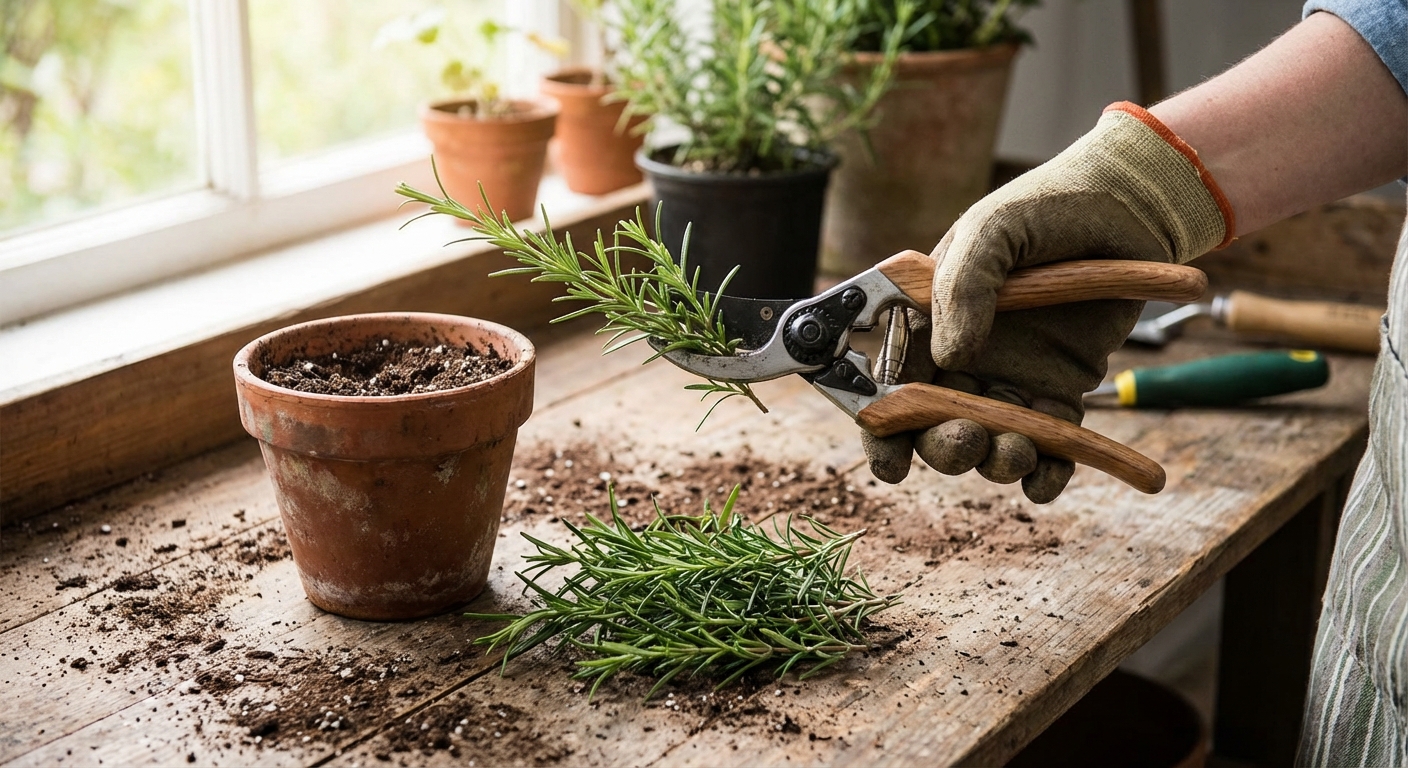
- Clean, sharp scissors or pruning snips
- Small pots with drainage holes (2 to 4 inch pots work well)
- Rooting medium (see options below)
- Optional humidity cover: clear plastic bag, humidity dome, or a clear storage bin
- Optional: rooting hormone (helpful, not required)
- Marker and a label (future you will be grateful)
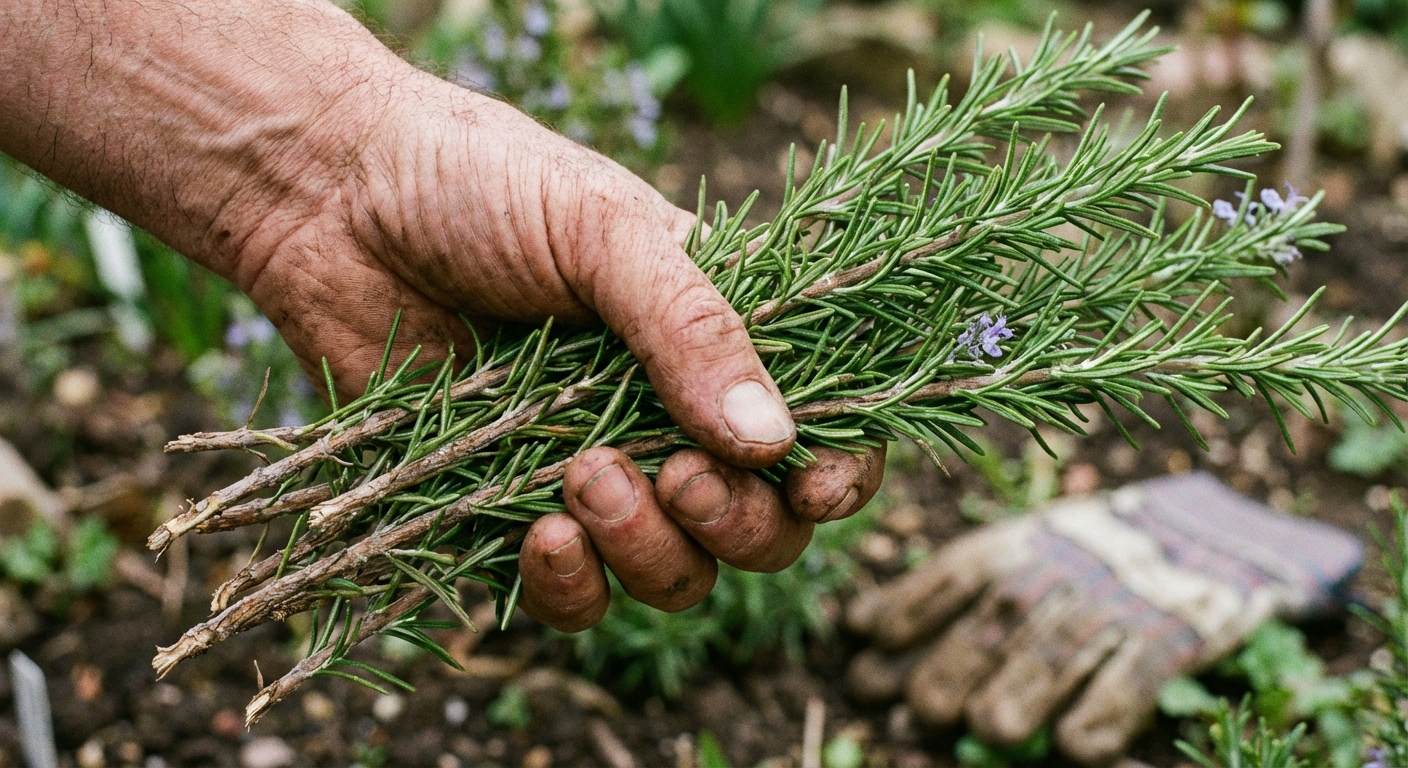
Choose the right stems
Rosemary can be a little woody and stubborn, so the secret is choosing stems that are mature enough to have energy, but young enough to root easily.
Ideal cutting material
- Length: 4 to 6 inches (10 to 15 cm)
- Type: Non-flowering stems are best, but lightly flowering stems can still work with a slightly lower success rate.
- Texture: Semi-softwood is perfect, meaning the tip is flexible and green, and the lower portion is just starting to firm up
- Health: Deep green needles, no pests, no blackened tips, no mildew
Avoid: Very woody stems (slow to root), very soft baby tips (wilt easily), and heavily flowering stems (more energy goes to blooms than roots).
Variety note: Upright and trailing rosemary both propagate well, but some cultivars root faster than others. If your first round is slow, it is not necessarily you.
Prepare the cuttings
This part looks small, but it sets you up for faster rooting and fewer problems with rot.
Step-by-step prep
- Cut below a node: Snip just below a spot where needles emerge. Nodes are where roots like to form.
- Strip the lower needles: Remove needles from the bottom 1.5 to 2 inches of the stem so none sit in water or damp mix.
- Optional, helpful: Lightly scrape one side of the stem base with a clean fingernail or blade to expose a thin strip of green tissue. This can encourage rooting.
- Optional: Dip the base in rooting hormone, then tap off excess. You want a light coating. Too much powder can hold moisture against the stem and encourage rot.
Quick tip: If you are taking several cuttings, keep them shaded and cool while you work. A plate with a slightly damp paper towel underneath is a simple holding station so they do not wilt.
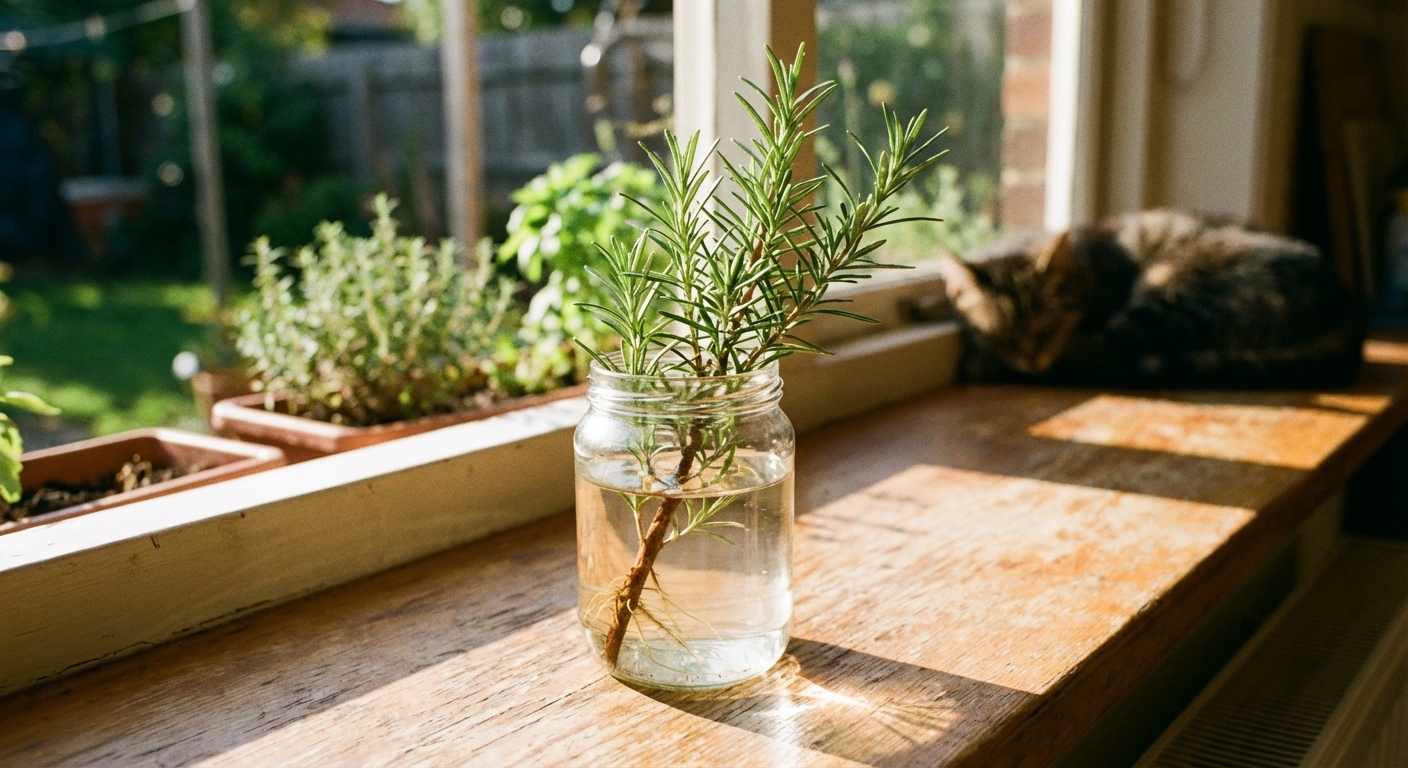
Method 1: Root in water
Water rooting is satisfying because you can watch the process, but rosemary can be slower in water than in a potting mix and sometimes struggles when moved from water to soil. Still, it is a perfectly valid method if you keep the water fresh.
How to root rosemary in water
- Place cuttings in a clean glass or jar with 1 to 2 inches of water.
- Keep all stripped portions submerged, and keep leafy parts above water.
- Double-check over the next few days that no needles are sitting below the waterline. Pluck any that slip down.
- Put the jar in bright, indirect light (near a window is great, but avoid harsh midday sun).
- Refresh the water every few days, or sooner if it looks cloudy.
Water method success tips
- Use room-temperature water.
- Do not overcrowd the jar. Good airflow around stems reduces rot.
- Be patient. Rosemary roots can start as tiny bumps that are easy to miss.
When to pot up from water: Transplant when roots are about 1 to 2 inches long and there are several roots, not just one skinny strand.
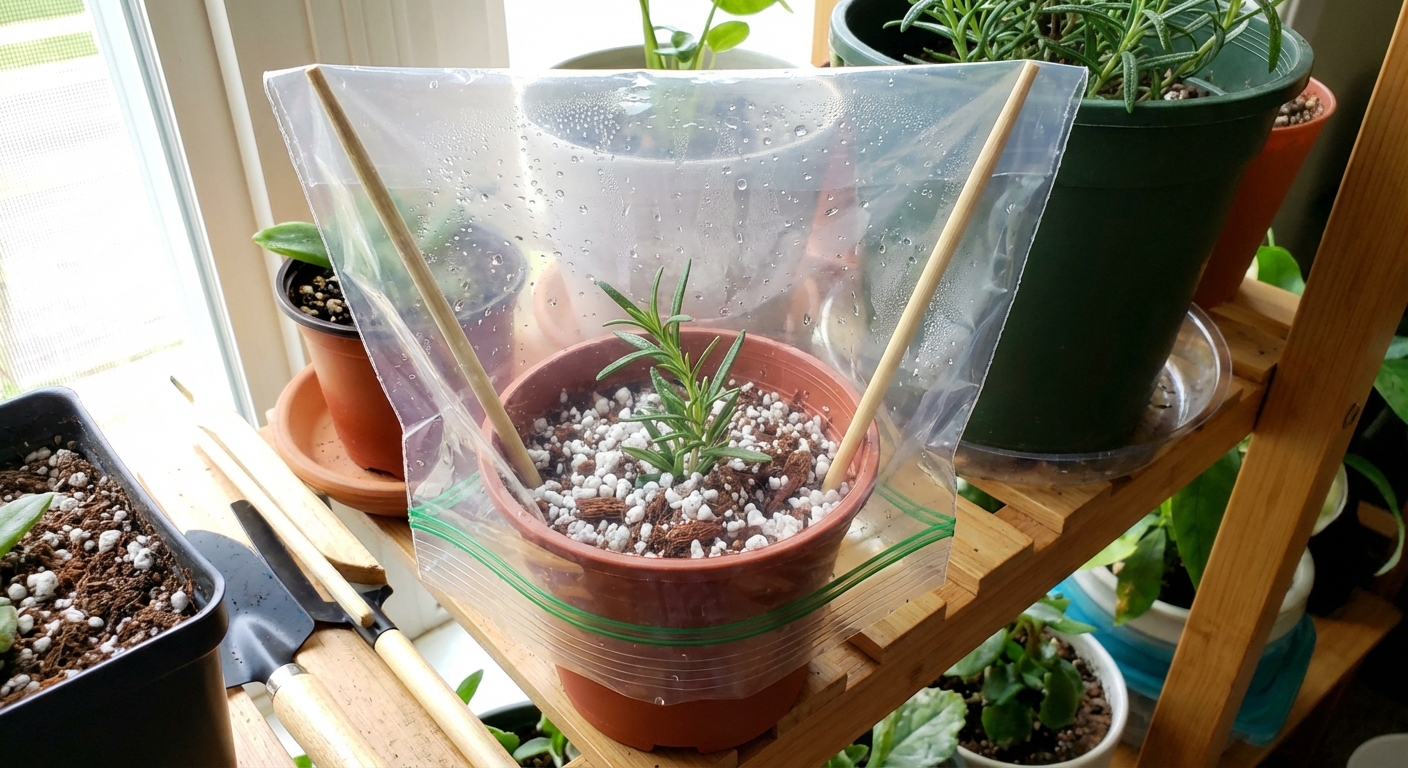
Method 2: Root in potting mix
Rooting directly in a light, well-draining mix usually creates sturdier roots that transition to a pot with less drama. It also lowers the transplant shock that can happen after water rooting.
Best rooting medium
Choose something that stays lightly moist but drains fast. Rosemary hates soggy feet.
- Great mix: 1 part perlite + 1 part coco coir (or peat moss)
- Also works: Seed-starting mix with extra perlite mixed in
- Avoid: Heavy garden soil or moisture-holding potting soil straight from the bag without extra drainage
How to root rosemary in mix
- Fill small pots with your rooting medium and water it so it is evenly moist, not dripping.
- Poke a hole with a pencil or chopstick so you do not scrape off rooting hormone (if used).
- Insert the cutting 1.5 to 2 inches deep, then gently firm the medium around it.
- Water lightly to settle everything in.
Humidity: helpful, not always required
Cuttings need higher humidity while they have no roots, but rosemary can rot if it stays too wet. In many indoor setups, rosemary will root fine without a cover as long as light is gentle and the medium stays lightly moist. If your home is dry or your cuttings droop, a cover can help. Just monitor closely.
- If using a cover, use a clear plastic bag propped up so it does not touch the leaves, or a humidity dome.
- Vent daily for a few minutes. Vent more if you see heavy condensation.
- Keep the medium lightly moist. If the surface stays wet for days, you have too much moisture.
Light and temperature
Think of cuttings like newborn plants. They want brightness and warmth, but they cannot handle intense stress yet.
- Light: Bright, indirect light is ideal. A sunny window with a sheer curtain works well. If using a grow light, place it close enough for brightness but not heat stress.
- Temperature: 65 to 75°F (18 to 24°C) is a comfortable range.
- Avoid: Hot, direct sun that bakes the cutting, and cold windowsills at night in winter.
How to tell light is right: The cutting stays perky most of the day. If it wilts hard by afternoon, it is likely too hot, too sunny, too dry, or a mix of all three.
Week-by-week timeline
Rosemary propagation is not instant gratification, but it is steady and rewarding. Here is a realistic timeline for both methods. Timelines can vary by variety and conditions, so use this as a guide, not a stopwatch.
Week 1: Settle in
- Cuttings may droop slightly the first day, then perk up if humidity is adequate.
- In mix: keep the medium barely moist, not wet.
- In water: refresh water every few days, sooner if cloudy.
Week 2: Quiet work
- Often no visible changes. This is normal.
- Resist tugging. Tugging breaks tiny root initials before they become roots.
- If using a cover, vent daily to prevent mold.
Week 3: First signs
- In water: you may see small white nubs or fine roots.
- In mix: you might see new tip growth, which can be a good sign but is not a guarantee of roots yet.
Week 4 to 6: Roots develop
- In mix: do a gentle resistance test. Hold the cutting near the base and very lightly pull. If it resists, roots are forming.
- In water: roots typically lengthen. Pot up when there are multiple roots around 1 to 2 inches long.
Week 6 to 10: Potting up
- Many rosemary cuttings are ready for their own pot by now, though some take longer, especially in fall, low light, or slower-rooting cultivars.
- If you used a humidity cover, reduce it gradually over several days so the plant adjusts.
- Begin light feeding only after you see clear new growth, and use a diluted organic fertilizer.
Reality check: Some cuttings root in 3 to 4 weeks, some take longer. Take a few extra cuttings so you are not emotionally invested in one stem like it is the chosen one.
Transplanting rooted rosemary
Once your cutting has roots, your job is to help it transition from nursery baby to tough little herb without shock.
Potting rooted cuttings
- Choose a pot with drainage holes, 4 to 6 inches wide.
- Use a well-draining mix. A good combo is quality potting soil plus extra perlite or pumice.
- Plant at the same depth the cutting was rooting.
- Water thoroughly once, then let the top inch of soil dry before watering again.
First month after potting
- Watering: Aim for a soak, then a slight dry-down. Constantly damp pots are the fastest route to rosemary sadness.
- Light: Increase light gradually if it has been living in bright shade or under a cover.
- Pinching for bushiness: Once you see steady new growth, pinch the very tips to encourage branching. Do not take more than a small trim at first.
Moving rosemary into the garden
Wait until the plant is actively growing and has a strong root system. If you live where winters are cold, spring planting is safest.
- Site: Full sun is ideal once established.
- Soil: Drainage matters most. Amend heavy clay with grit and organic matter, or consider a raised bed.
- Hardening off: If the plant has been indoors, increase outdoor time gradually over 7 to 10 days.
Common problems
My cutting turns black at the base
- Cause: Rot from too much moisture, poor airflow, dirty tools, or stale water.
- Fix: Start over with a fresh cutting, sterilize snips, use a drier mix, and vent humidity daily if using a cover.
The cutting wilts and never recovers
- Cause: Low humidity, too much sun, cutting too soft, or dehydration during prep.
- Fix: Use semi-softwood stems, add a humidity cover if your air is very dry, and move to bright shade.
No roots after 6 to 8 weeks
- Cause: Low light, cool temperatures, stem too woody, slower-rooting cultivar, or a stressed parent plant.
- Fix: Increase light, keep temperatures in a comfortable range, and take new cuttings from fresher growth.
Roots in water, but it struggles in soil
- Cause: Water roots can be less adapted to soil conditions.
- Fix: Pot into a very airy mix, keep lightly moist for the first 1 to 2 weeks, then gradually let it dry more between waterings.
Quick checklist
- Take 4 to 6 inch semi-softwood cuttings (non-flowering is ideal)
- Strip lower needles so nothing sits in water or wet medium
- Choose bright, indirect light and steady warmth
- Keep moisture light and airflow decent, especially if using a humidity cover
- Be patient and propagate a few extra stems
Once you propagate rosemary successfully, it becomes a bit addictive. One plant turns into gifts for neighbors, a fuller herb pot by the kitchen door, and that satisfying feeling that you made more life from a simple snip. If you try it, I am cheering for your tiny roots before you can even see them.