How to Grow Mint Without It Taking Over Your Garden
Mint is the friend who shows up with snacks, helps you move, and then quietly moves into your spare bedroom. It is generous, fragrant, and incredibly useful, but it also spreads with enthusiastic little runners (mostly underground) that can pop up where you least expect them.
The good news: you can absolutely grow a gorgeous, productive patch of mint without letting it annex your whole garden. You just need a containment plan from day one, plus a few harvesting habits that keep it lush and polite.
Why mint takes over
Most culinary mints (Mentha species and hybrids) spread in a few very effective ways:
- Creeping rhizomes: Underground stems that travel outward, then send up new shoots. This is the classic takeover tactic.
- Above-ground runners: Many mints also sprawl along the soil surface and root where stems touch the ground, especially in consistently moist beds.
- Seed: Less common in many kitchen mints (some are sterile hybrids), but flowering can still contribute to surprise seedlings if viable seed is produced.
Mint is happiest in moist soil, part sun to full sun, and moderate fertility. If you give it a cozy garden bed, it will do what mint does best: expand.
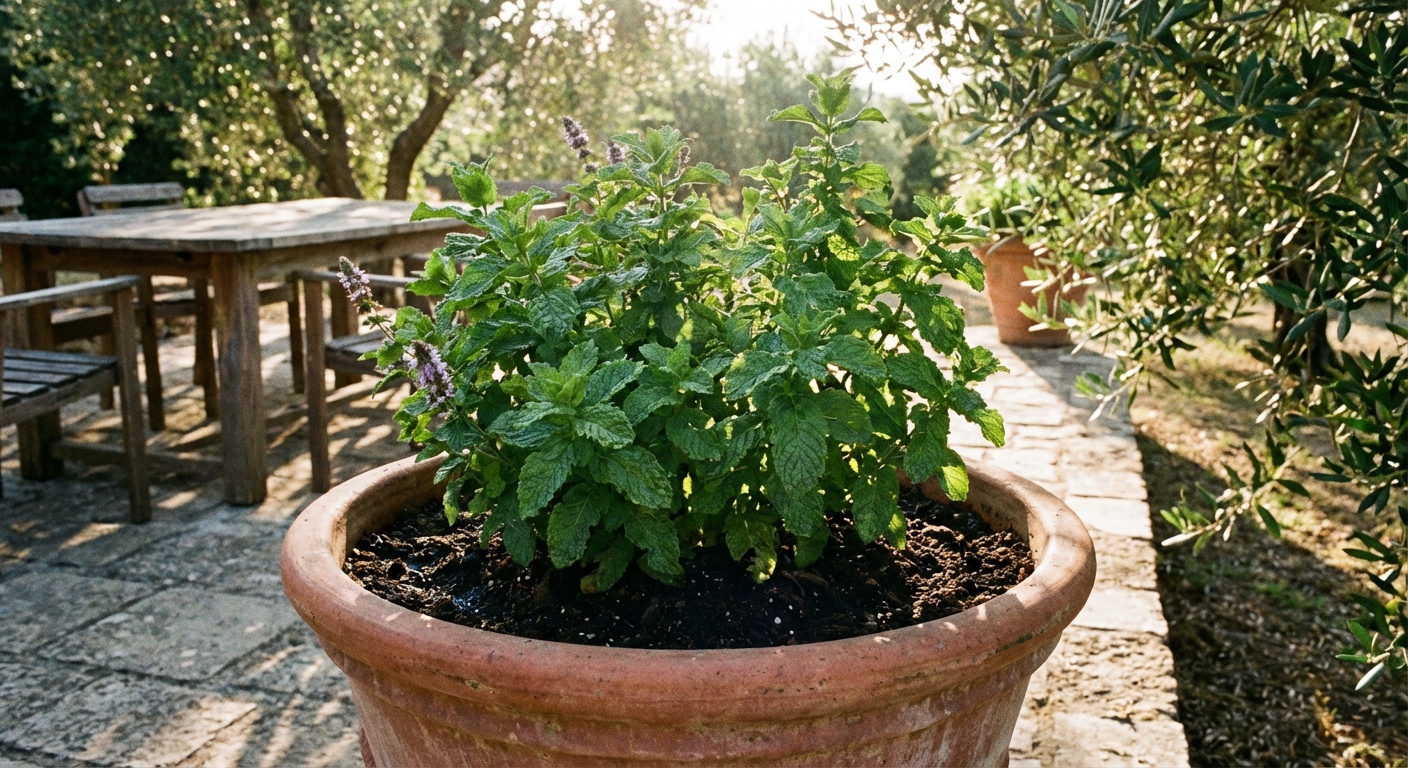
Container first, bed second
If you want mint and you do not want mint everywhere, grow it in a container. This is the single most reliable method for most home gardeners.
Container size
- Minimum: 10–12-inch pot for one plant
- Ideal for frequent harvest: 14–18-inch pot or a rectangular trough planter
- Depth: 10–12 inches deep is plenty for healthy roots
Mint likes consistent moisture, so choose a pot material that matches your watering style. Terracotta breathes and dries faster. Plastic and glazed ceramic hold moisture longer.
Soil and drainage
Use a quality potting mix (not garden soil). I like:
- 2 parts potting mix
- 1 part compost
- A small handful of perlite if your mix is heavy
Water when the top inch feels dry. Mint that swings between bone-dry and swampy tends to get scraggly and more pest-prone.
Place pots so mint cannot escape
Mint can root into the ground through drainage holes if the pot sits directly on soil. That is how “contained” mint becomes “surprise bed mint.”
- Set pots on pavers, a patio, gravel, or a deck.
- If it must sit on soil, place the pot on a solid tray and check often for roots sneaking out.
In-ground mint with a barrier
If you love the look of mint in a garden bed, you can do it, but you need a barrier that blocks runners and you need to install it like you mean it. Also, consider this your friendly reminder: barriers reduce spread, but they do not eliminate maintenance. Mint loves a loophole.
Option 1: Sink a pot
This gives you the in-ground look with container control.
- Choose a pot at least 12–16 inches wide.
- Keep the bottom on for real containment. If you remove the bottom, mint can exit into the bed, which defeats the point. If drainage is your worry, drill extra holes instead.
- Sink the pot so the rim sits 1–2 inches above soil level. This matters because runners can hop the edge if it is flush.
- Mulch around the outside, not over the rim.
Check the rim area a couple times per season and snip any adventurous runners.
Option 2: Install a barrier ring
If you want a dedicated mint “island,” create a ring using a rigid barrier material such as heavy-duty root barrier, thick high-density polyethylene (HDPE) plastic, or metal edging.
- Depth: 12–18 inches (deeper helps for long-term control)
- Height above soil: 1–2 inches exposed
- Seams: Overlap and secure them. Runners find gaps.
Once or twice a year, use a spade to slice straight down around the inside edge of the ring to cut any circling rhizomes and lift out what you find. Keep an eye on the top edge, too. Mint often travels shallow and tries to go up and over.
Option 3: A mint corner
Planting mint in a corner or against a path does not truly contain it. It just reduces the number of directions it can run. If you choose this route, plan to:
- Edge-trim with a spade every 4–6 weeks during the growing season.
- Pull or dig any shoots that pop up outside the line immediately.
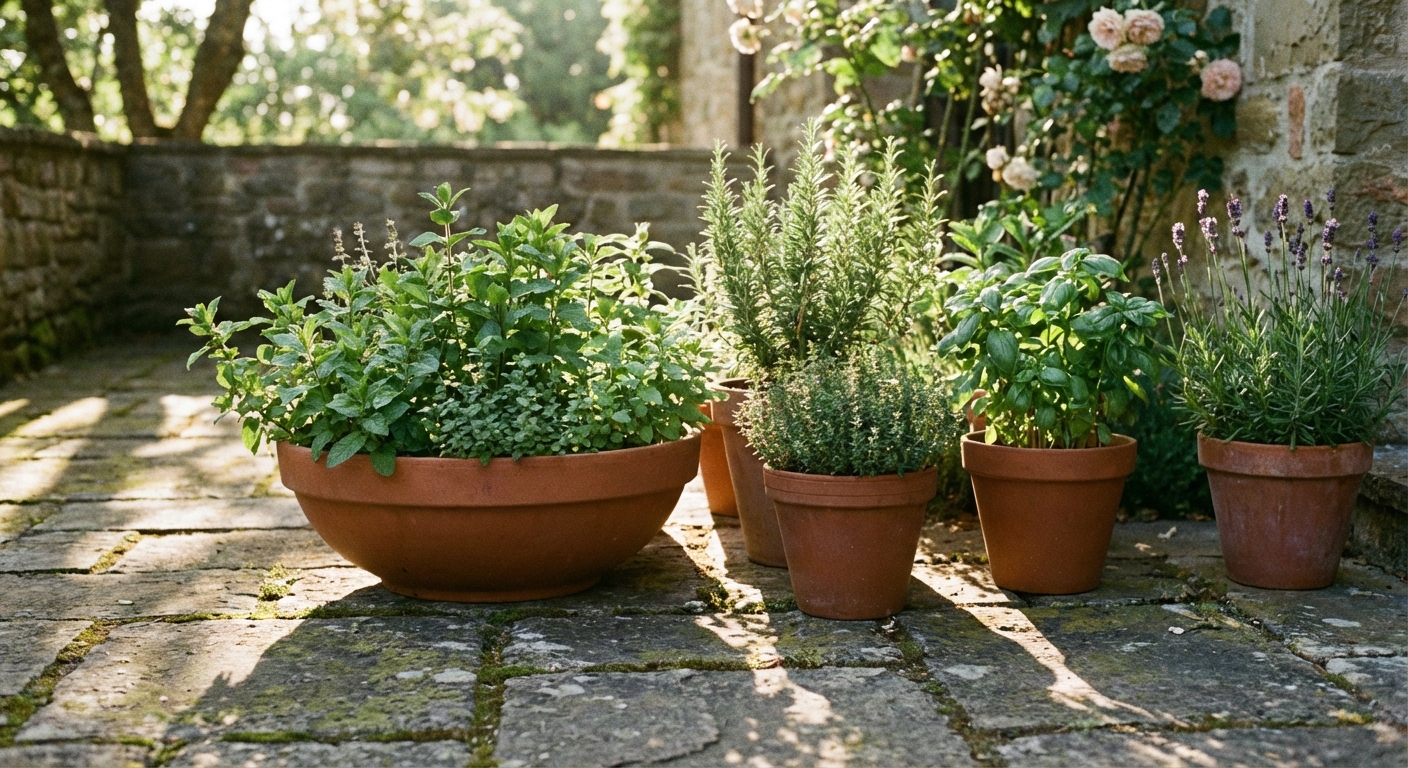
Best mint varieties
Different mints behave a little differently, but nearly all can spread aggressively when happy. Choose based on how you plan to use it most.
Quick safety note: Stick to culinary Mentha mints for eating and drinking. Some plants sold with “mint” in the name are ornamental or traditional-use herbs that are not a great idea for the kitchen.
- Spearmint (Mentha spicata): Classic for iced tea and everyday cooking. Sweet, mellow mint flavor.
- Peppermint (Mentha × piperita): Strong, cool bite. Great for desserts and herbal remedies.
- Mojito mint (often Mentha × villosa): Softer, less sharp, fantastic for drinks.
- Chocolate mint: Peppermint-leaning with a cocoa-like aroma. Fun in desserts and cold brew.
- Apple mint: Fuzzy leaves, fruity scent. Lovely for tea, a bit gentler in flavor.
- Orange or lemon mint: Citrus note for fruit salads and summer drinks.
My tip: If you are growing multiple mints, keep them in separate pots. It is not that their leaf flavor “crosses” in real time. It is that their runners tangle, labels get confusing fast, and the most vigorous variety usually outcompetes the others until you are left with one mint wearing everyone else’s name tag. (Cross-pollination matters for seeds and volunteer seedlings, not the flavor of the parent plant’s leaves.)

Planting for bushy growth
Start with one plant
Mint fills space fast. For a 14–18-inch pot, one healthy nursery plant is plenty. Within weeks it will start branching and thickening.
Pinch early
When stems reach 6–8 inches tall, pinch or snip just above a leaf node. That tells the plant to branch, giving you a fuller pot and more harvestable tips.
Light
- Best: 4–6 hours of sun, especially morning sun
- Hot climates: Afternoon shade prevents scorched leaves and bitter flavor
- Indoors: Bright window plus a grow light if stems get long and pale
Harvesting that helps containment
Harvesting is not just for the kitchen. It is your best tool for keeping mint from getting wild and woody.
How to harvest
- Cut stems just above a pair of leaves to encourage branching.
- Take up to one-third of the plant at a time without stressing it.
- For a big refresh, shear the plant back to 4–6 inches once mid-season. It usually rebounds beautifully.
Reduce self-seeding
If your mint flowers, it is not the end of the world, but flowering can mean:
- Less leaf production
- Potential seedlings nearby (if viable seed forms)
Snip off flower spikes as soon as you see them if your goal is maximum leaf and minimum spread.
Preserve extra harvest
- Freeze: Chop leaves and freeze in ice cube trays with water or a bit of lemon juice.
- Dry: Air-dry small bundles in a dark, well-ventilated spot, then store in a jar.
- Mint sugar: Blend leaves with sugar, spread to dry, then store for teas and baking.
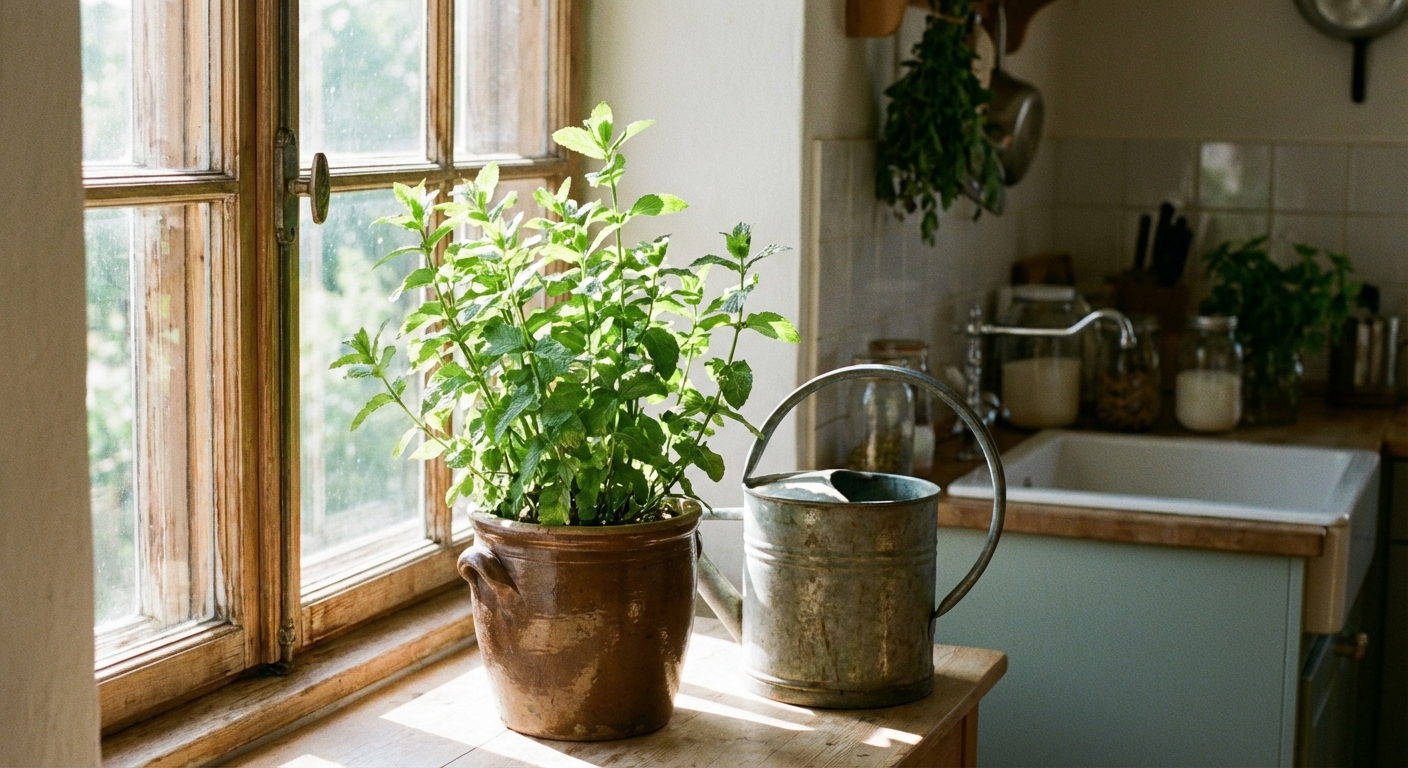
Indoor mint care
Mint can be a wonderful indoor herb, but it needs more light than most people expect.
Indoor setup
- Pot: 8–10-inch pot for one plant, with drainage holes
- Light: Bright south or west window, or 10–12 hours under a grow light
- Water: Keep evenly moist, not soaked
- Airflow: A little airflow helps prevent powdery mildew
Common indoor problems
- Leggy stems: Not enough light. Add a grow light and pinch tips weekly for a month.
- Yellowing leaves: Often overwatering. Let the top inch dry, and ensure the pot drains freely.
- Powdery mildew: Improve airflow, avoid wetting leaves, and remove the worst leaves. Outdoors in summer, mint often rebounds quickly.
- Spider mites: Rinse foliage in the sink and keep humidity slightly higher nearby.
Winter and overwintering
Mint is tough, but pots are harsher than the ground because roots get colder faster.
- In mild climates: Mint may stay green or only slow down. Keep watering lightly.
- In cold climates: Expect dieback after frost. Move pots to a sheltered spot (against the house, in an unheated garage with a little light, or into a cold frame), and water just enough to keep the soil from turning to dust.
- In-ground mint: Usually returns in spring. Mark the spot so you remember where it lives before it reappears with enthusiasm.
If mint escapes
If mint has already crept into your garden bed, take a breath. You are not a bad gardener. You are simply living with mint.
Step-by-step plan
- Trace the runners. Follow stems down to the soil and gently dig to find the rhizomes.
- Dig deeper than you think. Lift a generous section of soil and pull out all white, ropey rhizomes you can find.
- Sift and repeat. Any rhizome fragment can regrow. Recheck the area weekly for a month.
- Smother if needed. For stubborn patches, cut stems to ground level and cover with overlapping cardboard (extend it well beyond the patch) plus 3–4 inches of mulch for a full season. If it resurfaces at the edges, reset the cardboard and expect that it may take a second season.
- Replant intentionally. Put your “good” mint back into a pot where it belongs.
If it is in the lawn
Hand-digging works best for small areas. For bigger invasions, repeated mowing plus targeted digging can starve it out over time. Avoid tilling, which chops rhizomes into many new plants.
What about herbicide?
Some gardeners do, but on Leafy Zen I always start with physical removal and smothering. Mint is edible, and it often grows near food beds. If you decide to use any chemical control, follow label directions precisely and keep it away from edible plantings.
Companions and bad spots
Because mint likes moisture and can spread, it plays nicest when contained near plants with similar watering needs.
Good neighbors (with mint potted)
- Parsley, cilantro, chives in separate pots nearby
- Lettuce and leafy greens that appreciate consistent moisture
- Marigolds and nasturtiums nearby for pollinator charm
Where mint causes headaches
- In open ground near strawberries: Runners meet runners, and nobody wins.
- In perennial beds: It can weave through roots and become a long-term project.
- Next to thyme or rosemary: Those prefer drier soil, and mint will sulk or they will.
Quick checklist
- Best option: Grow mint in a pot placed on pavers or a hard surface.
- If in-ground: Use a barrier 12–18 inches deep with 1–2 inches above soil, and inspect the top edge.
- Pinch and harvest often: It keeps plants bushy and reduces flowering.
- Do a perimeter check: Every couple weeks in peak season.
- If it escapes: Dig rhizomes, then monitor and smother if needed.
Mint is one of those plants that rewards you for being gently firm. Give it a home with boundaries, harvest it like you mean it, and it will keep your kitchen stocked without turning your garden into Mintopolis.