How to Get Rid of Grubs in Your Lawn and Garden
If your lawn is developing irregular brown patches that do not respond to watering, or your turf feels a little too springy underfoot, you might be dealing with white grubs. And I know, the word “grub” makes most of us itch. But here is the good news: once you know what you are looking at, grubs are very manageable with timing, patience, and a couple of soil-friendly tools.
Quick note on timing: Grub hatch dates and “best treatment windows” vary by region, weather, and species. If you want a perfectly dialed-in calendar, check your local extension service for your area. This guide will keep you in the right lane for most temperate lawns.
White grubs are not one single pest. They are the larval stage of several common beetles, including Japanese beetles, June bugs, and chafers. That matters because the best treatments target them when they are small, feeding near the soil surface, and most vulnerable.
What grubs are (and which beetles they become)
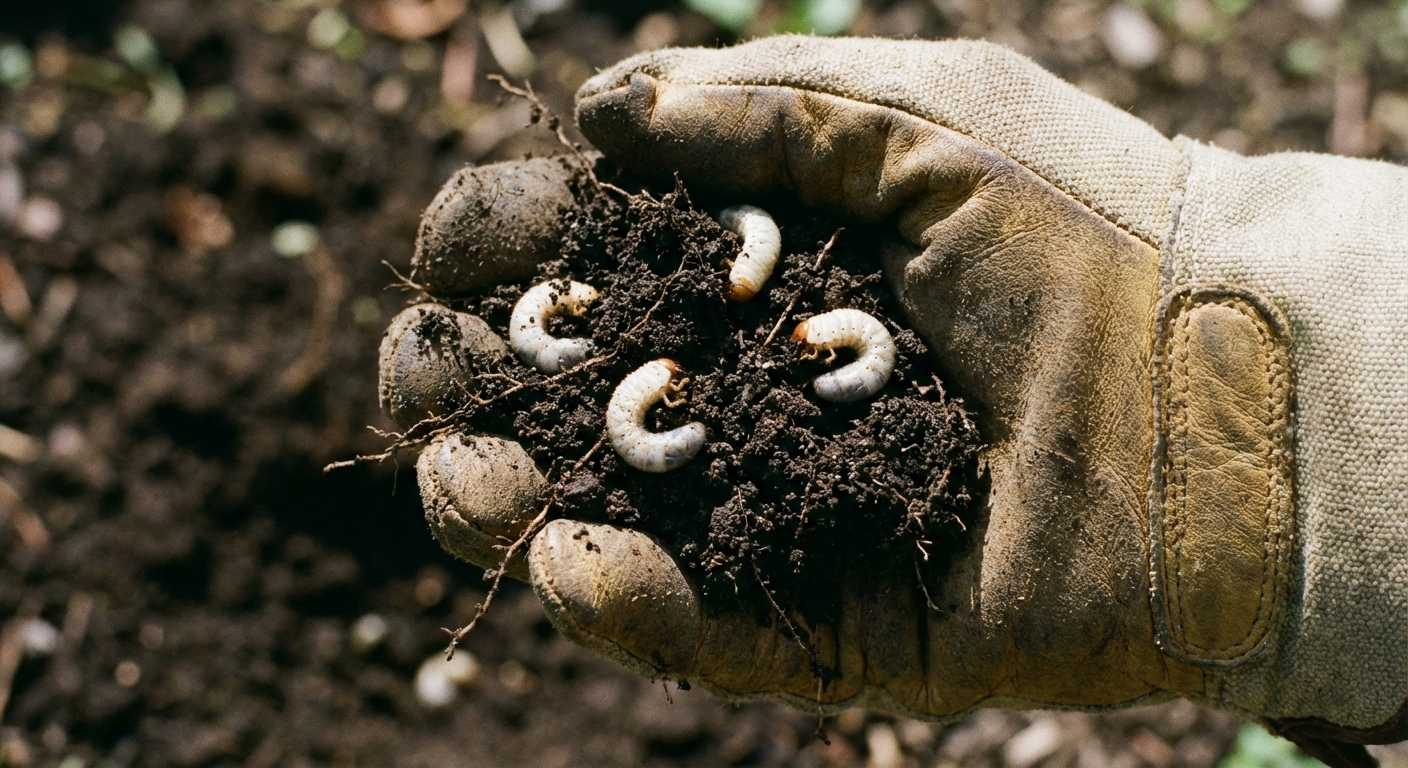
Grubs are beetle larvae that live in the soil and feed on grassroots. Most of the time, they curl into a tight C-shape when disturbed. As they grow, they can chew enough roots that the grass loses its anchor and starts to die back.
Common lawn and garden grubs
- Japanese beetle grubs: A major culprit in many regions. Treating grubs can help reduce how many adults emerge later, although adults can still fly in from nearby yards. If you are battling the metallic green adults on roses and fruit trees, you will want to read our Japanese beetle guide too: Japanese beetles.
- June bug (June beetle) grubs: Often called “June bugs” as adults. Grubs can be larger and may stay in soil longer depending on species.
- Chafer grubs: Common in some areas and often show up with classic “spongy turf” symptoms and animal digging.
In day-to-day lawn care, the exact species matters less than confirming that you have true grub damage and then treating at the right time of year.
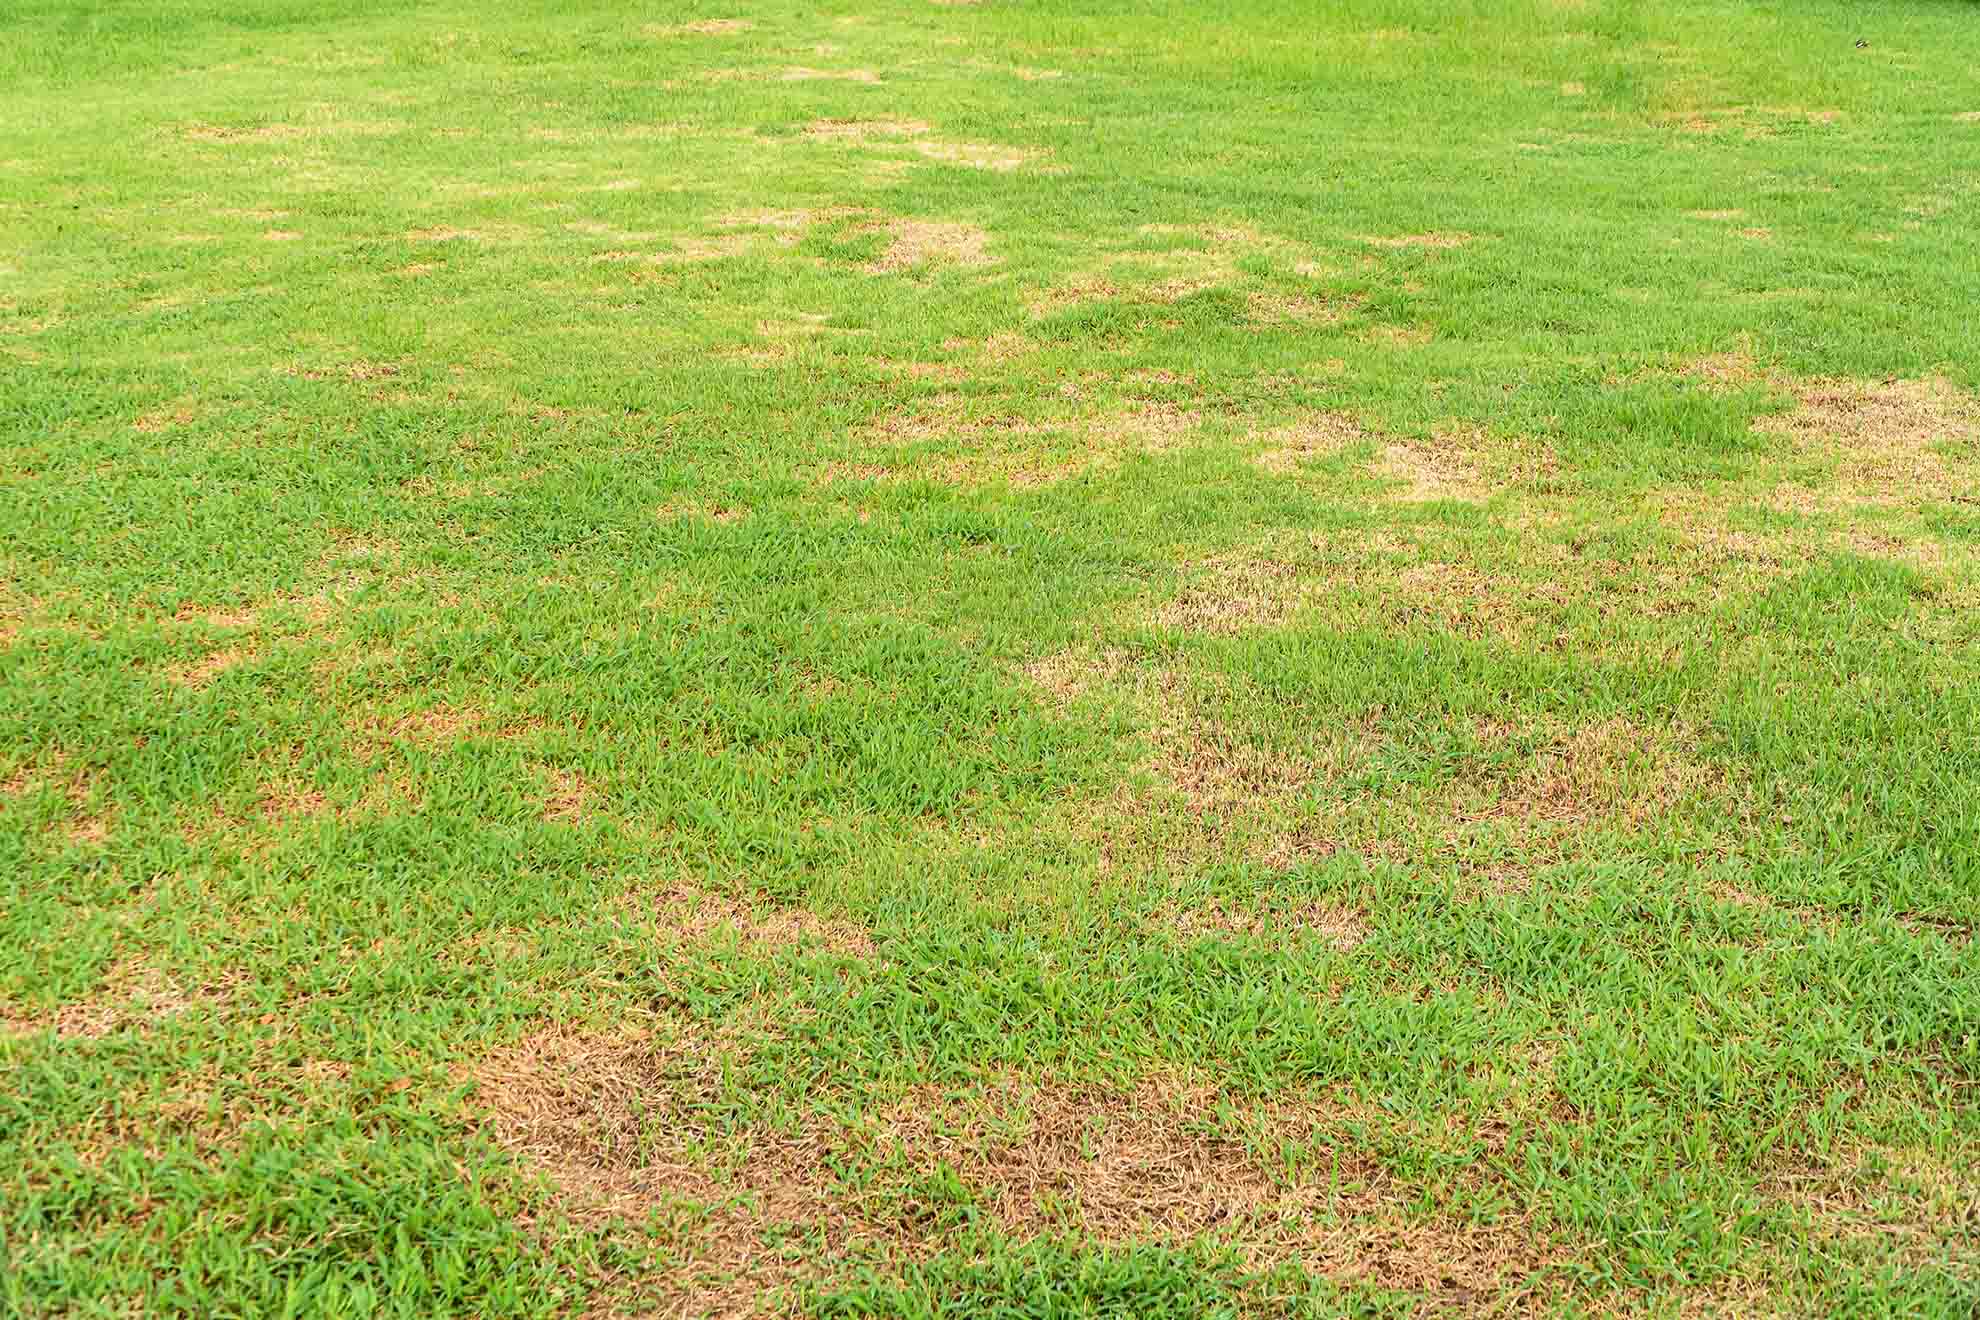
Signs you have grubs (not drought, disease, or dog spots)
Grub damage can look like other lawn problems at first glance. The giveaway is that the roots are compromised, so the grass cannot hold on or pull water like it should.
Typical grub symptoms
- Irregular brown patches that expand even when you water.
- Spongy turf that feels bouncy underfoot.
- Grass that peels back like a rug because the roots have been chewed off.
- Increased animal digging from raccoons, skunks, crows, or neighborhood dogs hunting the grubs for dinner.
- Wilting during mild heat because the lawn has lost its root system.
Common lookalikes: Heat stress, fungal issues (like brown patch), pet urine spots, and surface-feeding insects (like chinch bugs) can all mimic grub damage. Grub-damaged turf usually pulls up easily because the roots are gone.
Confirm it with a simple grub check
Before you treat, verify what is happening below the surface. I promise this takes less time than guessing and re-seeding in frustration later.
The 5-minute “lift the turf” test
- Choose the edge of a damaged patch where brown meets green.
- Cut a square of turf about 12 inches by 12 inches, 2 to 3 inches deep, using a spade.
- Peel it back and look in the top few inches of soil and thatch.
- Count grubs in that one-square-foot area.
- Replace the sod and water it in so you do not leave a dry, sad flap of lawn behind.
As a rough rule, 5 to 10+ grubs per square foot can justify treatment in many lawns, especially if you are seeing active damage. That said, thresholds vary by region, grass type, season, and grub species. A healthy lawn can tolerate a small population, while stressed turf may struggle with fewer.
Tip from my own yard: If the turf lifts easily, you do not even need to count perfectly. Roots that are mostly gone tell the story.
When to treat grubs for best results
Timing is the difference between “this worked beautifully” and “why did I spend money on this.” Grubs are easiest to control when they are small and close to the surface.
Best seasons (in most temperate regions)
- Late summer through early fall: Often the sweet spot. Eggs have hatched and young grubs are feeding aggressively near the surface.
- Spring: Can work, but grubs may be larger and harder to knock back. Treat if you confirm active grubs and damage.
In late fall and winter, grubs tend to move deeper into the soil. Most biological treatments will struggle then.
Natural and organic-friendly ways to get rid of grubs
If you are reading Leafy Zen, you probably do not want to carpet-bomb your soil ecology. Same. These methods focus on reducing grubs while supporting long-term soil health.
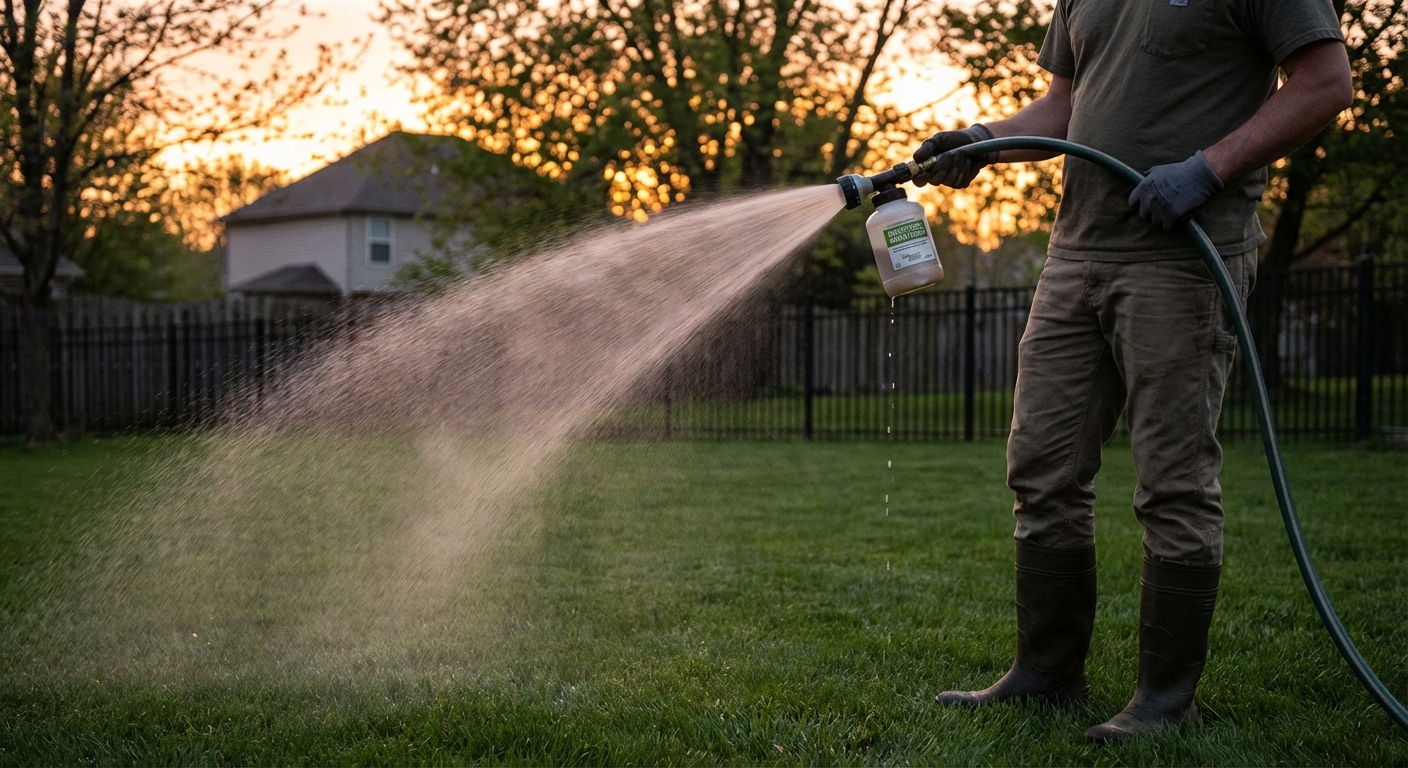
1) Beneficial nematodes (fast, effective when applied correctly)
Beneficial nematodes are microscopic soil-dwelling organisms that parasitize grubs. Think of them as tiny, living pest control that works best when conditions are moist, mild, and the grubs are still young.
- Choose the right type: For many white grubs, Heterorhabditis bacteriophora is commonly recommended. (Product labels usually say which pests they target.)
- Apply at the right time: Late summer or early fall is ideal in many areas, or spring if you confirm active grubs and your soil is warming up.
- Warm soil helps: Nematodes generally perform best when the soil is comfortably warm and grubs are near the surface. If your nights are still chilly and your soil is cold, results can be slower.
- Water first and after: Moist soil helps nematodes move. Water the area before application, then water again after to wash them into the root zone.
- Keep soil lightly moist for 1 to 2 weeks: Not soggy, just consistently damp enough to support their movement and survival.
- Apply in the evening or on a cloudy day: UV light can harm them.
- Avoid tank-mixing with pesticides or harsh chemicals unless the product states it is compatible.
If you have ever whispered encouragement to seedlings, you will understand why I love nematodes. You are basically releasing helpful life into your soil and letting it do what it evolved to do.
2) Milky spore (best for Japanese beetle grubs, long-term approach)
Milky spore is a naturally occurring bacterium that specifically targets Japanese beetle grubs. It is not a quick fix, but it can be a great long-term strategy in regions where Japanese beetles are an annual headache.
- Best for: Japanese beetle grub populations, not all grub species.
- What to expect: It can take 1 to 3 years to build up in the soil, depending on conditions and how heavy the infestation is.
- Regional reality check: Results vary by climate and soil. In cooler regions, it may establish more slowly or perform less consistently.
- Why it is worth it: Once established, it can persist and help reduce future generations, but longevity varies by location.
Because Japanese beetle grubs become the adults that skeletonize leaves, treating the larval stage is one of the most satisfying forms of prevention. If you are also seeing the adults, pair this page with our guide: How to get rid of Japanese beetles.
3) Smart watering and mowing (make your lawn less inviting)
You cannot “mow your way out” of a heavy infestation, but you can absolutely make your lawn more resilient and less attractive for egg-laying beetles.
- Water deeply but less often to encourage deeper roots. Shallow, frequent watering makes grass more fragile during root damage.
- Raise your mowing height (many lawns do well around 3 to 4 inches). Taller grass shades the soil and supports stronger roots.
- Aerate compacted soil if your lawn is heavily trafficked. Healthy roots tolerate some feeding better.
- Feed the soil with compost topdressing or organic slow-release fertilizer. Strong turf can outgrow minor grub feeding.
Timing note: Many grub-producing beetles lay eggs in summer, and several species tend to prefer moist turf for egg-laying. If you keep your lawn constantly wet during peak beetle activity in your area, you may be rolling out the welcome mat. Aim for deep, spaced-out watering instead of constant moisture.
What about chemical grub killers?
Some situations do call for faster knockdown, especially if you are losing large areas of turf. Products sold as “curative” grub control are designed to kill feeding grubs, while “preventive” products target newly hatched larvae.
Because availability and regulations vary by region, and because chemical choices can affect pollinators and soil life when misused, I recommend this order of operations:
- Confirm grubs first with a turf check.
- Start with nematodes (and milky spore if Japanese beetles are the main issue).
- Use targeted chemical control only if needed, and follow label directions exactly, including watering instructions and timing.
Timing matters here:
- Curative products work best when grubs are small and near the surface, typically late summer to early fall (or in spring if you confirm active feeding). This is the “I have grubs right now” option.
- Preventive products need to be applied earlier so they are in the root zone when eggs hatch, often early to mid-summer (commonly June or July) depending on your region and the product. This is the “I want to stop the next wave” option.
If you are unsure which type you are looking at, check the label for whether it is intended for active infestations (curative) or for preventing newly hatched grubs (preventive), then match the application window to your local timing.
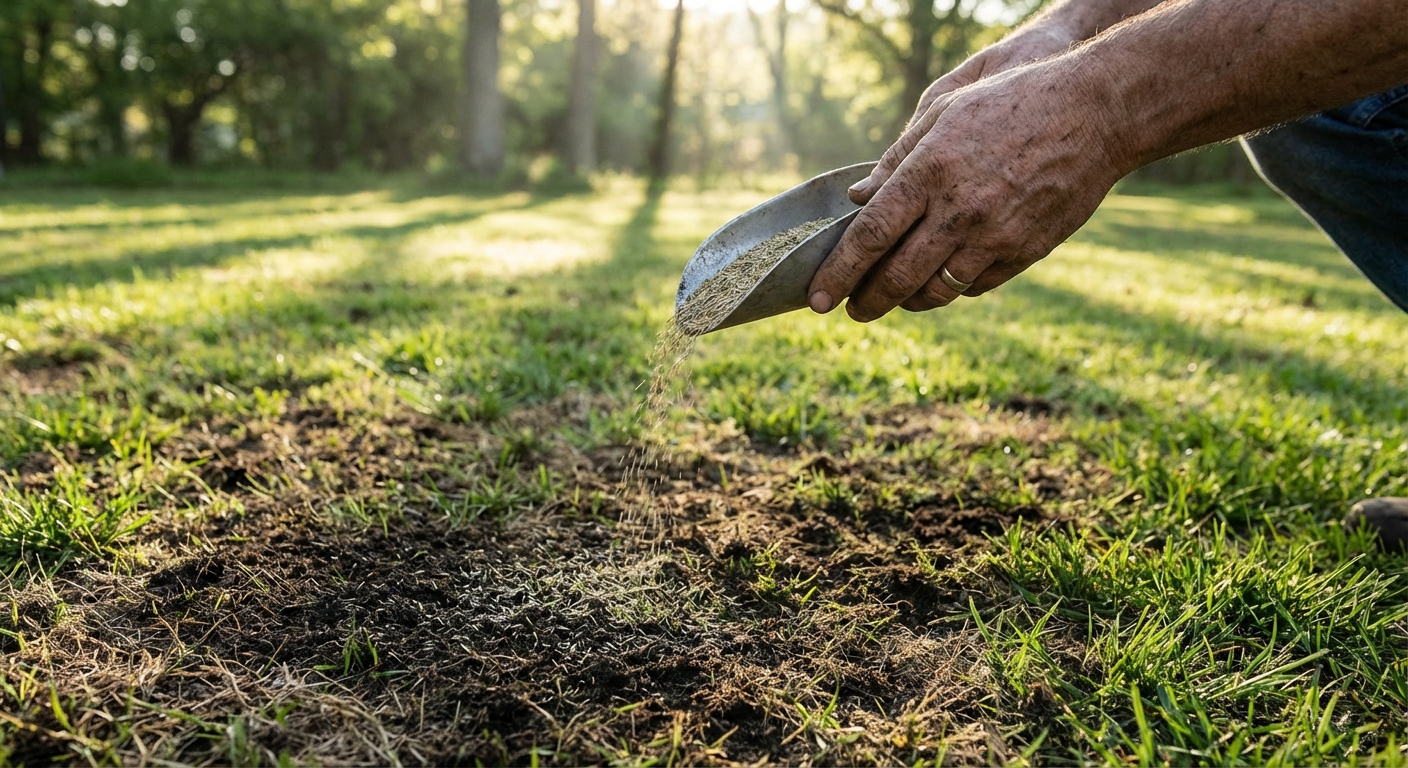
Repairing grub damage after treatment
Once grubs are under control, your lawn may still need a little nursing. Think of it like putting a plant back on a steady watering schedule after a rough week. It can bounce back, but it appreciates support.
Quick recovery steps
- Rake out dead grass so new growth has room.
- Loosen the top layer lightly with a rake or core aeration if soil is compacted.
- Topdress with compost (a thin layer, about 1/4 inch) to feed soil microbes and improve structure.
- Overseed early fall (often best) or spring, depending on your grass type and climate.
- Keep seed consistently moist until established, then transition to deep watering.
Grubs in garden beds: what to do
Grubs do not always stay politely in the lawn. You might find them in vegetable beds, raised beds, or around ornamental plants, especially if you are turning compost or digging planting holes.
- Hand-pick while you dig: If you find a few grubs while planting, remove them and drop them into a bucket of soapy water.
- Use beneficial nematodes in beds as well, following the same moisture and timing rules.
- Focus on soil health: Diverse soil life helps keep pest populations from exploding. Compost, mulch, and avoiding unnecessary pesticides all help.
One caution: if you are seeing large grubs in compost piles or rich, decaying material, some may be decomposers depending on your region and species. Species-level ID is tricky without experience. My rule is simple: confirm damage before you declare war. In lawns, do the turf test. In beds, look for wilting, stunted plants, or roots that look chewed, not just the presence of a few C-shaped visitors.
Grub control checklist (printable in your brain)
- Confirm grubs with a 12-inch turf check
- Expect thresholds to vary by region, turf health, and species (use local extension guidance if possible)
- Treat when grubs are small: late summer to early fall is often best
- Apply beneficial nematodes with moisture, warm soil, and low UV exposure
- Use milky spore for Japanese beetle grubs as a long-term plan (results vary by climate)
- Raise mowing height and water deeply to strengthen roots
- Repair with compost topdressing and overseeding after control
If you are also seeing shiny green-and-copper beetles chewing leaves, remember: many of those adults started life as these very grubs. You can tackle both stages with a one-two punch. Start here for the larval stage, then head to our Japanese beetle page for adult control tactics.