How to Get Rid of Cucumber Beetles Naturally
Cucumber beetles have a special talent for showing up the moment your cucumbers look happy. One day you’ve got bright seedlings and tidy little blossoms, and the next you’re staring at ragged holes in the leaves and that awful, sinking feeling that something’s chewing through your harvest.
The good news is you can manage cucumber beetles naturally. The trick is to act early, protect young plants, and stack a few gentle tactics instead of leaning on one “magic” spray.
Meet the culprits
In many home gardens, two of the most common cucumber beetles are the striped and the spotted. Both love cucumbers, squash, melons, and pumpkins. (Depending on where you live, there can be other cucumber beetles and a few lookalikes, too.)
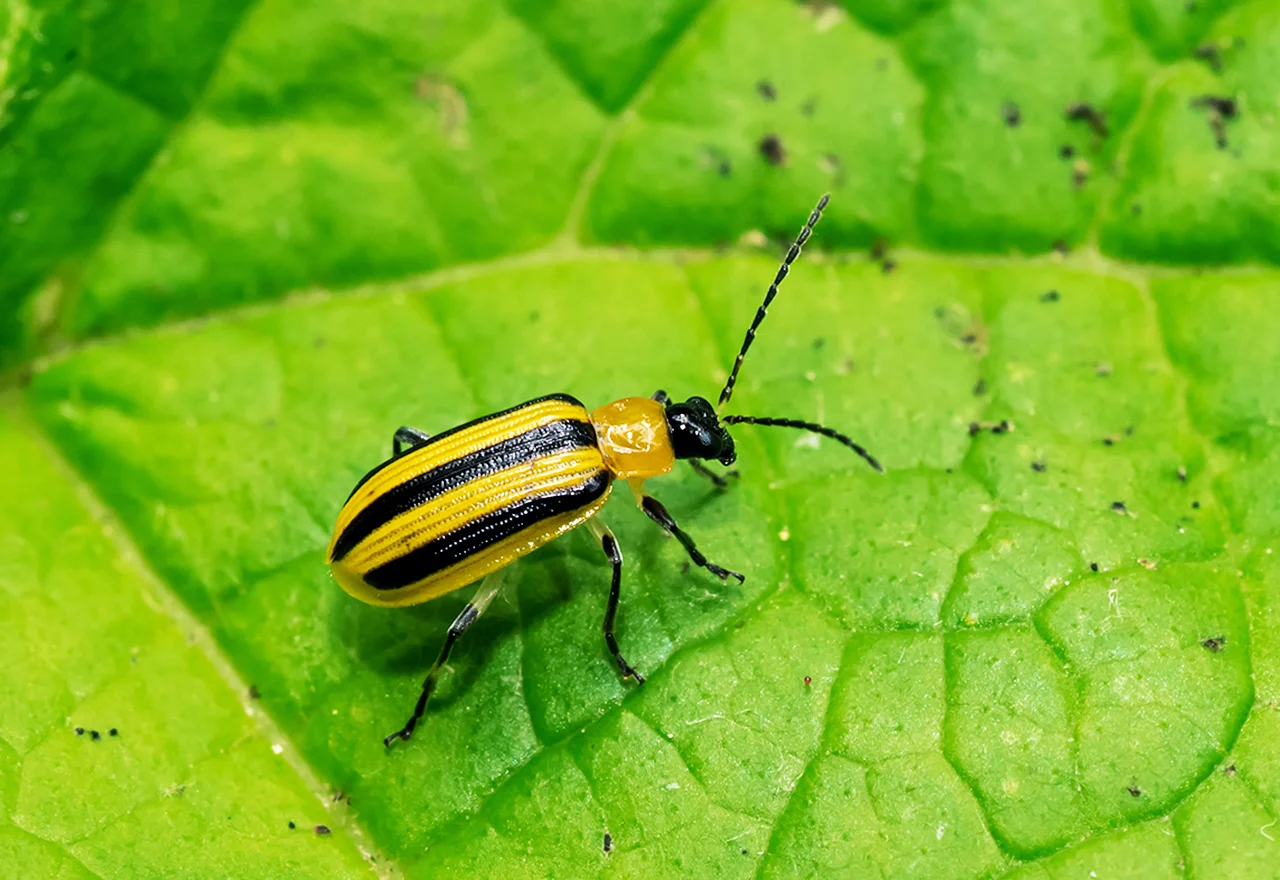
Striped cucumber beetle
- Look: Yellow-green body with three black stripes running lengthwise down the wing covers.
- Common in: Much of North America, often the biggest problem on cucumbers.
- Big risk: More closely associated with bacterial wilt transmission.
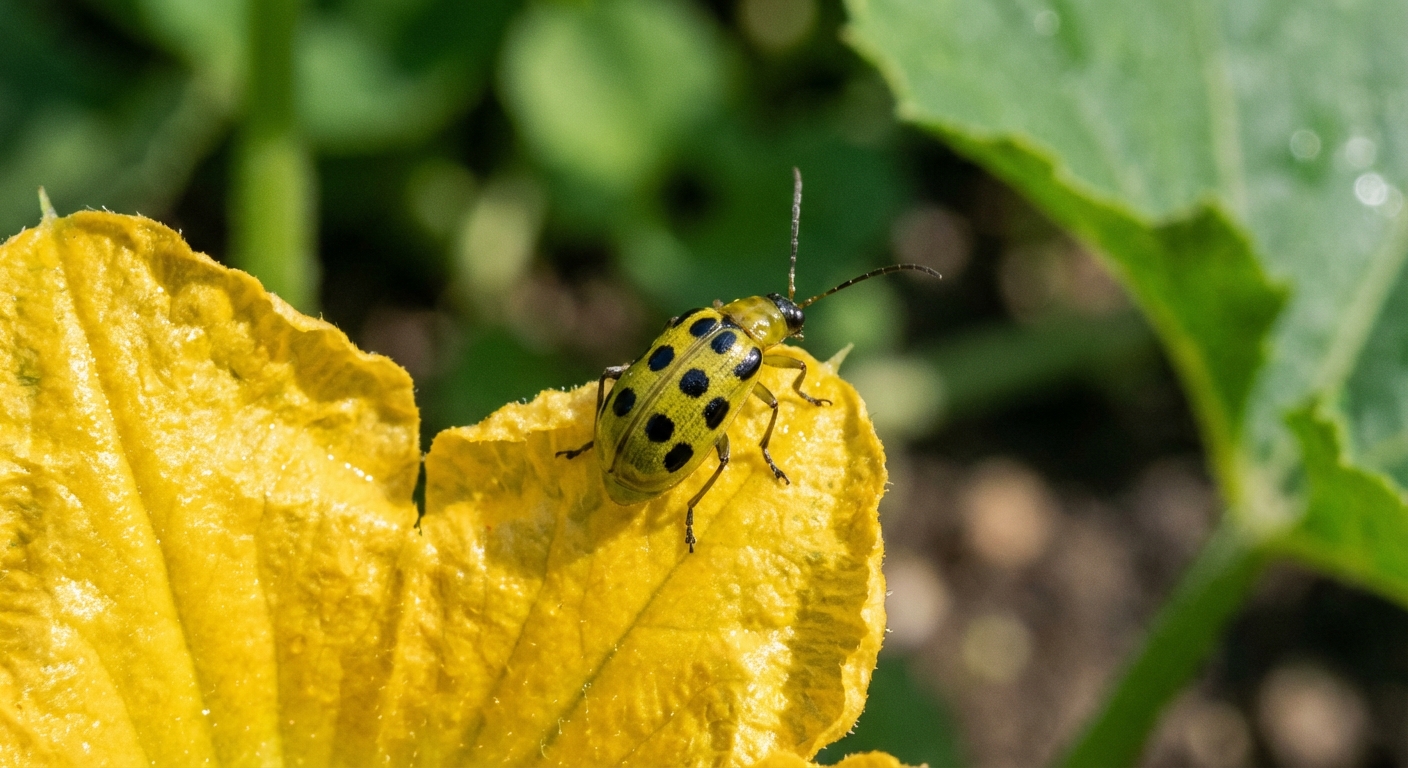
Spotted cucumber beetle
- Look: Yellow-green body with black spots (not stripes).
- Also called: The same species is commonly called the southern corn rootworm in its larval stage.
- Big risk: Heavy feeding damage and it can spread diseases too.
If you’re not sure which one you’ve got, don’t stress. The natural control methods below work for both.
What they do to plants
Cucumber beetles show up in two places in the life cycle: adults chew above ground, and larvae feed below ground on roots. That’s why early protection matters so much.
1) Leaf and flower feeding
Adults chew small holes in leaves, stems, and blossoms. Seedlings and young transplants are most vulnerable. If they hit early, plants can stall out or die back, especially if the stems get nicked at the base.
2) Fruit scarring
As fruit forms, beetles can create pitted, scarred areas on cucumbers. The fruit often still tastes fine, but it’s more likely to rot and it’s definitely not the kind of cucumber you want to show off.
3) Bacterial wilt, the real nightmare
Cucumber beetles can spread bacterial wilt (caused by Erwinia tracheiphila) when they feed. The bacteria enters through feeding wounds and clogs the plant’s vascular system.
Classic symptoms:
- Leaves wilt in the heat of the day, then perk up at night at first
- Wilting becomes permanent and spreads quickly
- Whole vines collapse even when soil moisture is fine
Important: Once a plant has bacterial wilt, there’s no cure. Prevention and quick beetle control are what save the rest of the patch.
Quick variety note: Cucumbers and muskmelons tend to be hit hardest by bacterial wilt. Many squash are less susceptible, but they can still be chewed up.
Natural control, step by step
I like to think of cucumber beetle control as a layered system. Stack two or three of these tactics and you’ll usually go from panic to manageable pretty fast.
When to escalate: If seedlings are getting repeatedly chewed (especially if you’re seeing beetles daily), move straight to physical exclusion plus daily removal. Small plants can’t “grow out of it” the way big vines sometimes can.
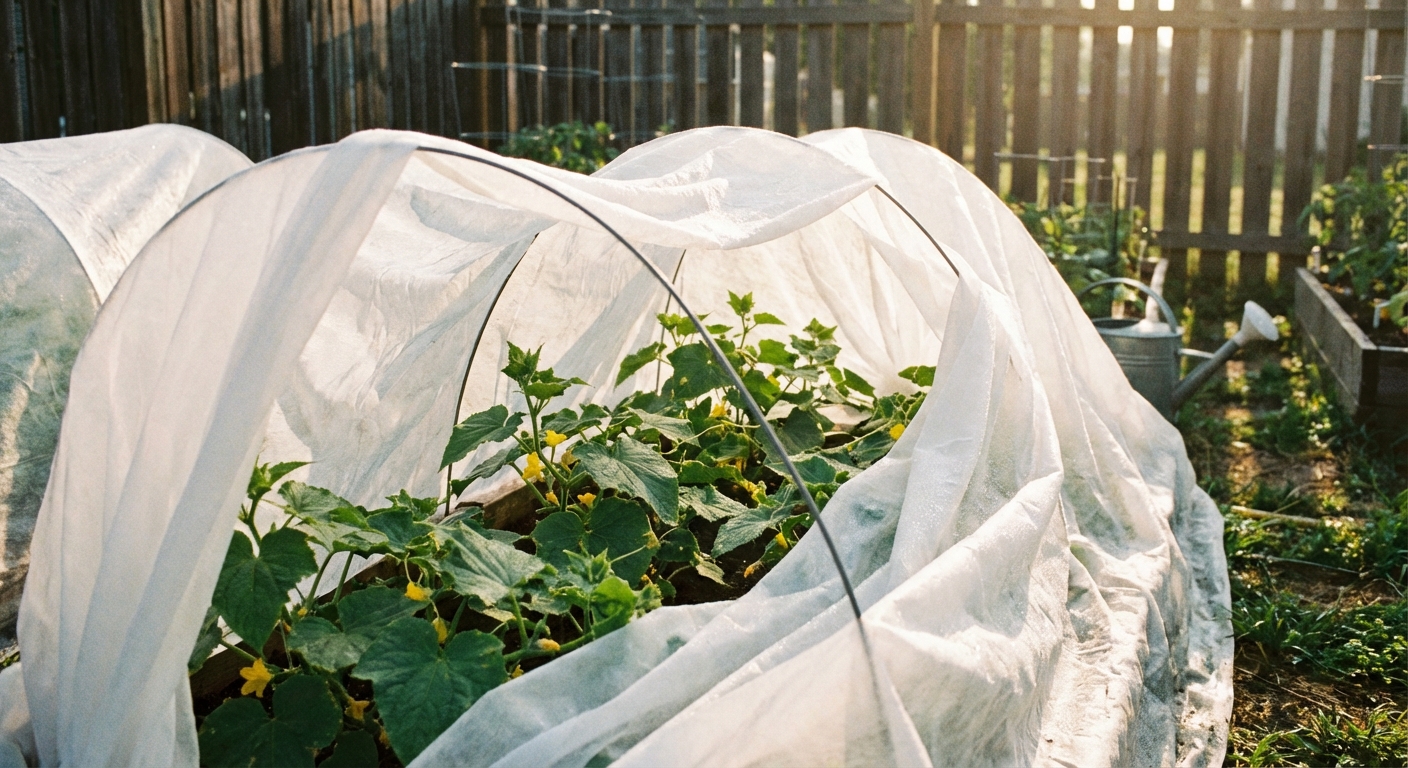
Row covers
Lightweight row cover fabric physically blocks beetles from reaching plants. This is hands down my favorite organic tactic for cucumbers because it prevents early feeding and lowers the odds of bacterial wilt.
- When to install: Right after planting or transplanting.
- Before you cover: If you’re installing covers late, inspect plants first and hand-pick any beetles. Otherwise you can trap them inside and make things worse.
- How to use: Drape the fabric over hoops or directly over plants, then seal edges with soil, boards, or landscape staples.
- When to remove: When plants begin flowering and need pollinators. If you’re growing parthenocarpic cucumbers (some greenhouse or “no pollination needed” types), you may be able to keep covers on longer.
Tip from my own beds: Even a tiny opening is a beetle doorway. Take one extra minute to secure edges tightly.
Hand-picking
If you’ve only got a few plants, hand-picking is surprisingly effective, especially in the first weeks.
- Best time: Early morning when beetles are sluggish.
- How: Hold a cup or small bucket of water with a few drops of dish soap under the leaf, then tap the leaf or gently flick beetles in.
- Repeat: Daily for several days during peak activity, then every few days as pressure drops.
If you stay consistent for one week, you can often prevent that first population spike.
Trap crops
A trap crop is a plant the beetles prefer, placed nearby to concentrate them in one spot so your main crop gets a break.
- Common trap crops: Blue Hubbard squash is a classic. Some gardeners also use certain summer squash varieties.
- Placement: Plant trap crops on the edge of the cucumber bed or a few feet away, not mixed in.
- What you do next: Once beetles gather on the trap crop, you can hand-pick there, vacuum with a small handheld garden vac, or treat only the trap crop with an approved organic product.
Key point: A trap crop works best when it’s planted a bit earlier so it’s more attractive before your cucumbers are.
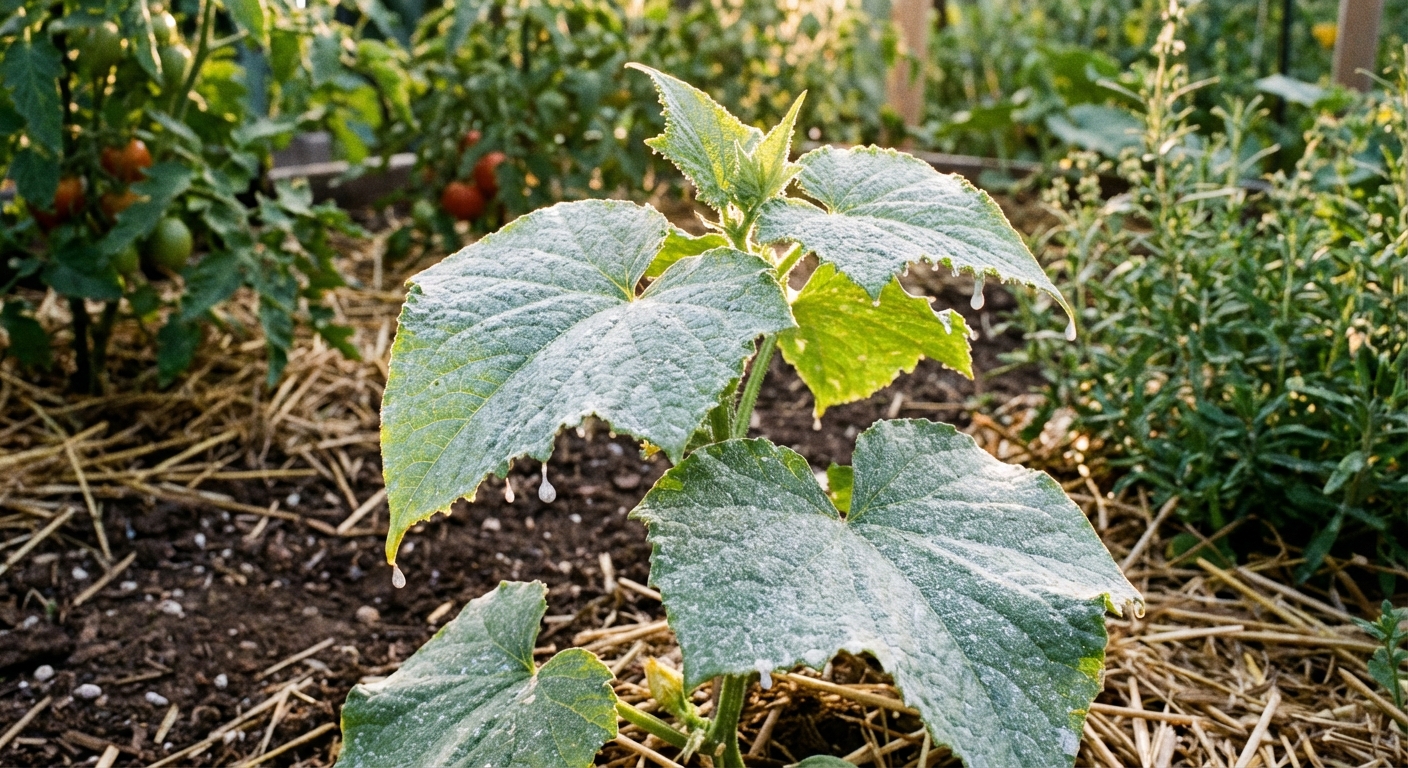
Kaolin clay
Kaolin clay (often sold as a horticultural film) leaves a fine, white mineral coating that makes plants less appealing for feeding. It’s not a poison. It’s more like making your cucumbers feel unpleasant to chew.
- Best use: As a preventative or right at first sighting.
- Application: Mix and spray until leaves are evenly coated. Reapply after heavy rain or vigorous new growth.
- What to expect: Leaves will look dusty white. That’s normal and it washes off produce.
- Reality check: It can reduce feeding and may reduce egg-laying, but results vary garden to garden.
Plant-safety note: Try a small test spray first, and avoid spraying stressed plants in the heat of the day.
Neem oil
Neem can be helpful as part of the plan, but it isn’t a quick knockdown for adult beetles. Think of it more as a tool that may reduce feeding and act as a repellent, with results that vary.
- How to apply: Spray thoroughly, especially leaf undersides where beetles hide.
- Timing: Apply in early morning or evening to reduce risk to pollinators and avoid leaf burn in hot sun.
- Repeat: Usually every 5 to 7 days during heavy pressure, and after rain, following label instructions.
Pollinator note: Avoid spraying open flowers. If you’ve got to treat during bloom, spray only foliage and only at dusk when bees aren’t active.
Plant-safety note: If your plants are heat-stressed, skip neem until they perk up, or test on a small area first.
Beneficial nematodes (for larvae)
If you suspect you’ve got heavy pressure year after year, beneficial nematodes can be a nice add-on because they target soil-dwelling stages like larvae.
- What to use: Look for species sold for garden pest larvae control (commonly Steinernema and Heterorhabditis types).
- How to apply: Water them into moist soil, then keep soil lightly moist for the period recommended on the package.
- Timing: Most effective when soil temps are in the recommended range and larvae are present.
This isn’t an instant fix, but it can help tip the balance over time.
Bring in the good guys
Your goal isn’t to create a sterile garden. It’s to build a lively little ecosystem where pests have natural enemies. Just keep expectations realistic: beneficials support your long game, but they won’t usually stop a sudden outbreak overnight.
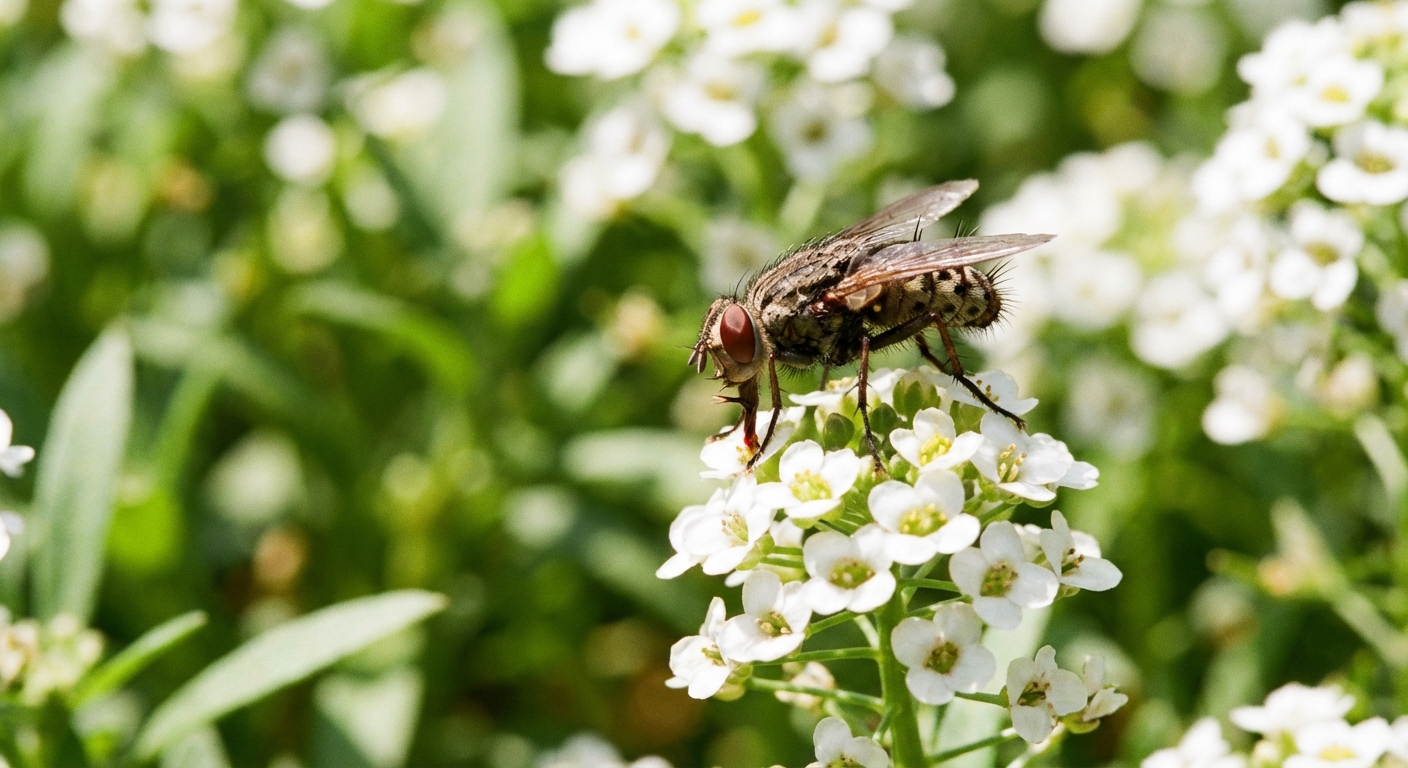
Tachinid flies
Tachinid flies are beneficial parasitoids. Many species lay eggs on or near pest insects, and their larvae develop by feeding on the host. In home gardens, you won’t usually “release” tachinid flies like you might ladybugs. You attract them.
How to attract tachinid flies and other beneficials:
- Plant small-flowered nectar sources like dill, cilantro, parsley (let some bolt), yarrow, alyssum, and calendula
- Include a few native flowering plants for a longer bloom season
- Avoid broad-spectrum insecticides, even organic ones, unless truly necessary
Other helpful allies
- Ground beetles and rove beetles: Predators that can eat eggs and larvae in soil and debris
- Parasitic wasps: Many target common garden pests. They’re more of a steady pressure than a same-day solution for cucumber beetles.
- Spiders: Not picky eaters, which is exactly why I let them stay
Quick action plan
- Check plants at sunrise and hand-pick into soapy water for 3 to 5 days.
- If plants aren’t flowering, add row covers and seal the edges (after you’ve inspected and removed any beetles already on the plants).
- If plants are flowering, skip covers and use kaolin clay on foliage, avoiding blossoms.
- Set up a trap crop on the bed edge for the next wave.
- Support beneficials by adding a small patch of nectar plants nearby.
Most gardens turn the corner when you combine physical exclusion (covers or kaolin) with removal (hand-picking) and habitat support (beneficials). It’s not glamorous work, but it’s peaceful in its own way. A few quiet mornings in the cucumber patch can save your whole season.
Prevention for next season
- Rotate cucurbits to a different bed if possible to reduce carryover pressure.
- Clean up plant debris at season’s end to remove hiding spots.
- Harden off and transplant strong seedlings since bigger plants tolerate some feeding.
- Mulch thoughtfully: Keep the area around stems tidy so you can monitor pests, but maintain overall soil coverage for health.
- Start with covers from day one for the simplest, lowest-stress prevention.
- Consider nematodes if you’ve had chronic pressure and want to target larvae in the soil.
When to worry about bacterial wilt
If you see sudden, spreading wilt on cucumbers while the soil is evenly moist, take it seriously.
- Remove severely affected plants to reduce beetle feeding and disease spread to nearby vines.
- Control beetles right away on remaining plants using the methods above.
- Don’t compost badly diseased vines if your compost doesn’t get consistently hot. Bag and dispose instead.
If you want to do a quick at-home check, many gardeners use the “string test” for wilt bacteria by cutting a wilted stem and gently pressing the cut surfaces together, then pulling apart to see if sticky strands form. It’s not perfect, but it can support your suspicion when symptoms fit.