DIY Water Features for a Calmer Garden
There are few things that calm a busy brain faster than moving water. Even a small trickle can soften street noise, pull birds into your yard, and turn an ordinary corner into a place you actually use. The best part is you do not need a landscape crew or a giant budget. A weekend, a level, and a little patience will get you there.
This guide walks you through three beginner-friendly options, how to size and place them, and the step-by-step install for each: a bubbling urn, a recirculating fountain, and a backyard pond. Pick the vibe that fits your space and your maintenance comfort level, then we will build it together.
Pick your water feature style
All water features fall on a spectrum of sound, wildlife value, and upkeep. Here is the honest gardener version of what you are signing up for.
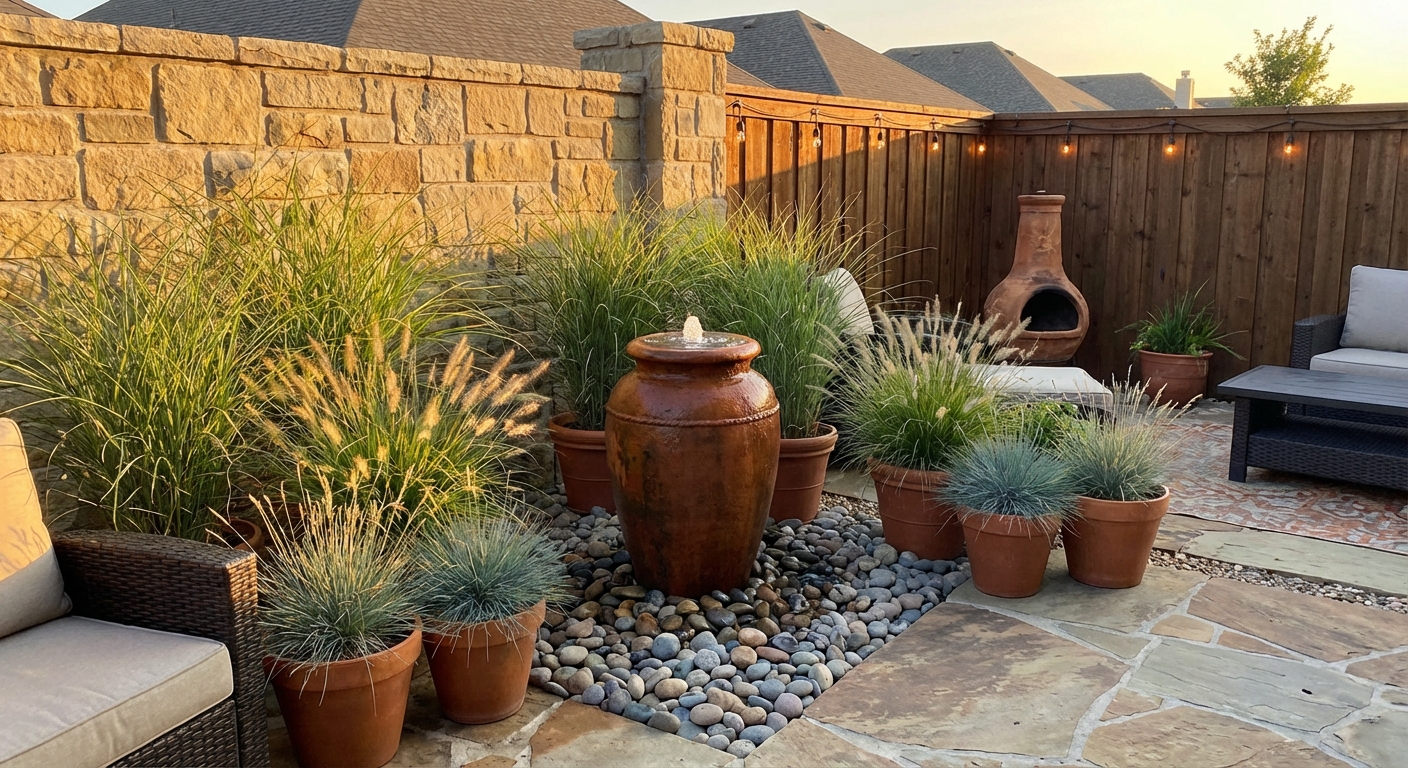
Bubbling urn (my favorite starter project)
- Best for: patios, small yards, entry gardens, balcony-adjacent courtyards
- Sound: gentle burble, easy to tune by adjusting flow
- Maintenance: low, mostly topping off water and wiping algae
- Wildlife: moderate, add a shallow dish or pebble edge for safe sipping
Recirculating fountain (basin + pump)
- Best for: a focal point you can see from a window, like near a patio or kitchen view
- Sound: adjustable, from a whisper to a lively splash
- Maintenance: low to moderate, depends on basin size and sun exposure
- Wildlife: good, birds love a clean, shallow edge
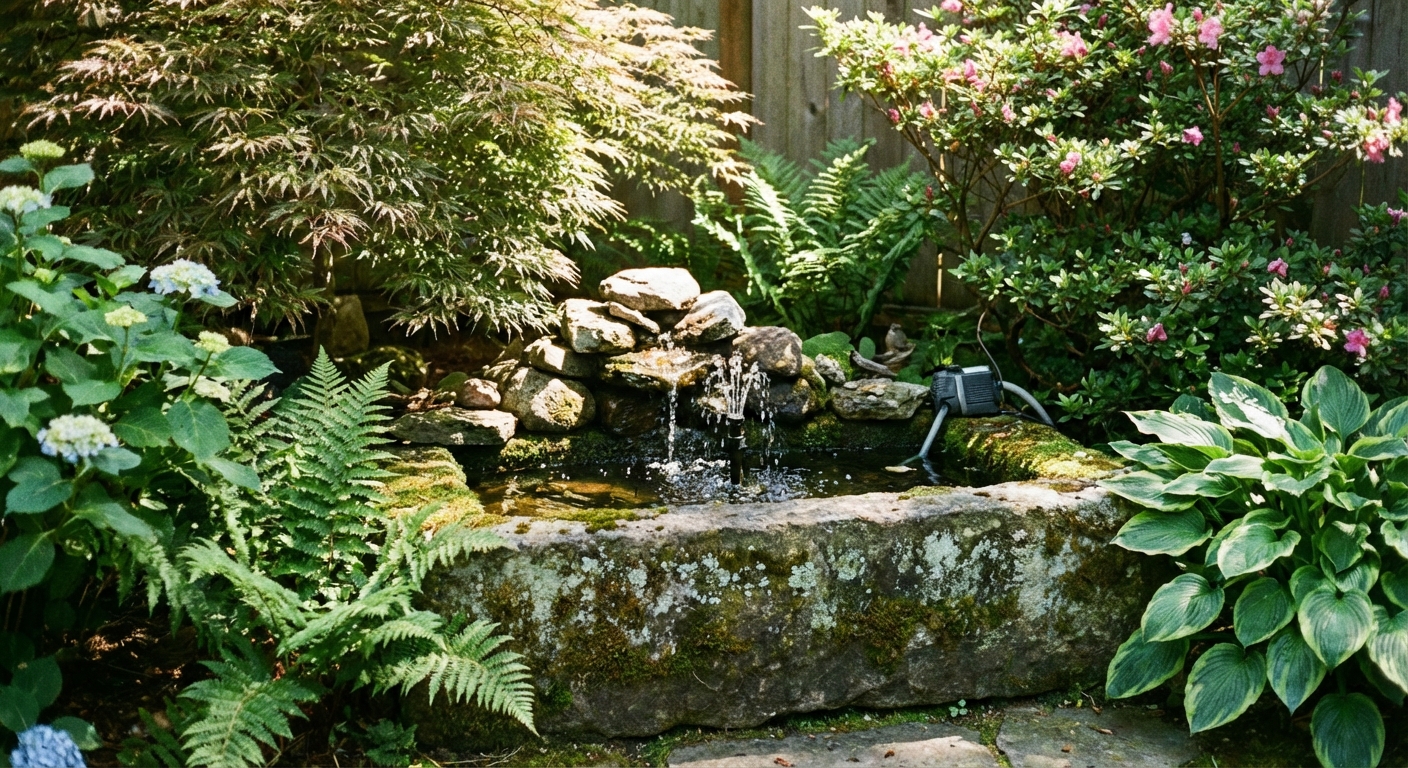
Backyard pond (liner pond or preformed)
- Best for: maximum zen, plants, frogs, dragonflies, and true habitat
- Sound: optional, add a small waterfall or spillway
- Maintenance: moderate, but easier than people fear once it is balanced
- Wildlife: excellent, especially with shelves for marginal plants
Clara’s quick rule: If you want the calm look of water with the least fuss, do a bubbling urn. If you want an ecosystem, do a pond.
Plan first: placement, size, and sound
Where to put it
- Choose a view: Place it where you will actually see it from a favorite chair or window. A water feature hidden behind shrubs is like buying perfume and keeping it in a drawer.
- Stay near power: Most beginner DIY builds use an electric submersible pump (solar exists, but it is its own rabbit hole). Keep the location within reach of a GFCI-protected outlet. If you are not sure, assume you need an electrician.
- Aim for part sun: Full sun warms water and encourages algae. Deep shade can mean more leaf litter. Morning sun with afternoon shade is a sweet spot.
- Avoid the dripline: Big trees drop leaves, and their roots can complicate digging. The dripline is the canopy edge where rain drips off. If you love the spot anyway, commit to a simple skimmer net routine.
- Keep it level: Water shows every tiny tilt. Pick a spot that is naturally flat or that you can level with a few inches of base material.
How big should it be?
Use this quick sizing guide to avoid the two most common mistakes: a feature that feels dinky in the space, or a basin so small you are topping it off constantly.
- Small patio: 18 to 24 inch diameter basin or reservoir
- Medium patio or courtyard: 24 to 36 inch basin or hidden reservoir
- Small pond: 4x6 feet is a great starter footprint, with the deepest point at least 18 to 24 inches in warmer climates. If you overwinter fish or live where water freezes hard, many pond keepers go 30 to 36 inches or more. Check local freeze depth and your fish species.
Sound matters more than you think
Water sound comes from drop height and surface splash. A short drop over rocks gives a soft, natural trickle. A taller drop into an open basin makes brighter sound and more evaporation. If your yard is noisy, a bit more splash can be a blessing.
Tools and supplies (for most DIY builds)
Gathering everything first saves a lot of muddy trips to the hardware store. Most projects will use some mix of the list below.
- Shovel and hand trowel
- Level (a 2 to 4 foot level is ideal)
- Measuring tape
- Wheelbarrow or heavy-duty tote
- Landscape fabric (optional but helpful under gravel)
- Sand or stone dust (decomposed granite or stone screenings) for leveling base
- River rock or polished pebbles (choose stones too large for kids to swallow)
- Submersible pump (sized to your feature)
- Tubing (typically 1/2 inch to 1 inch ID, matched to pump outlet)
- Hose clamps
- GFCI outlet and an outdoor-rated extension cord if needed (rated for wet locations)
- Optional: check valve to keep water in the line when the pump turns off
- Optional: fountain foam or silicone to guide water flow over rocks
Pump sizing shortcut (with a reality check): For a simple bubbler, aim for 100 to 200 GPH. For small fountains, 200 to 400 GPH. For waterfalls, a common starting point is about 100 GPH per inch of waterfall width at roughly a 1 foot drop, then adjust based on the look you want.
One important note: pump boxes list GPH at 0 head (no lift). Always check the pump’s max head and, if available, the performance chart. A pump rated 400 GPH at 0 head may deliver much less once you lift water 3 to 5 feet through tubing.
Project 1: Bubbling urn (step-by-step)
A bubbling urn looks fancy, but the guts are simple: a pump in a hidden reservoir pushes water up through the urn, then it spills back down through rocks into the reservoir again. No standing open basin, which often means fewer mosquitoes and less risk for curious pets.
Mosquito reality: This works best as long as water stays circulating and there are no stagnant pockets. If the pump is off for stretches, treat the water with BTI mosquito dunks as needed and follow label directions.
What you need
- Urn or pot with a drilled hole (or a drillable material like cast stone or thick ceramic)
- Hidden reservoir basin (a pre-made fountain basin, or a sturdy plastic tub designed for reservoirs)
- Reservoir grate (to support stones and the urn)
- Submersible pump + tubing
- River rock to cover the grate
Step 1: Mark and dig
Set the reservoir in place and trace around it. Dig the hole so the rim will sit about 1 inch above the surrounding soil. That tiny rise keeps runoff, mulch, and lawn clippings from washing into your clean water.
Step 2: Level the base
Add 1 to 2 inches of sand or stone dust, tamp it, then check level in multiple directions. This step is the difference between “serene” and “why is it always spilling on one side.”
Step 3: Place the reservoir and grate
Drop the reservoir in, double-check level, then set the grate on top. Cut a small notch for the tubing if your grate does not have one.
Step 4: Install the pump and tubing
Put the pump in the reservoir. Attach tubing firmly and run it up through the urn. Use a hose clamp if the fit is not snug. If your urn is tall, choose a pump with enough head height so the water still bubbles nicely at the top.
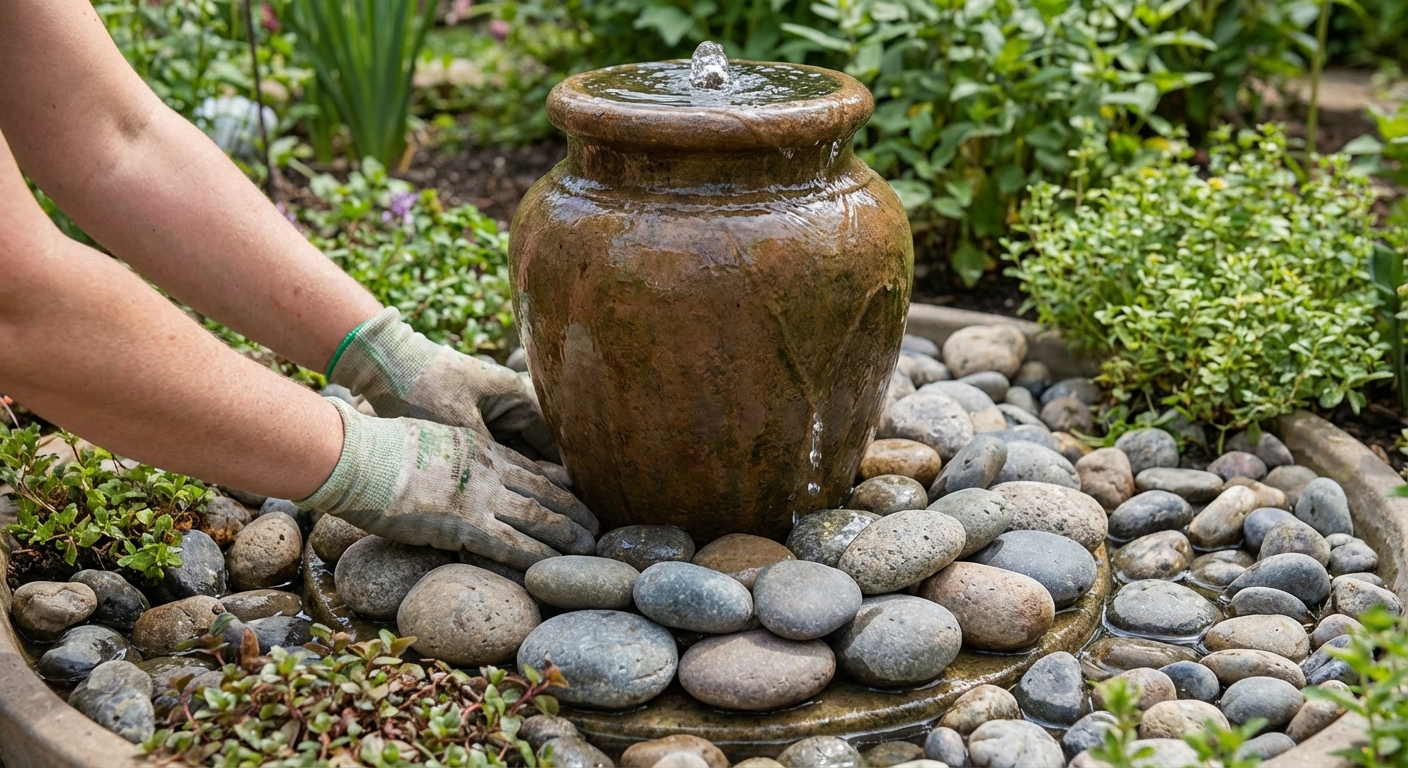
Step 5: Set the urn and hide the hardware
Place the urn centered over the grate, then cover the grate with river rock. Keep stones away from the pump intake so it can breathe.
Step 6: Fill, test, and tune
Fill the reservoir until the pump is fully submerged. Plug into a GFCI outlet and test. Adjust the flow control on the pump (if it has one) until the water bubbles up and falls back into the rocks without spraying outside the reservoir.
Pro tip: If water wants to hug the urn and sneak outside the reservoir, add a ring of smooth pebbles near the base to guide it back in. Water is persistent like that.
Project 2: Simple recirculating fountain (basin style)
This is the classic look: a visible basin that holds water, plus a fountain head or feature that returns water to the basin. It is easy, affordable, and very satisfying.
What you need
- Watertight basin (stone, resin, metal, or glazed ceramic rated for outdoors)
- Fountain pump
- Fountain tubing and a nozzle or fountain head (optional)
- Bricks or an inverted pot to raise the pump if the basin is deep
- Stones to hide the pump and tubing (optional)
Step 1: Choose a stable base
Set your basin on compacted soil, pavers, or a small gravel pad. Check level. A fountain that is slightly out of level will splash out faster and look lopsided.
Step 2: Position the pump
Place the pump in the basin. If the basin collects debris, lift the pump slightly on bricks so it sits above grit on the bottom.
Step 3: Connect tubing and nozzle
Attach tubing to the pump outlet and add the nozzle if you want a specific spray pattern. Keep the spray low at first. The higher the spray, the faster the wind steals your water.
Step 4: Fill and test
Fill the basin, plug into a GFCI outlet, then watch for splash. Adjust the pump flow until all water lands back in the basin even on a breezy day.
Step 5: Finish the edges
Add stones, a ring of groundcover, or a simple gravel skirt. This is where a fountain goes from “new object” to “belongs here.”
Project 3: Backyard pond (liner pond, beginner-friendly)
A pond feels like you built a whole little world. It is also the project where planning pays off the most, especially for depth, shelves, and edging.
Before you dig
- Call before you dig: In the US, call 811 (or your local utility locate service) before you start. Hitting a line is not a lesson any of us need.
- Depth matters: Deeper water is more stable in temperature and algae-prone swings. Even a small pond benefits from a deeper center pocket.
- Shelves help: Plant shelves (shallow ledges) make it easy to place marginal plants and create wildlife-friendly edges.
- Edging is everything: The liner should be hidden and protected from sunlight. Your edge treatment is what makes it look natural.
What you need
- Pond liner (EPDM rubber is durable and widely used)
- Underlayment (pond underlayment or old carpet, never anything treated with chemicals)
- Pond pump and tubing (and a filter if you want extra clarity)
- Rocks for edging and for creating hiding places
- Aquatic plants (more on this below)
- Dechlorinator if filling from a chlorinated water source
Liner sizing quick rule
Buy the liner larger than you think you need. A simple sizing formula is:
- Liner length = pond length + (2 x max depth) + 2 feet
- Liner width = pond width + (2 x max depth) + 2 feet
That extra 2 feet gives you overlap to hide and secure the edges without playing “tug of war” with the liner.
Step 1: Lay out the shape
Use a garden hose or rope to outline your pond. Stand back and look at it from your main viewing spot. Gentle curves look more natural than sharp angles.
Step 2: Dig shelves and depth
Dig in layers. Create a shallow shelf around part of the perimeter (6 to 10 inches deep) for marginals, then step down to a deeper middle area. Remove sharp rocks and roots as you go.
Step 3: Level the rim
This is non-negotiable. Set a long board across the pond and place the level on top. Adjust the soil until the rim is level all the way around. If one side is low, water will seek it and your pond will always look “half full.”
Step 4: Add underlayment and liner
Line the hole with underlayment, then drape the liner over it. Do not stretch it tight. Let it relax into folds. Folds are normal and they hide under rocks and plants.
Step 5: Fill slowly and adjust
Add water gradually, smoothing the liner as the weight of water settles it into place. As it fills, tug gently to relieve tension around shelves and corners.
Step 6: Install pump and optional waterfall
Place the pump on a flat stone in the deepest area so it does not sit in muck. Run tubing to where you want water to return. For a simple return, you can use a small spillway or let water trickle over stacked rocks.
Step 7: Edge the pond to hide the liner
Fold excess liner under itself at the rim. Cover with a mix of larger rocks and gravel. Leave at least one spot with a gently sloped pebble edge so birds and beneficial critters can safely approach.
Step 8: Plant it like an ecosystem
Plants are your pond’s natural filter. Aim for a mix:
- Marginals: pickerel weed, marsh marigold, sweet flag, and cattail varieties labeled dwarf or non-spreading (still worth double-checking, because some can be aggressive)
- Floaters: water lettuce or frogbit (check local regulations, some are invasive in certain areas)
- Submerged oxygenators: anacharis or hornwort (again, verify what is allowed locally)
As a rough target, plan for 50 to 70 percent surface shade from plants in peak summer to help control algae.

Make it look intentional
Blend the edges
A water feature looks most natural when it transitions into the surrounding garden. Try a gravel ring, low grasses, or a few stepping stones that invite you closer.
Use repetition
If your yard already has warm-toned stone, repeat it near the water. If you have lots of black metal planters, echo that with a dark urn. Repetition is the quiet secret sauce of good design.
Plant for movement
Water is motion, so pair it with plants that sway and whisper. Ornamental grasses, sedges, Japanese forest grass, and airy perennials like gaura are all beautiful nearby.
Add a landing spot
A small bench, a flat boulder, or two pavers can turn a nice feature into a daily ritual. I am forever surprised how often I use a garden seat once I give myself a place to pause.
Keep it clean and clear
Crystal water is mostly about balance and basic habits, not blasting everything with chemicals.
Weekly (5 minutes)
- Top off water to keep the pump submerged (evaporation is normal, especially in heat and wind)
- Remove leaves and debris before they sink
- Quickly check that the flow looks normal
Monthly
- Rinse the pump intake sponge or screen. If you have a pond with beneficial bacteria, avoid using chlorinated tap water on biofilter media. Mechanical parts (like a pump screen) are less sensitive, but pond water is the gentlest choice.
- Wipe basin surfaces with a soft brush if algae is building up
Seasonally
- Spring: deep clean if needed, but avoid stripping a pond completely sterile. Keep some established water and media if you can.
- Summer: add more plant shade if algae blooms, reduce feeding if you have fish
- Fall: use a net over ponds under trees, remove dying foliage from aquatic plants
- Winter: in freezing climates, store small fountain pumps and drain basins that could crack from ice expansion. For ponds, many people either keep a pump running below the ice line (not a roaring waterfall) or remove the pump and use a de-icer or aerator to keep a small gas-exchange opening. Choose the approach that fits your climate and fish.
Mosquito note: Moving water discourages mosquitoes. If you have still water (or the pump is off), add a small circulator or use BTI mosquito dunks (a targeted biological control commonly used in ponds and rain barrels). Follow label directions.
Safety basics
- Use GFCI protection: Always plug pumps into a GFCI outlet. Water and electricity must be treated with respect.
- Use an in-use cover: Outdoor outlets should have a weatherproof, in-use cover so cords stay protected even when plugged in.
- Make a drip loop: Let the cord dip below the outlet before it rises to plug in, so water drips off the lowest point instead of running into the receptacle.
- Extension cords are temporary: If you need power long-term, consider a properly installed outdoor outlet. If you use an extension cord, choose one rated for outdoor wet locations and avoid running it where it will be nicked, pinched, or tripped over.
- Hide cords thoughtfully: Run cords along edges, under gravel, or through conduit where appropriate. Follow local code.
- Consider kids and pets: Bubbling urns with hidden reservoirs are often the simplest safer choice. For ponds, include a shallow beach-like edge and supervise as you would around any water.
- Check local rules: Some areas have regulations on pond depth, fencing, or water discharge. A quick city or HOA check can save headaches.
Troubleshooting
The pump is running but water is not moving
- Check water level first. Pumps cannot pump air.
- Clean the intake screen or sponge.
- Look for a kink in the tubing.
It keeps losing water
- Do the 24-hour test: Mark the waterline. Turn the pump off for 24 hours. If the level still drops, you likely have a leak (or wicking). If it stays steady, the loss is probably splash or waterfall overspray.
- Wind splash is the most common culprit. Lower the spray height or redirect flow.
- Make sure the feature is level.
- For ponds: check that the liner edge is not wicking water out under rocks.
Green water algae bloom
- Add more plant shade or floating plants.
- Reduce sun exposure if possible.
- Consider a filter or UV clarifier for larger ponds if you want consistently clear water.
It is louder than you wanted
- Turn down pump flow.
- Reduce drop height.
- Add more stones where water lands to soften splash.
A simple shopping checklist
If you want a quick grab-and-go list, here are solid basics for each build.
Bubbling urn
- Urn with center hole
- Hidden reservoir + grate
- 150 to 300 GPH pump (choose based on the lift height and the pump’s max head)
- 1/2 inch to 3/4 inch tubing + clamp
- Two bags of river rock (more if your reservoir is wide)
Fountain basin
- Watertight basin
- 200 to 400 GPH pump (confirm flow at your head height)
- Nozzle kit or simple bubbler attachment
- Stones to hide the pump (optional)
Small liner pond
- EPDM liner + underlayment (use the sizing formula and go bigger if you are between sizes)
- Pond pump sized for your return flow and head height
- Filter box (optional but helpful)
- Edging stone and gravel
- A starter set of aquatic plants
Closing thoughts from a gardener who talks to her ferns
If you are nervous about messing it up, start with the bubbling urn. It is forgiving, it teaches you how pumps and flow work, and it adds instant calm. Then, if you catch the water-garden bug, a pond is waiting for you like the next chapter of a very soothing novel.
Whatever you choose, build it where you will enjoy it every day. The point of a water feature is not perfection. It is presence. And you deserve that kind of quiet in your own yard.