Design a Drought-Tolerant Xeriscape Garden
Xeriscape gets a bad rap as “just rocks and a cactus.” But true xeriscaping is really about designing with water in mind, so your garden stays beautiful through heat waves, watering restrictions, and those long dry stretches when the sky forgets it owns clouds.
If you can dream up a cozy reading nook, a path that crunches pleasantly underfoot, and plants that look intentional instead of thirsty, you can build a xeriscape. I will walk you through it like we are strolling a nursery together, stopping to touch leaves and make sensible choices.
What xeriscaping means
Xeriscape is a landscaping approach that reduces irrigation needs by combining smart layout, water-wise plants, healthy soil, and moisture-saving ground covers. It is not a single “style.” A xeriscape can feel modern and minimalist, cottagey and pollinator-friendly, or desert-clean and architectural.
The big idea
- Put water where it matters most (and stop wasting it where it does not).
- Choose plants that fit your climate, not plants that require you to fight your climate.
- Build soil that holds moisture while still draining well.
- Mulch like you mean it, because bare soil is a moisture leak.
Step 1: Read your yard
Before you buy a single plant, spend a week observing. I know it sounds slow, but this is where xeriscapes go from “fine” to “thriving.”
Make a quick sketch
- Outline your house, fences, patios, and existing trees.
- Mark sun: full sun (about 6 to 8+ hours, definitions vary), part sun (about 3 to 6), shade (under 3).
- Mark water flow: where gutters dump, where puddles form, where water runs off.
- Mark wind and heat: hot reflected zones near walls and driveways, and windy corners.
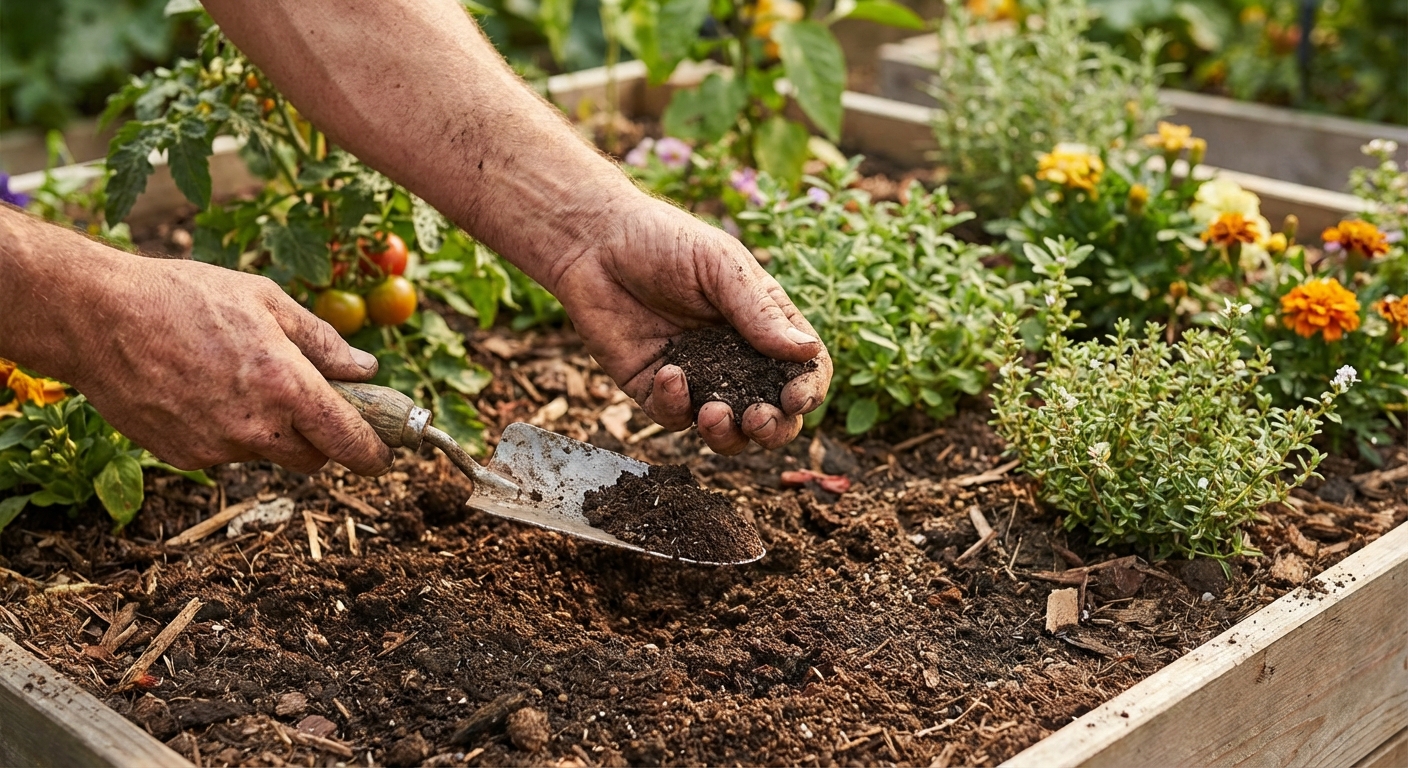
Do a simple soil check
Grab a trowel and look at your soil in a few spots. Is it sandy and quick-draining? Heavy and sticky clay? Somewhere in between? If you can, do a basic soil test for pH and nutrients. Xeriscaping is easier when you are not guessing.
Step 2: Set priorities
Decide what you want this garden to do. A xeriscape is most successful when it is designed around real-life use, not just plant lists.
Ask yourself
- Do you need a kid and pet zone?
- Do you want pollinators, privacy, or color for curb appeal?
- How much time do you want to spend weeding and pruning?
- Will you irrigate at all, or only during establishment?
Clara tip: If you are converting a lawn, keep a small patch of green if it truly improves your life. Xeriscaping is about intentional water use, not self-denial.
Step 3: Make hydrozones
Hydrozoning means grouping plants by water needs. This is how you avoid the classic mistake of watering the whole yard just because one thirsty plant is pouting.
Three simple zones
- Oasis zone (highest water): Near the house or patio where you spend time. A few favorites that get occasional deep watering.
- Transition zone (moderate water): Most flowering perennials and shrubs that often do well with weekly to biweekly deep watering during peak heat, depending on soil and climate.
- Arid zone (lowest water): The outer edges, hellstrips, or hot slopes. These plants should handle long dry spells once established.
When you place your irrigation later, you will thank past-you for keeping these zones separate.
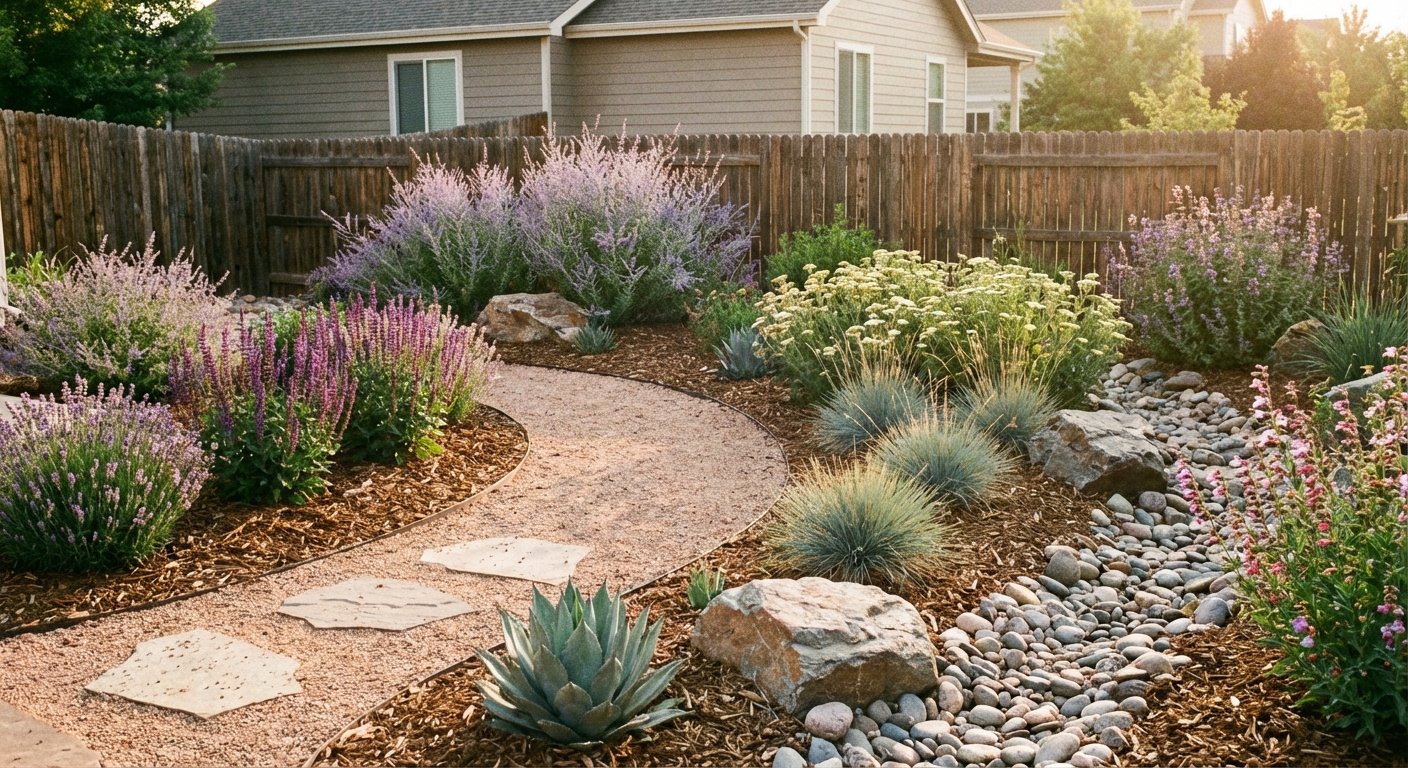
Step 4: Plan layout first
Design is what makes a xeriscape feel lush and “finished,” even with fewer plants and less water. Think in layers and shapes, not single specimens sprinkled like seasoning.
Use this structure
- Anchor plants: A few shrubs or small trees for year-round structure.
- Mid-layer: Perennials and grasses for movement and seasonal color.
- Ground layer: Groundcovers, mulch, and stones to protect soil and reduce weeds.
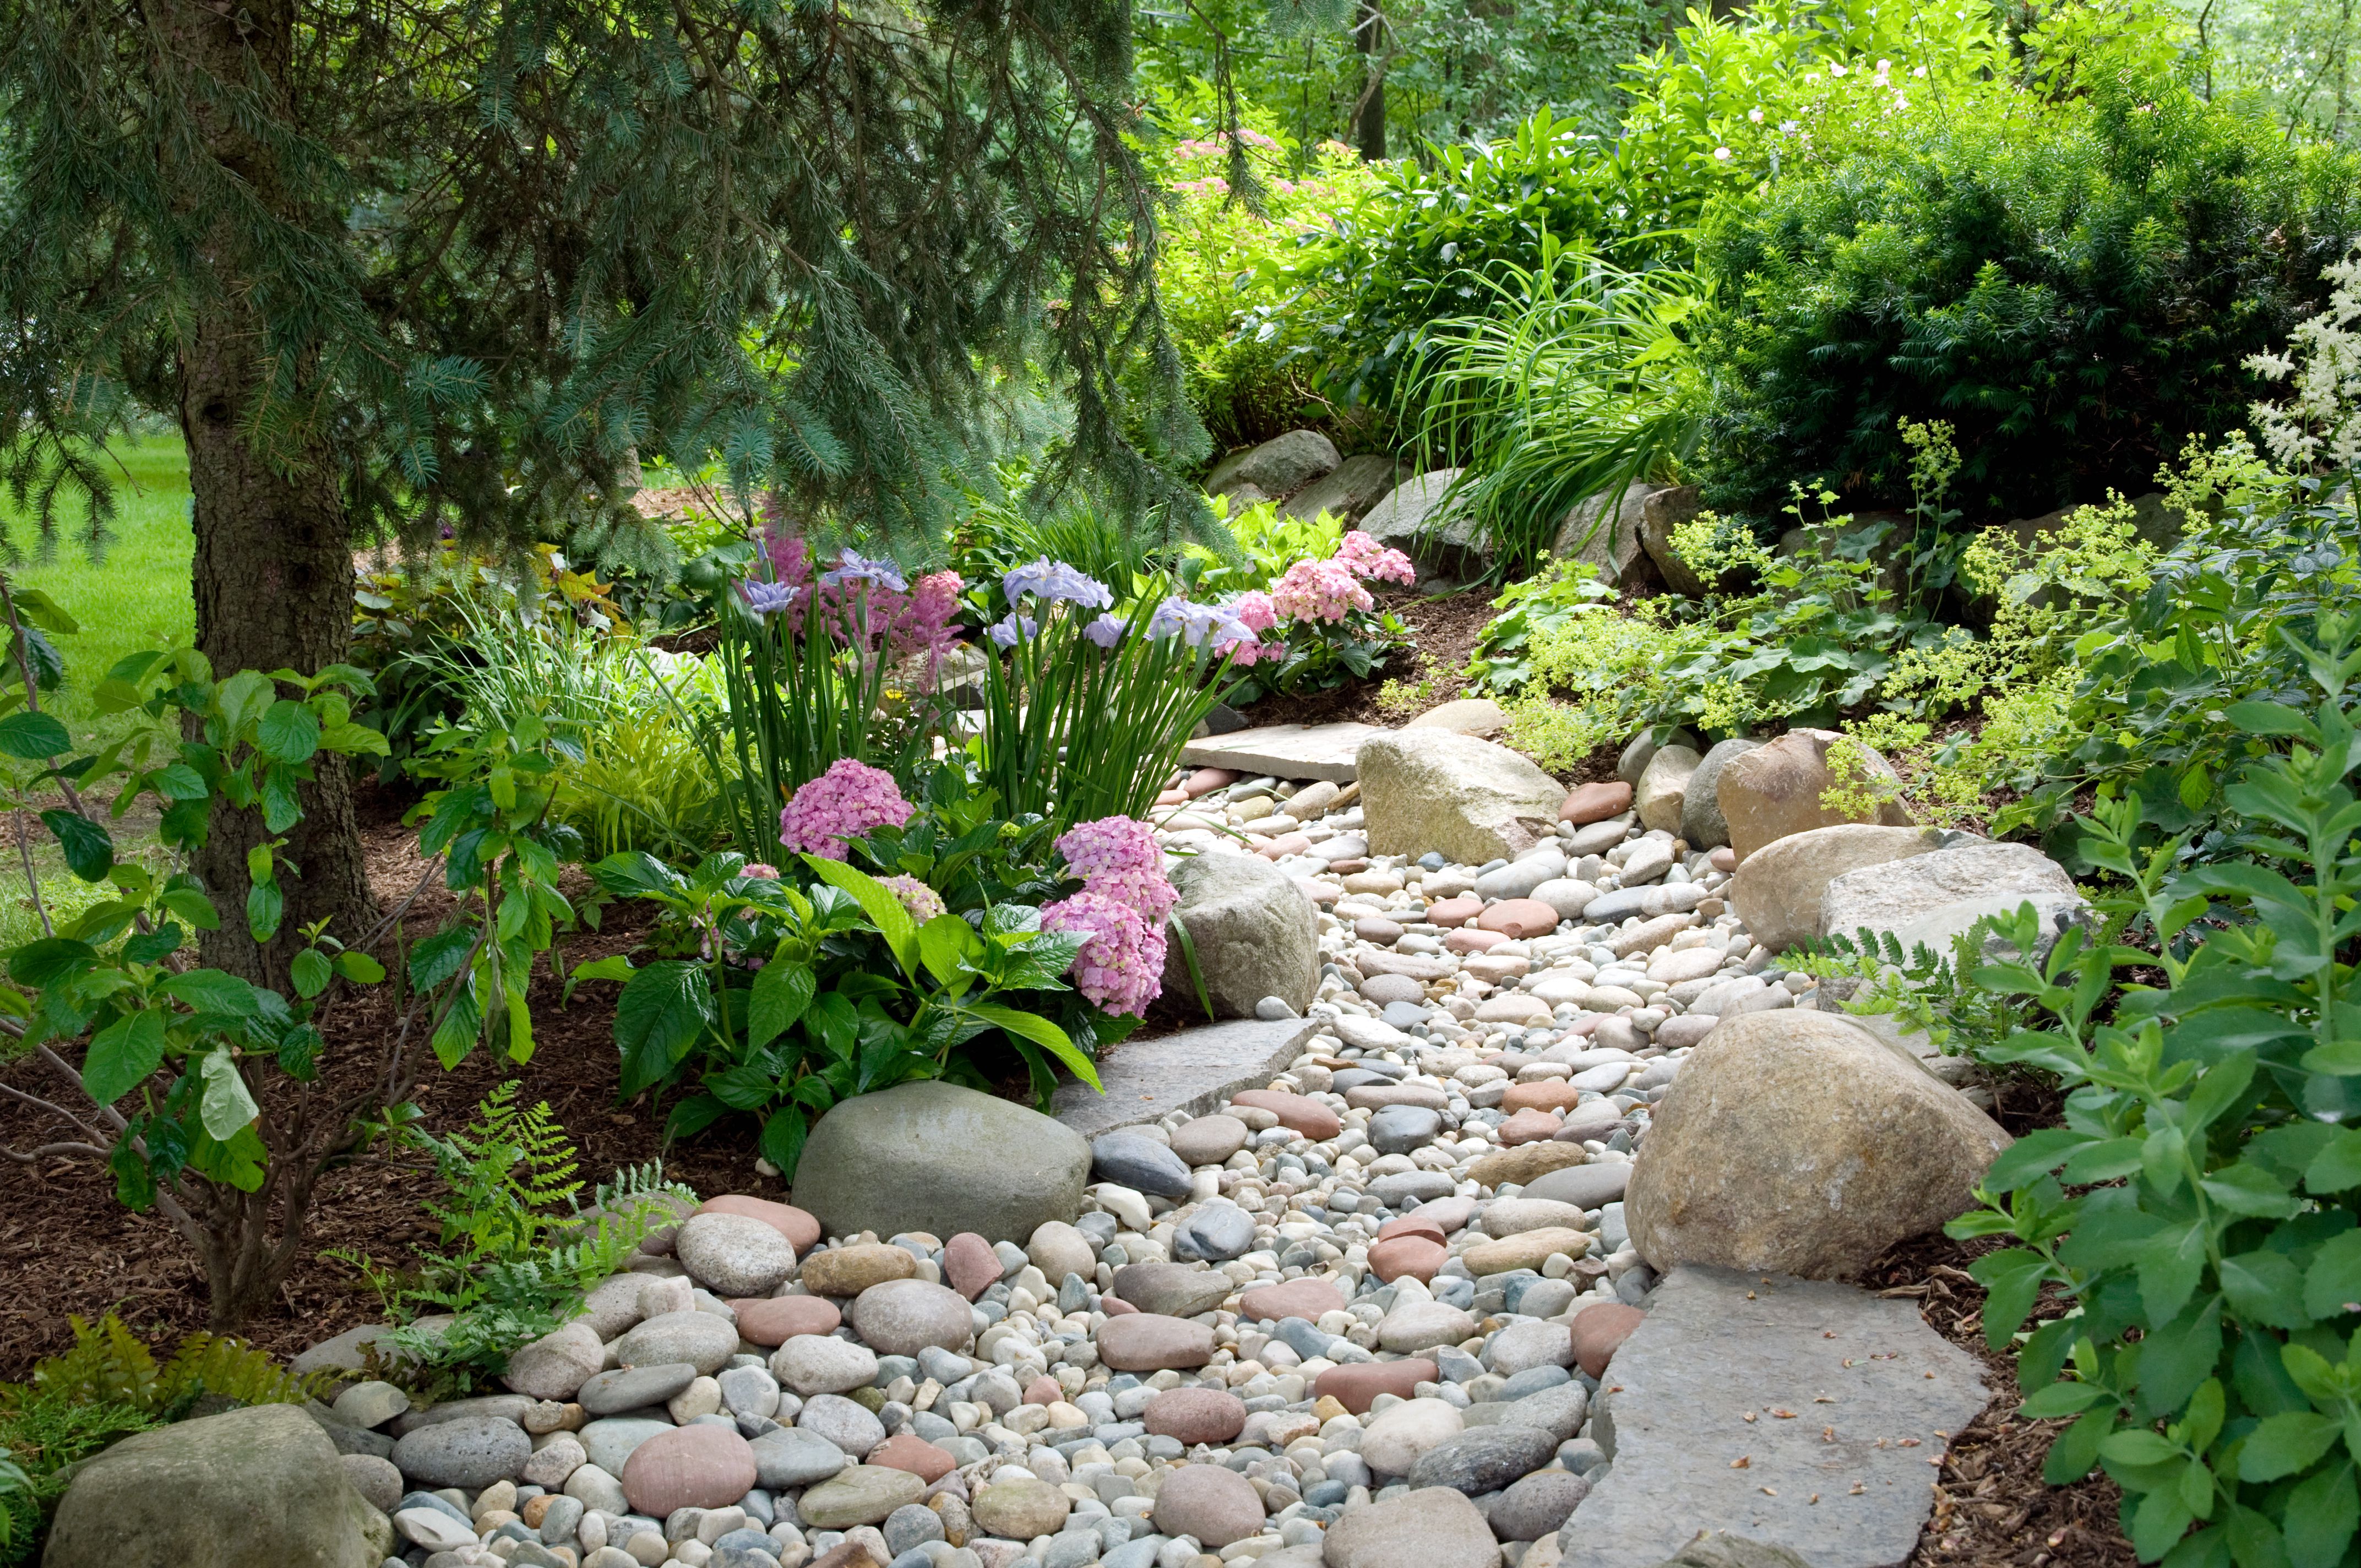
Hardscape that saves water
- Paths: Gravel, decomposed granite, pavers with permeable joints.
- Edging: Steel, stone, or brick to keep mulch in place and define beds.
- Capture rain: A shallow swale, rain garden pocket, or dry creek bed where runoff naturally wants to go.
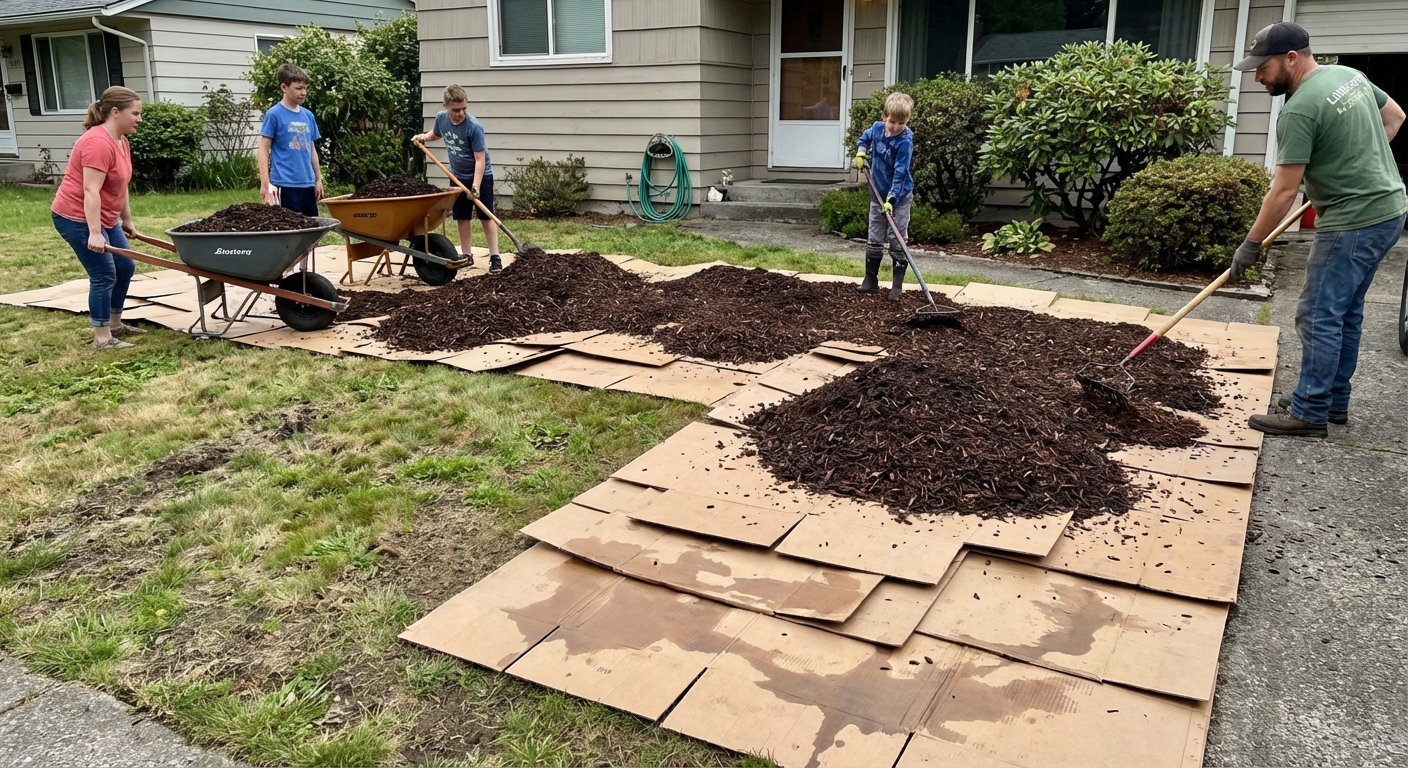
Step 5: Remove lawn gently
If you are converting turf, skip the temptation to till everything. Tilling can bring up a surprise party of weed seeds.
Two effective options
- Sheet mulching (my favorite): Mow low, water lightly, lay plain cardboard overlapping seams, then add compost and 3 to 4 inches of mulch. Plant after it starts breaking down, or cut holes for larger transplants right away.
- Sod cutting: Fast and clean if you need to plant immediately, followed by compost and mulch.
For persistent weeds like bindweed or Bermuda grass, plan on a longer transition. Xeriscapes are low water, not zero effort, especially in year one.
Step 6: Prep soil
This is the part where organic gardeners get a little gleam in the eye. Healthy soil is your hidden irrigation system. But there is a balance: some drought-tolerant plants hate rich, overly amended soil, especially many Mediterranean herbs and desert natives.
Soil prep basics
- Compost: Work in 1 to 2 inches of finished compost in planting areas if your soil is compacted or low in organic matter.
- Clay soil: Compost helps aggregation and infiltration over time.
- About sand in clay: Avoid adding sand as a quick fix. Unless you are changing soil texture at a large scale (and doing it correctly), small sand additions can make clay harder to work with. Compost and mulch are the safer, more effective tools for most home gardens.
- Sandy soil: Compost boosts moisture holding capacity. Mulch is especially important.
- For natives: Consider lighter amendments, or amend only the top layer. Many native plants prefer “lean” soil once established.
Do a drainage test
Dig a hole about 12 inches deep, fill with water, and see how long it takes to drain. As a rough guide, you want it to drain within about 24 hours. If water still sits in the hole the next day, choose plants that tolerate heavier soil, improve drainage over time with organic matter, or create slightly raised planting mounds.
Step 7: Choose plants
Plant selection is where xeriscape becomes art. Focus on texture, repetition, and long-season interest. And choose plants suited to your USDA hardiness zone, summer heat, and humidity, not just what looks pretty in a nursery pot.
What to check on tags
- “Low water” once established (not just “drought tolerant” as a vague promise).
- Sun requirements that match your map.
- Mature size so you do not have to prune constantly to keep peace.
Plant ideas (mix by climate)
Important: “Drought-tolerant” looks different in a dry Southwest summer than it does in a humid Southeast summer. Always verify plants for your region and conditions, and avoid invasive species by checking local extension office lists.
Water-wise shrubs: lavender (Lavandula), rosemary (Salvia rosmarinus), Texas sage (Leucophyllum, best in arid regions), manzanita (Arctostaphylos, region-dependent), potentilla (Dasiphora fruticosa), jojoba (Simmondsia chinensis, desert regions).
Perennials and pollinator favorites: yarrow (Achillea), salvia (Salvia), coneflower (Echinacea), blanket flower (Gaillardia), penstemon, catmint (Nepeta), coreopsis, California poppy (Eschscholzia, best in dry-summer climates).
Grasses and grass-like plants: blue fescue (Festuca glauca), little bluestem (Schizachyrium scoparium), muhly grass (Muhlenbergia), deer grass (Muhlenbergia rigens, warmer regions), red yucca (Hesperaloe parviflora, arid regions).
Groundcovers: creeping thyme (Thymus serpyllum), sedum, woolly yarrow (Achillea tomentosa), Delosperma ice plant (check local invasiveness), native groundcovers suited to your region.
Small trees (shade is water-saving): desert willow (Chilopsis linearis, Southwest), redbud (Cercis), native oaks (region-dependent), crape myrtle (Lagerstroemia, in warmer zones), olive (Olea europaea, only where appropriate and non-invasive, and be mindful of allergy concerns in your area).
Clara tip: Repeat a few “signature” plants three to five times across the design. Repetition is what makes a garden look cohesive and intentional, even when it is simple.

Step 8: Mulch well
Mulch is one of the biggest water savers in a xeriscape. It lowers soil temperature, slows evaporation, and reduces weed competition.
Best mulch choices
- Arborist wood chips: Excellent for shrubs and mixed beds, breaks down into soil-building goodness.
- Shredded bark: Good on slopes because it knits together and resists washing.
- Gravel or rock: Useful in very arid designs, but it can increase heat. Pair with heat-loving plants and avoid using it right up against the house in fire-prone regions unless it fits your local fire guidance.
How to apply
- Spread 2 to 4 inches of organic mulch (more for large chips).
- Keep mulch 3 to 6 inches away from plant crowns and tree trunks.
- Refresh as it breaks down, because that breakdown is feeding your soil.
Step 9: Irrigate smart
A truly water-wise garden often still uses irrigation, at least while plants establish. The goal is deep, infrequent watering that trains roots to go down instead of hovering near the surface like nervous houseguests.
Irrigation basics
- Drip irrigation or soaker lines deliver water to the soil, not the air.
- Separate valves by hydrozone so the arid zone is not watered like the oasis zone.
- Water early to reduce evaporation.
- Adjust seasonally and pause when rain actually shows up.
- Check depth: After watering, poke a screwdriver or soil probe into the ground. If it slides in easily 4 to 6 inches deep, you are watering deeply enough for most beds.
Establishment timing
Use this as a starting point, then let your soil, weather, and plants tell the truth. (They always do.)
- Weeks 1 to 4: Water regularly to keep the root ball from drying out, often 2 to 3 times per week in heat.
- Months 2 to 3: Shift toward weekly deep watering.
- After 1 growing season: Many drought-tolerant plants can move to every 2 to 4 weeks in summer, with little to none in cool seasons, depending on rainfall and region.
Clara tip: Instead of following a rigid calendar, check moisture where roots live. If the top looks dry but the soil at 4 inches is still cool and slightly damp, you can usually wait. If that zone is dust-dry, it is time to water.
There is no shame in watering. The win is targeted watering, not blanket watering.
Step 10: Keep it tidy
Xeriscapes are not no-maintenance, but they are lower maintenance once they settle in. The trick is staying ahead of weeds and paying attention during the first year.
Seasonal checklist
- Spring: Top up mulch, check irrigation for clogs, do light pruning, and replant groundcover plugs where bare soil is showing. If you use a low-water lawn alternative, reseed that instead.
- Summer: Deep water as needed, deadhead for more blooms, watch new plants closely in heat spikes.
- Fall: Plant shrubs and perennials if your climate has mild fall weather, because roots love cool soil.
- Winter: Prune structurally, clean up only what you need, and leave some seed heads for birds if you can.
Rebates and rules
Before you rip out turf or change irrigation, check local rules. Many cities and water districts offer turf-replacement rebates, free design templates, and sometimes requirements about irrigation type or runoff control. A quick look now can save money and prevent a do-over later.
Fire-wise notes
If you garden in wildfire-prone regions, xeriscaping and fire-wise landscaping belong at the same table. Aim for defensible space near structures, keep plants from crowding against the house, remove dry debris, and choose mulches based on your local guidance. In many areas, the safest approach is to use non-combustible hardscape close to the home and keep wood mulches a bit farther out, with well-watered, well-spaced plantings in between.
Common mistakes
- Too much rock, not enough plant cover: Rock can reflect heat and stress plants. Balance it with living groundcovers and mulch where appropriate.
- Over-amending soil: Some drought plants flop or rot in rich soil. Match amendments to plant needs.
- Planting too close: It looks full on day one, then turns into a pruning marathon. Respect mature sizes.
- Mixing water needs: Hydrozones matter. Group plants by thirst level.
- Giving up too early: Year one can look sparse. Year two is the glow-up. Year three is when people stop you on walks to ask what you planted.
A starter plan
If you are staring at your yard thinking, “Clara, I still do not know where to begin,” try this gentle template:
- Define two to three bed shapes with a garden hose, keeping wide curves and easy mowing or path access.
- Add one anchor shrub group (3 of the same shrub) as a focal point.
- Repeat two perennials in drifts (5 to 7 of each), spaced for mature size.
- Add one grass in clusters of 3 for movement.
- Fill with groundcover or leave intentional mulch spaces for breathing room.
- Mulch deeply and set up drip by zone.
Start with one area, not the entire property. Success is contagious.
Quick FAQ
Is xeriscaping only native plants?
No. Native plants often fit xeriscaping beautifully, but xeriscape is about water-wise design. Many non-native plants are drought-tolerant too, especially Mediterranean species like lavender and rosemary.
Will it look dry?
Not if you design for texture and seasons. Silver leaves, grasses, evergreen structure, and staggered bloom times create a garden that feels alive, not parched.
Can I xeriscape in partial shade?
Absolutely. Shade often means less evaporation, which helps. Just choose drought-tolerant shade plants suited to your region and avoid overwatering in cooler, darker spots.
One last nudge
If you are worried you will “mess it up,” welcome to gardening. We all do. Xeriscaping is forgiving because it leans into nature instead of arguing with it. Start small, pay attention, and keep your mulch fluffed like a cozy blanket. Your garden will meet you halfway.