Anthurium Care for Beginners
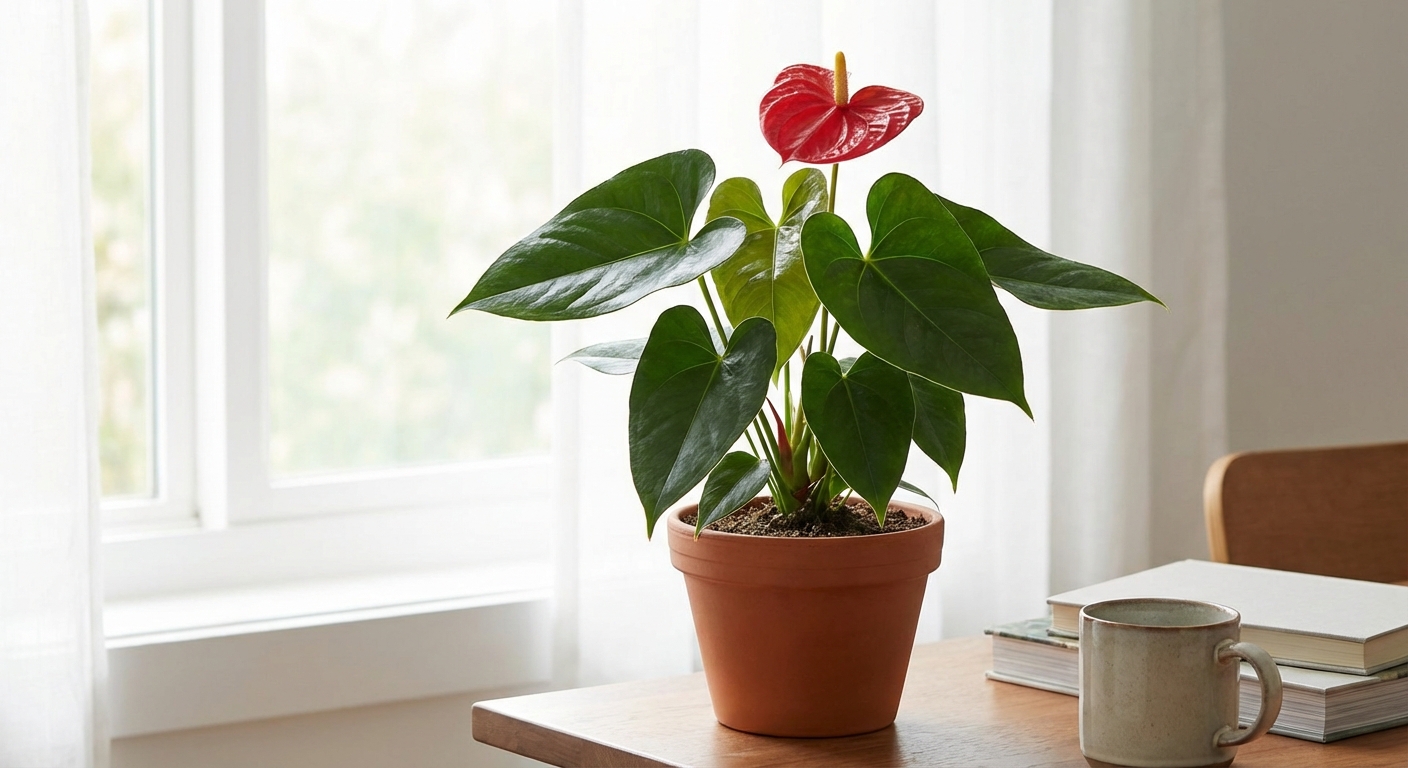
If you have ever stood in a nursery staring at those shiny, heart-shaped leaves and waxy blooms and thought, “No way I can keep that happy,” I promise you can. Anthuriums are not fragile divas. They are simply tropical plants with a few strong opinions, mostly about light, air around their roots, and not sitting in soggy soil.
Let’s walk through the basics so your anthurium can settle in, grow new leaves, and bloom reliably, without you feeling like you need a PhD in plant parenting.
Quick care snapshot
- Light: Bright, indirect light
- Water: When the top 1 inch of soil feels dry
- Humidity: Moderate to high, aim for 50% to 70%
- Temperature: 65 to 85°F (18 to 29°C), avoid drafts
- Soil: Chunky, airy mix that drains fast
- Fertilizer: Light feeding in spring and summer
- Propagation: Division during repotting
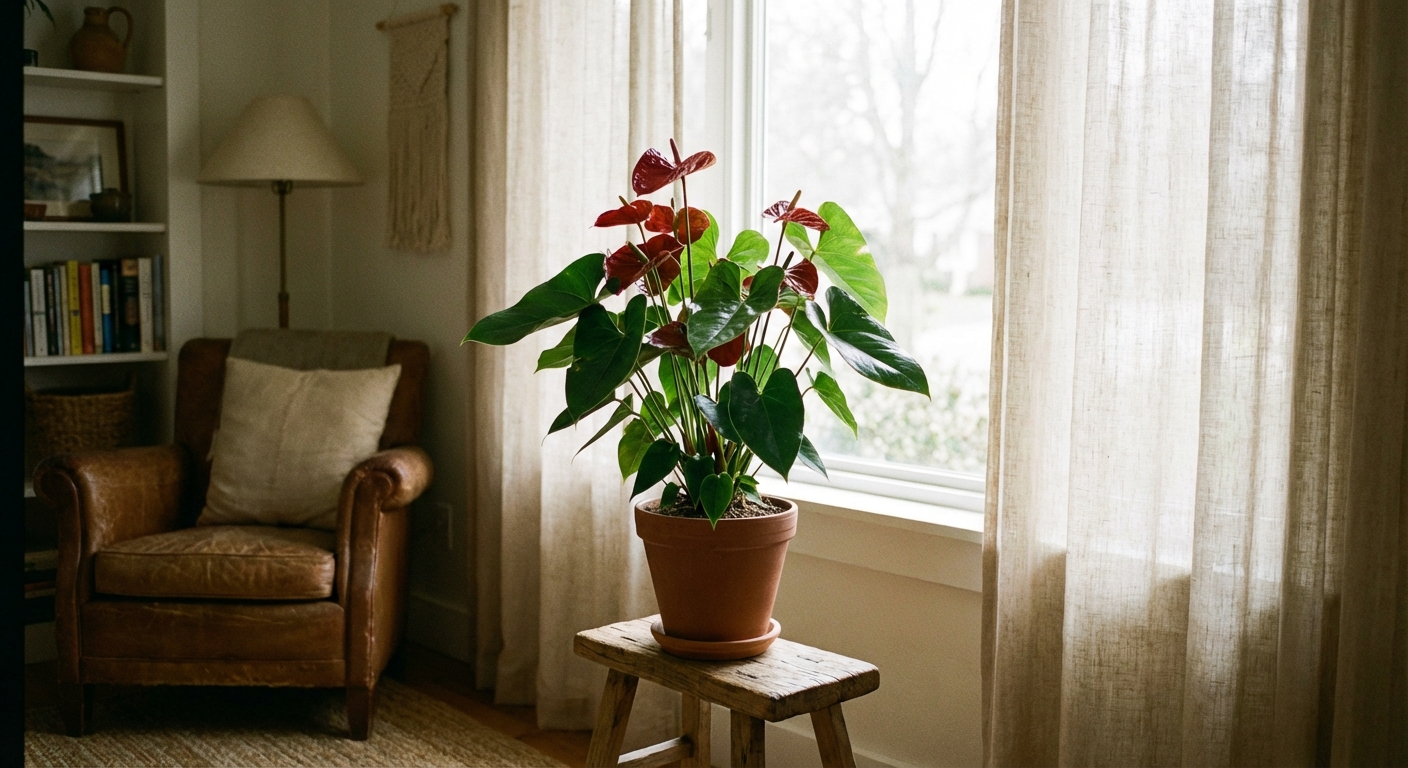
Light requirements
Anthuriums thrive in bright, indirect light, like the kind you get near an east window or a few feet back from a south or west window with a sheer curtain. In the wild, they grow under tree canopies, soaking up filtered sunlight.
Best spots in your home
- East-facing window: Morning sun is gentle and usually perfect.
- South or west-facing window: Keep it back from the glass or diffuse the light so leaves do not scorch.
- Under a grow light: Totally acceptable if your home is dim. Aim for 10 to 12 hours a day.
Signs the light is off
- Too little light: Slow growth, long leggy stems, fewer or no flowers.
- Too much direct sun: Pale patches or crispy brown scorch marks on leaves.
If your plant is not blooming, light is usually the first lever to pull. Nudge it into brighter indirect light and give it a few weeks to respond.
Watering: when the top inch is dry
This is the anthurium sweet spot: water when the top 1 inch of soil is dry. Not bone dry all the way down, not constantly damp. I like to do the finger test, because it keeps you from watering on autopilot.
How to water (my foolproof routine)
- Check the soil with your finger. If the top inch feels dry, it is time.
- Water thoroughly until you see water drain from the bottom.
- Empty the saucer so the pot does not sit in standing water.
How often is that?
It depends on season, light, and potting mix. Many homes land around:
- Spring and summer: every 7 to 10 days
- Fall and winter: every 10 to 14 days
But the plant is the boss, not the calendar. Always check the soil first.
Overwatering vs underwatering
- Overwatering signs: Yellowing leaves (especially lower ones), mushy stems, sour smell, fungus gnats, or blackened roots.
- Underwatering signs: Drooping, dry curling leaves, crispy edges, soil pulling away from the pot.
If you are nervous, err slightly on the dry side. Anthuriums recover from “a bit thirsty” faster than they recover from “roots constantly wet.”
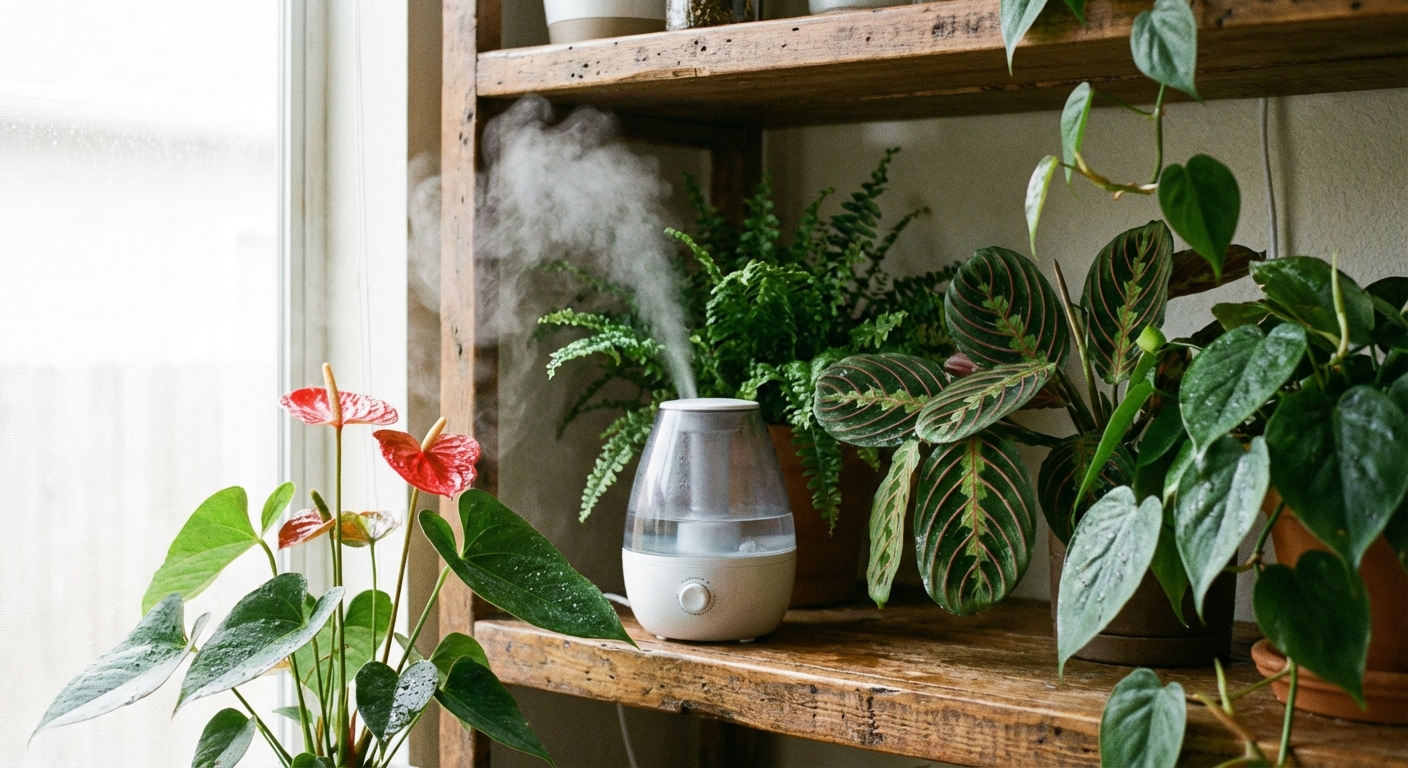
Humidity needs
Anthuriums love humidity because they are tropical plants with big, moisture-loving leaves. Aim for 50% to 70% humidity if you can. That said, plenty of people keep them alive at average household humidity, especially if they keep watering and soil structure on point.
Easy ways to boost humidity
- Humidifier: The most consistent option, especially in winter.
- Group plants together: They create a tiny humid microclimate.
- Pebble tray: Helpful in small doses, especially for smaller plants. Keep the pot above the waterline.
Skip heavy misting as your main strategy. It is temporary and can encourage leaf spotting if air circulation is poor. If you do mist, do it lightly in the morning so leaves dry by evening.
Temperature and airflow
Think “tropical comfort.” Anthuriums are happiest in the 65 to 85°F range (18 to 29°C). They do not like cold snaps, and they definitely do not like being blasted by dry air.
Placement tips
- Avoid cold drafts: Keep them away from leaky windows and frequently opened doors in winter.
- Avoid HVAC vents: Heating and AC vents can dry the plant out fast and cause crispy edges.
- Keep it steady: Stable temps usually mean steadier growth and better blooming.
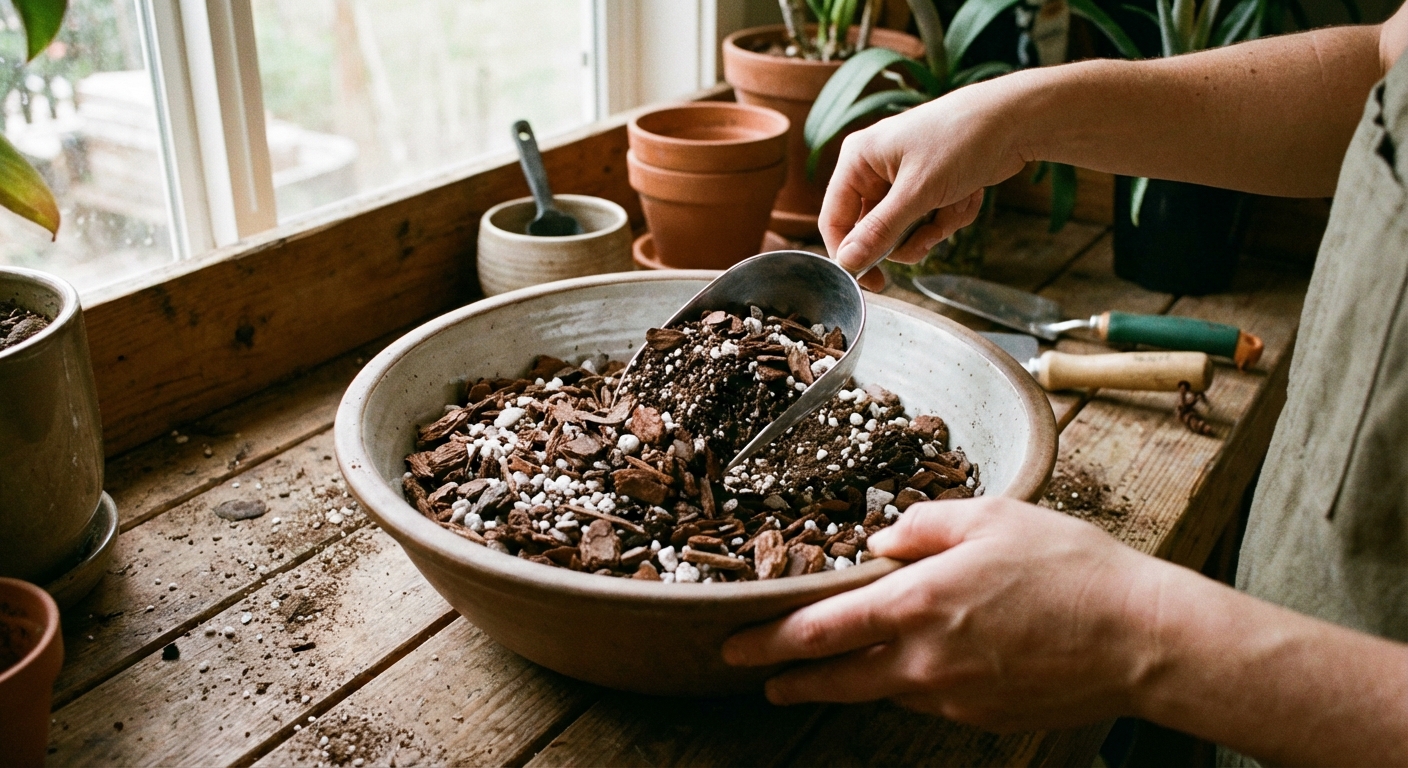
Ideal soil mix (airy and fast-draining)
The number one thing that helps anthuriums thrive indoors is an airy mix. These plants hate dense, soggy soil. Think “forest floor debris,” not “mud pie.”
A simple DIY anthurium mix
Here is a beginner-friendly blend that works well for most homes:
- 40% coco coir or peat-based potting mix
- 30% orchid bark (chunky)
- 20% perlite or pumice
- 10% worm castings or compost for gentle nutrition
If you already have an aroid mix for monstera or philodendron, anthuriums usually love that too, especially with a bit of extra bark for airflow.
Pot choice matters
- Drainage holes are non-negotiable.
- Terracotta dries faster and can help if you tend to overwater.
- Plastic holds moisture longer and can help if your home is very dry or warm.
Fertilizing schedule
Anthuriums are not heavy feeders, but they do appreciate steady, gentle nutrition during active growth. Overfertilizing can cause leaf tip burn and salt buildup, so we go light and consistent.
What to use
- Balanced liquid fertilizer (for example 10-10-10 or 20-20-20) diluted to quarter strength
- Or a fertilizer slightly higher in phosphorus can support blooming, but do not chase blooms at the expense of healthy leaves
When to fertilize
- Spring through early fall: every 4 to 6 weeks at diluted strength
- Late fall and winter: pause or feed very lightly if the plant is still actively growing under strong light
One soil-health habit that helps
Every couple of months, flush the pot with plain water to rinse away fertilizer salts. Just water thoroughly for a minute or two and let it drain completely.
Leaf care and cleaning
Those big, glossy leaves are part of the anthurium magic, but they also collect dust like a magnet. A dusty leaf does not photosynthesize as efficiently, and it can make pests harder to spot early.
Simple routine
- Wipe leaves gently with a soft, damp cloth every couple of weeks.
- Support the leaf with your hand as you wipe so you do not bend the stem.
- Skip leaf shine products. Clean is enough.
Toxicity and safety
This part matters: anthuriums contain calcium oxalate crystals and are toxic if chewed or ingested by pets and people. They can cause mouth irritation, drooling, and stomach upset. Sap can also irritate sensitive skin.
- Keep out of reach of cats, dogs, and curious kids.
- Wash hands after pruning or repotting, or wear gloves if you are sensitive.
- If ingestion happens or symptoms appear, contact your veterinarian or local poison control.
Common problems (and how to fix them)
Anthuriums are pretty good at telling you what is wrong. You just have to know how to read the clues.
Brown leaf tips
This is one of the most common beginner worries. It is usually caused by dry air, inconsistent watering, or fertilizer salts. It can also happen if the plant is sitting near a heating vent.
- Check watering rhythm: Let the top inch dry, then water deeply.
- Raise humidity: Aim for 50% or more if possible.
- Move it off the blast zone: Keep it away from HVAC vents and drafty spots.
- Reduce fertilizer: Use quarter strength and flush the soil occasionally.
- Water quality: If your tap water is very hard, try filtered water or let water sit out overnight so chlorine can dissipate.
You can trim the brown tips with clean scissors, following the natural shape of the leaf. The browned part will not turn green again, but the plant can still be perfectly healthy.
Yellow leaves
- Most common cause: Overwatering or soil staying wet too long.
- What to do: Check for compacted soil, confirm drainage, and let the mix dry a bit more between waterings.
If the plant is dropping older lower leaves occasionally while pushing new growth, that can be normal. Widespread yellowing is your signal to reassess moisture and roots.
No flowers
No blooms usually comes down to one of these:
- Not enough light: Move to brighter indirect light or add a grow light.
- Too much nitrogen: Heavy feeding can produce leaves but fewer flowers. Fertilize lightly.
- Immature plant or recent stress: New purchases and recent repots often pause blooming for a while.
- Too cool or drafty: If nights are chilly or the plant is near a draft, blooming can slow.
Also, what we call the “flower” is actually a spathe (the waxy, colorful part) plus a spadix (the little tail). Each spathe can last weeks or even months, so blooming is not constant, but it should be steady once the plant is settled and happy.
Drooping leaves
This can mean too dry or too wet, which is annoying, I know. Feel the soil.
- If the mix is dry, water deeply and let it drain.
- If the mix is wet, hold off watering and improve airflow and drainage.
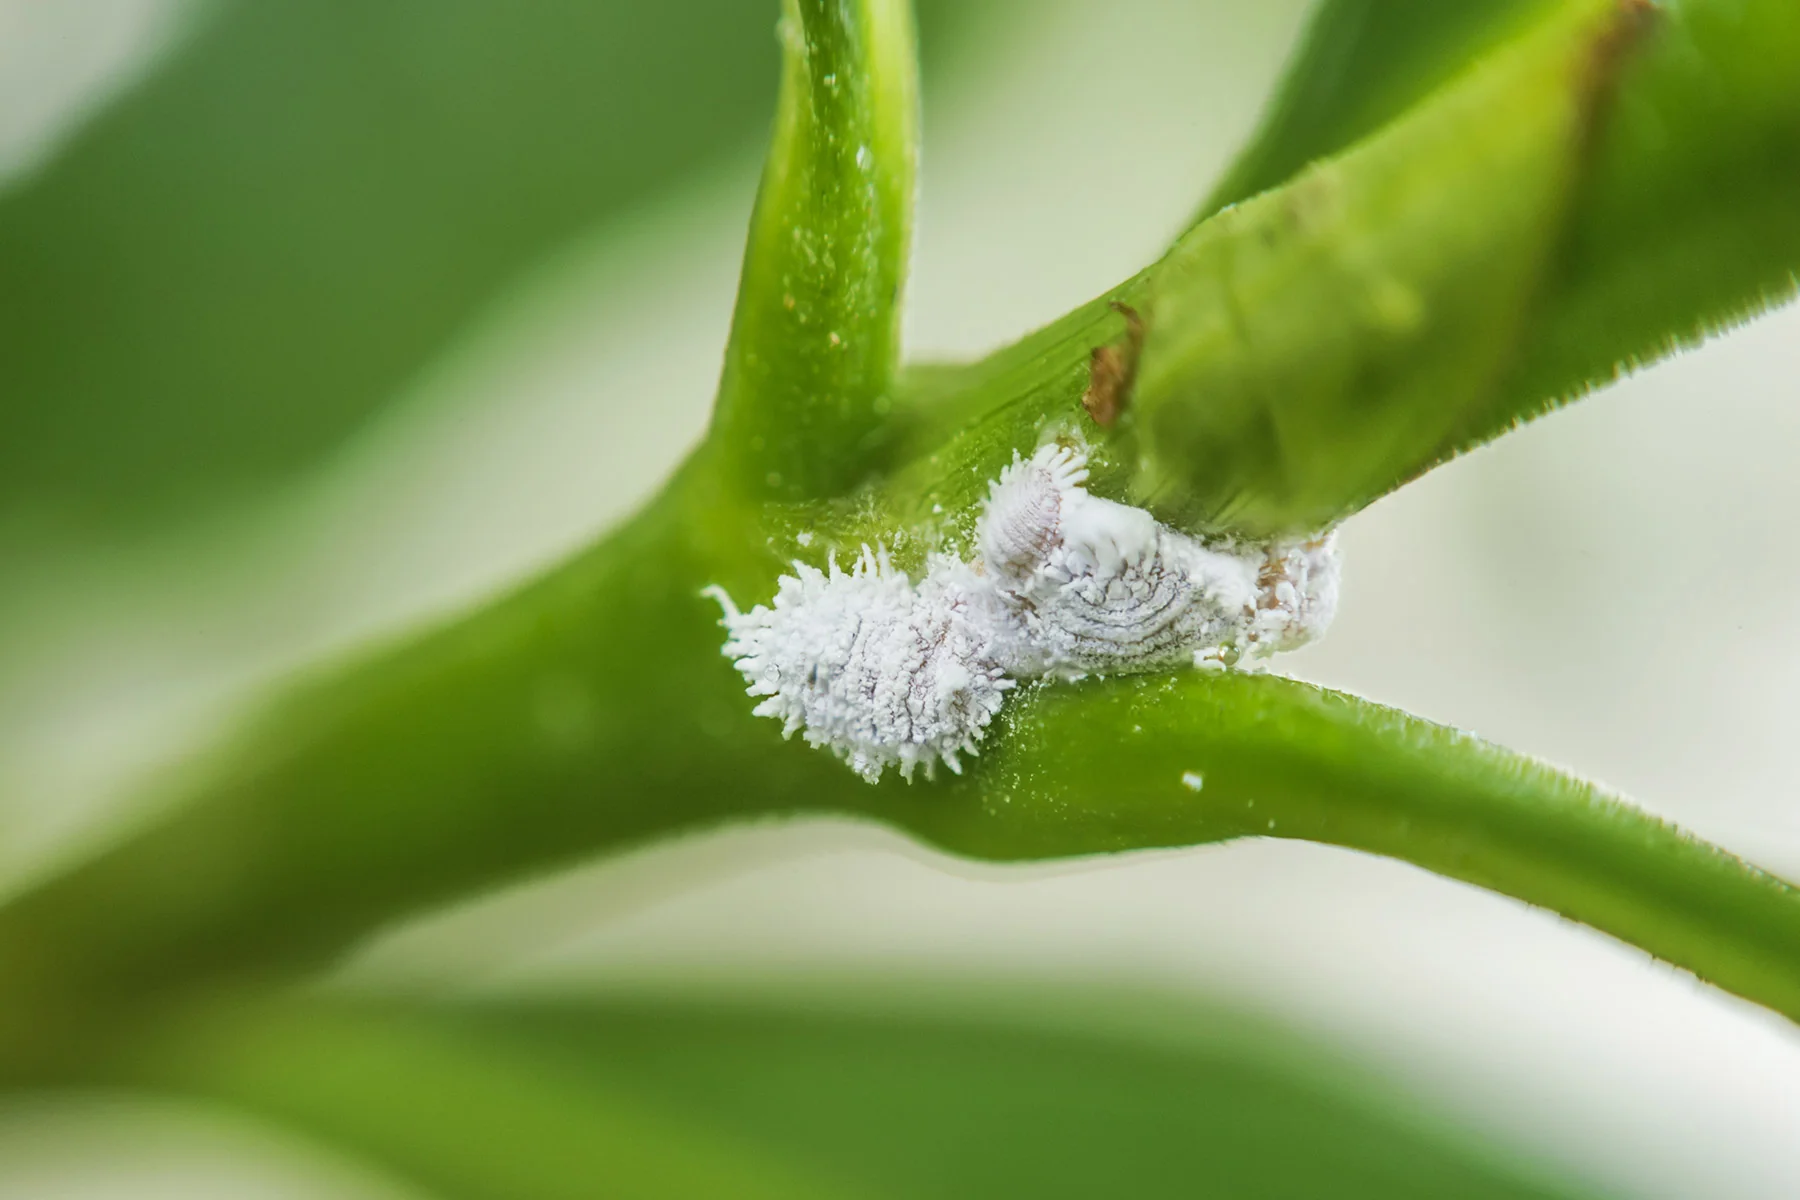
Pests (mealybugs, scale, spider mites)
Anthuriums can occasionally attract pests, especially in dry indoor air.
- Wipe leaves and stems with a cotton swab dipped in rubbing alcohol for mealybugs and scale.
- Rinse the plant in the shower and treat with insecticidal soap for spider mites.
- Repeat treatments weekly for a few weeks, because pests love a comeback tour.
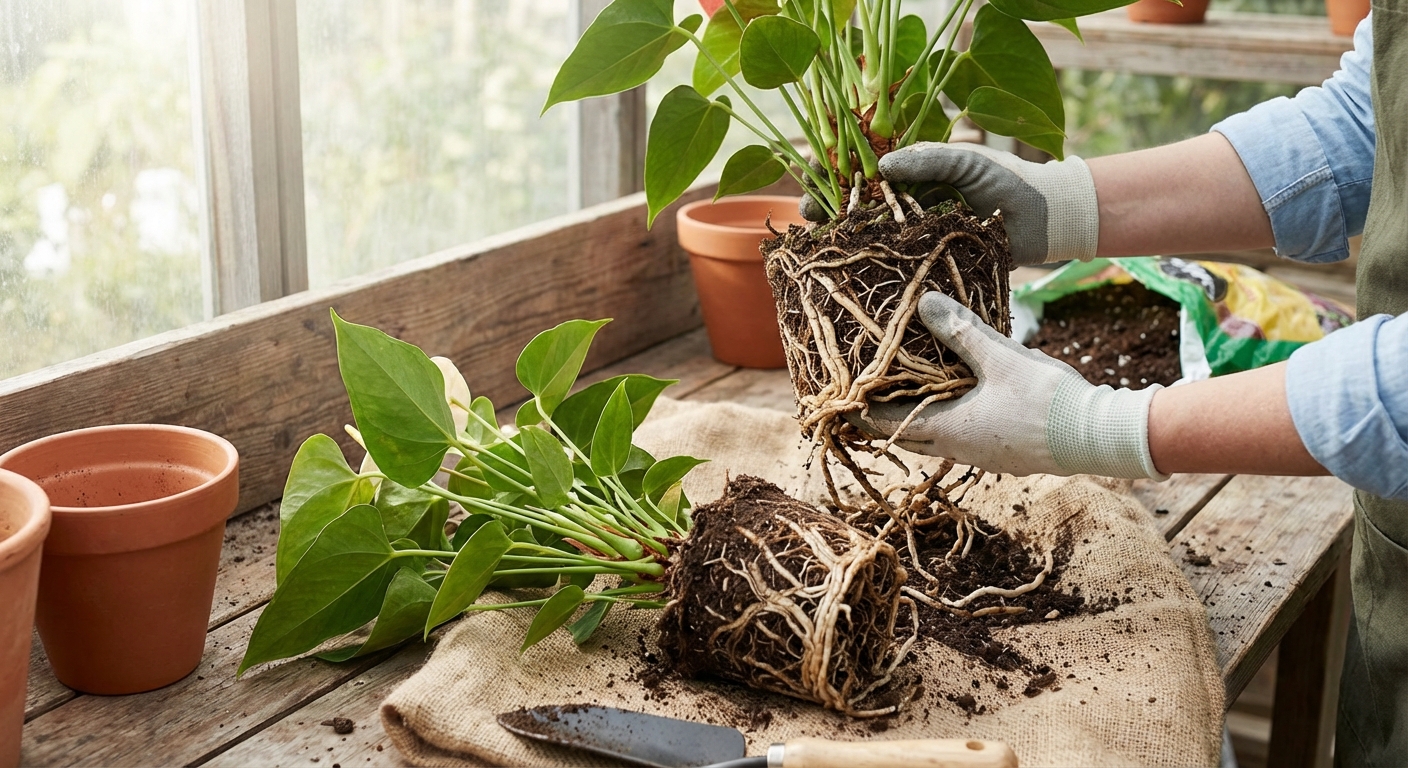
Propagation by division
The easiest way to propagate anthurium is division, and it also helps keep a crowded plant healthy. Do this when you are already repotting, ideally in spring or early summer.
When your anthurium is ready
- Multiple crowns or clumps of stems
- Roots circling the pot or pushing up
- Growth slowing even though care is solid
Step-by-step division
- Water the plant the day before to reduce stress.
- Slide it out of the pot and gently loosen the root ball with your fingers.
- Look for natural separations, where stems and roots form distinct clumps.
- Pull apart gently. If roots are tightly fused, use clean scissors or a sterilized knife to separate.
- Pot each division into a small pot with fresh airy mix. Do not oversize the pot.
- Water lightly, then keep in bright indirect light. Expect a short adjustment period.
My little rule of thumb: each division should have its own healthy roots and at least a couple of leaves. Tiny divisions can survive, but they take longer to bounce back and bloom.
Repotting tips
Anthuriums do not mind being slightly snug in their pots. Repot every 1 to 2 years, or when the mix breaks down and starts holding too much moisture.
- Choose a pot only 1 to 2 inches wider than the current one.
- Refresh the mix with chunky ingredients for airflow.
- Do not bury the crown deeper than it was before. Keep stems at the same level to avoid rot.
Beginner-friendly care checklist
- Give bright, indirect light and rotate the pot every couple of weeks for even growth.
- Keep it cozy: 65 to 85°F, away from drafts and HVAC vents.
- Water only when the top inch of soil is dry, then drain well.
- Use a chunky, airy soil mix and a pot with drainage holes.
- Keep humidity moderate to high if possible, especially in winter.
- Wipe dust off leaves occasionally so the plant can photosynthesize efficiently.
- Fertilize lightly in spring and summer, then flush salts occasionally.
- If it is not blooming, increase light before changing anything else.
- Place it out of reach of pets and kids, since anthuriums are toxic if chewed.
If you want, tell me what your light situation looks like (which direction your window faces and how close the plant sits), and I will help you fine-tune a setup that works in your space.